This article was co-authored by wikiHow staff writer, Rain Kengly. Rain Kengly is a wikiHow Technology Writer. As a storytelling enthusiast with a penchant for technology, they hope to create long-lasting connections with readers from all around the globe. Rain graduated from San Francisco State University with a BA in Cinema.
The wikiHow Tech Team also followed the article's instructions and verified that they work.
This article has been viewed 6,647,316 times.
Learn more...
If you want to record an audio note on your iPhone, you can easily do so with the Voice Memos app. You can use Voice Memos to take personal memos, record class lectures, and more. After creating a recording, you can trim it to remove unnecessary sections or split it for easier sharing. You'll be able to share your memos by sending the audio file through apps such as Messages, Mail, and AirDrop. This wikiHow will show you how to record and send a Voice Memo on your iPhone.
Things You Should Know
- Open the Voice Memos app and press the red Record button to begin recording. When finished, tap the button again the end the recording.
- Edit your voice memo by clicking the three dots icon. Tap Edit Recording, then trip, delete, or adjust the recording quality.
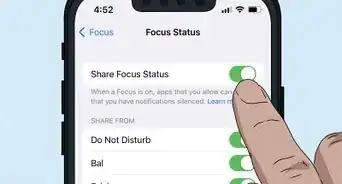
- Share your voice memo by clicking the three dots, then Share. Select AirDrop, Messages, Mail, or another app to share your memo.
Steps
Recording a Voice Memo
-
1Open the Voice Memos app. This looks like a red and white soundwave with a black background. You can usually find this in your Utilities folder.
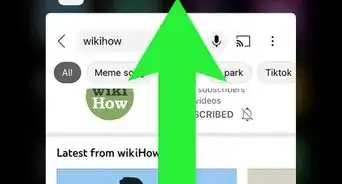
- You can also swipe down on your home page to manually search for the Voice Memos app.
-
2Tap the red Record button to begin recording. Your iPhone will begin recording immediately. You'll be able to see the length of your voice memo on the screen.
- For best results, place your iPhone close to the sound you want to record.
- You can use AirPods if you want to record your own voice without holding the phone to your face.
Advertisement -
3Tap the Record button to stop recording. The voice memo will automatically save to your iPhone.
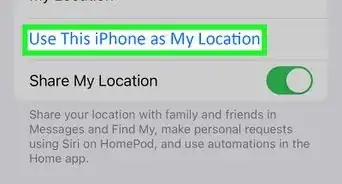
- If you have Voice Memos turned on in iCloud settings or iCloud preferences, your recordings will be synced to iCloud.[1]
-
4Tap New Recording to change the name. You can title the voice memo for easier identification later.
- There is no practical limit to the length of recordings, though eventually you may run out of space on your iPhone if your recording is long. Recordings are essentially 480 KB per minute, meaning an hour-long recording would take approximately 30 MB.[2]


Editing a Voice Memo
-
1Tap the voice memo you want to trim. You can trim your recordings to remove parts you don't need or split a long recording into multiple parts.[3]
-
2Tap ••• . This will be on the right side of the recording.
- A pop-up menu will open.
-
3Tap Edit Recording. This will be underneath Share next to a sound wave icon.
-
4Trim your recording. Tap the crop icon above the recording, towards the right side. This looks like a square with two extending points. Use the timeline at the bottom to crop your voice memo.
- Drag the left arrow towards to right to crop the beginning.
- Drag the right arrow towards the left to crop the ending.
- Tap Trim to trim the selection or Delete to delete the selection.
- Tap Save to save your changes.
-
5Edit recording options. Tap the options icon. This looks like three switches.
- Adjust the playback speed. Drag the circle towards the turtle icon to make it slower or towards the rabbit icon to make it faster.
- Toggle on Skip Silence to automatically detect and remove silence in your recording.
- Toggle on Enhance Recording to reduce background noise and echo.
-
6Tap Done. This will save and apply all your changes.


Sharing a Voice Memo
-
1Tap the voice memo you want to share. You'll be able to share the voice memo with others via Messages, Mail, and more. The file will be sent in M4A format, which can be played on most modern devices.
-
2Tap ••• . This will be on the right side of the recording.
- A pop-up menu will open.
-
3Tap Share. This will be underneath Copy.
- A list of apps will appear and options will appear.
- If you want to save the recording to your Files app, tap Save to Files on the menu.
-
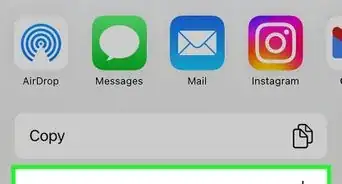
4Tap the app you want to use. Your voice memo will open within the app you choose.
- You can use AirDrop if you want to send the voice memo to someone nearby.
- You can also use Messages, Mail, or share via social media.
-
5Send the voice memo. After tapping your preferred sharing method, you'll need to confirm the
- When using Messages, tap the recipient you want to send to. Tap the arrow in the text field to send your voice memo.
- When using Mail, enter the email address of the recipient. Add a subject title, then tap the arrow in the top-right corner to send.
- You can also send files to another device.


Sending an Audio Message in Messages
-
1Open your Messages app. You can send quick audio notes to your contacts using the Messages app. This is a great way to send SMS messages without having to type manually.
- Be sure to update your iPhone to access the latest features.
-
2Open a conversation. You can find pinned messages at the very top.
- Because audio messages use the iMessage platform, you can only send audio messages to other people who also use an iPhone, iPad, or a Mac. If you want to send an audio message to an Android user, you can record a voice memo and share the recording.
- If the message bubbles are green, you will not be able to send audio messages.
-
3Tap the Audio Message icon. This looks like a white soundwave with a blue background. You can find this below the text field, within the row of quick apps.
- On older versions of iOS, this is a grey button to the right of the text field
-
4Tap and hold the red Record button to record. Your iPhone will begin recording immediately. You can see the length of your audio message displayed on the screen.
- If you need to cancel the recording, slide your finger off the record button, then release.
-
5Release the button to stop recording. Your audio message will automatically send once you stop recording.
- If you receive an audio message in return, you can listen to the audio message by raising your phone to your ear.


Community Q&A
-
QuestionHow do I listen to my memos?
 Community AnswerTap on the Voice Memos app to find the list of memos underneath the black recording box. Find the memo you want to listen to and tap on it. If it does not play immediately, tap the triangle-shaped play button to hear your memo.
 -
QuestionHow long will voice memos record?
 Community AnswerIt depends on how much space you have left on your device. Normally, it will record until a certain amount of space is left.
 -
QuestionHow long can voice memos be?Community AnswerAs long as you wish, it also depends on how much storage you have as it can take up a lot of megabits/gigabits, etc. Also consider how much you actually want to listen over what you've said again.
wikiHow Video: How to Record a Voice Memo on an iPhone


References
About This Article

1. Open the Voice Memos app.
2. Tap the red "Record" button.
3. Tap the red square to pause the recording.
4. Tap Done to finish recording.
5. Enter a name for the recording and tap Save.