Easily create a poll in Outlook with this simple guide
X
This article was co-authored by wikiHow staff writer, Nicole Levine, MFA. Nicole Levine is a Technology Writer and Editor for wikiHow. She has more than 20 years of experience creating technical documentation and leading support teams at major web hosting and software companies. Nicole also holds an MFA in Creative Writing from Portland State University and teaches composition, fiction-writing, and zine-making at various institutions.
The wikiHow Tech Team also followed the article's instructions and verified that they work.
This article has been viewed 118,055 times.
Learn more...
This wikiHow teaches you how to add voting buttons to an outgoing email message using Microsoft Outlook on your PC.
Steps
Method 1
Method 1 of 3:
Creating a Poll
-
1Open Outlook. Click the Start menu, click All Apps, select Microsoft Office, and then click Microsoft Outlook.
-
2Click New Email. It’s at the top-left corner of Outlook. You can also add a button to message you’re forwarding. [1]
- To forward a message, click the message, then click Forward.[2]
Advertisement -
3Click the Options menu. It’s at the top of the window, toward the left.
-
4Click Use Voting Buttons. A drop-down menu will appear.
-
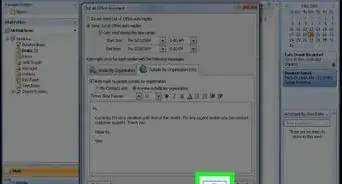
5Select a voting button style. Once you make your selection, a message will appear that says “You Have Added Voting Buttons to This Message.[3] ” Here’s what the different options do:
- Approve;Reject: Use when you need authorization for something.
- Yes;No: This is a great way to do a fast poll.
- Yes;No;Maybe: Adds an additional response to the Yes and No poll.
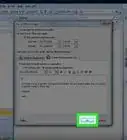
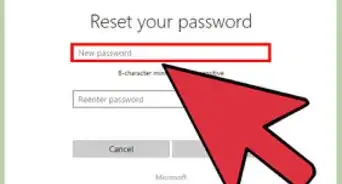
- Custom: Gives you the option to customize your own poll options, such as time and date options. If you choose this option, check the box beside “Use voting buttons” under “Voting and Tracking options,” create your button text, then click Close.
-
6Enter your desired recipients. Type the email address(s) into the To: and CC: fields as needed.
-
7Add a subject and message. Use the message and/or subject boxes to describe the details of the poll.
-
8Click Send. It’s at the top-left corner of the message.
- When the message is delivered to the recipients, they can click Click here to vote to access the buttons, and then cast their votes. Responses will be delivered to your inbox.
- You can view all responses in a table. To do so, open one of the response messages, click The sender responded in the message header, and then click View voting responses.[4]


Advertisement
Method 2
Method 2 of 3:
Voting on a Poll
-
1Open Outlook. Click the Start menu, click All Apps, select Microsoft Office, and then click Microsoft Outlook.
-
2Double-click the message that contains the poll. This opens the message in its own window.
- If you’re viewing the message in the reading pane, click Click here to vote in the message’s header, and then skip to the last step.
-
3Click the Message tab. It’s at the top of the window.
-
4Click Vote. It’s under the “Respond” header.[5]
-
5Click the option you want. This will add your vote to the results of the poll.


Advertisement
Method 3
Method 3 of 3:
Reviewing Poll Results
-
1Open Outlook. Click the Start menu, click All Apps, select Microsoft Office, and then click Microsoft Outlook.
- Use this method after you’ve created a poll and want to view the results.
-
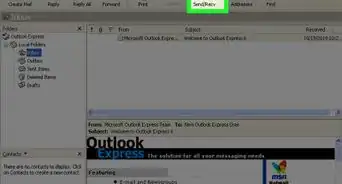
2Click the Sent Items folder. It’s in the left panel.[6]
-
3Click the message that contains the poll. This opens the message in the reading pane.
-
4Click the Message tab. It’s at the top of the window.
-
5Click Tracking. It’s under the “Show” header. The results of the poll now appear in a table inside the window.
- You won’t see the Tracking button until at least one of the recipients casts a vote.


Advertisement


References
- ↑ https://support.office.com/en-us/article/create-polls-in-email-messages-and-review-the-results-4d10e079-8ea1-489a-a79c-18cb71ae12dd
- ↑ https://support.office.com/en-us/article/reply-to-or-forward-an-email-message-a843f8d3-01b0-48da-96f5-a71f70d0d7c8
- ↑ http://www.dummies.com/software/microsoft-office/outlook/how-to-take-a-vote-with-outlook-2013/
- ↑ https://support.office.com/en-us/article/create-polls-in-email-messages-and-review-the-results-4d10e079-8ea1-489a-a79c-18cb71ae12dd
- ↑ https://support.office.com/en-us/article/create-polls-in-email-messages-and-review-the-results-4d10e079-8ea1-489a-a79c-18cb71ae12dd#ID0EAABAAA=2016,_2013,_2010
- ↑ https://support.office.com/en-us/article/create-polls-in-email-messages-and-review-the-results-4d10e079-8ea1-489a-a79c-18cb71ae12dd#ID0EAABAAA=2016,_2013,_2010
About This Article

Nicole Levine, MFA
wikiHow Technology Writer
This article was co-authored by wikiHow staff writer, Nicole Levine, MFA. Nicole Levine is a Technology Writer and Editor for wikiHow. She has more than 20 years of experience creating technical documentation and leading support teams at major web hosting and software companies. Nicole also holds an MFA in Creative Writing from Portland State University and teaches composition, fiction-writing, and zine-making at various institutions. This article has been viewed 118,055 times.
How helpful is this?
Co-authors: 2
Updated: August 24, 2022
Views: 118,055
Categories: Outlook
Advertisement