This article was co-authored by wikiHow staff writer, Nicole Levine, MFA. Nicole Levine is a Technology Writer and Editor for wikiHow. She has more than 20 years of experience creating technical documentation and leading support teams at major web hosting and software companies. Nicole also holds an MFA in Creative Writing from Portland State University and teaches composition, fiction-writing, and zine-making at various institutions.
This article has been viewed 235,228 times.
Learn more...
Going on vacation? If your business or organization uses Microsoft Outlook to send and receive email, you can easily set up an automatic Out of Office response to inform the people who email you that you're away. Creating a vacation autoresponder is easy whether you're using Outlook as part of Microsoft Office or Outlook.com on the web. And, if your organization uses an Exchange server, you'll be able to set up custom automatic replies to people within and outside of your organization. This wikiHow article will show you how to easily set up an Out of Office message in any version of Outlook for Windows & Mac.
Things You Should Know
- You can set up automatic email replies in any version of Outlook, including for your free Outlook.com email address.
- In the Outlook desktop app, go to File > Automatic Replies to create your vacation autoresponder.
- If you don't have the option to create Automatic Replies, you can set up a rule that automatically responds to incoming messages with a template you create.
Steps
Creating an Automatic Reply (Outlook Desktop)
-
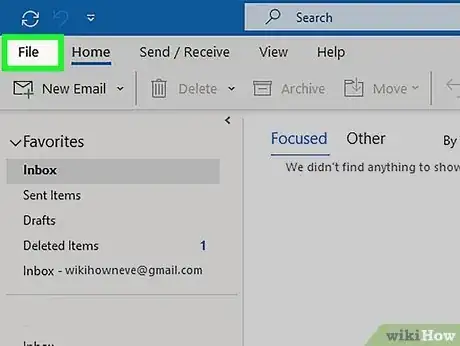
1Click the File menu at the top-left corner of Outlook. This expands a larger menu that takes up much of the window.
- If you're using Outlook 2007, see this method instead.
-
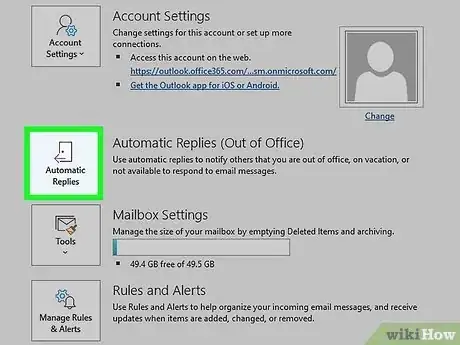
2Click Automatic Replies. You'll see this button on the left side of the window in most versions of Outlook.
- If you don't see an Automatic Replies button, use this method instead.
Advertisement -
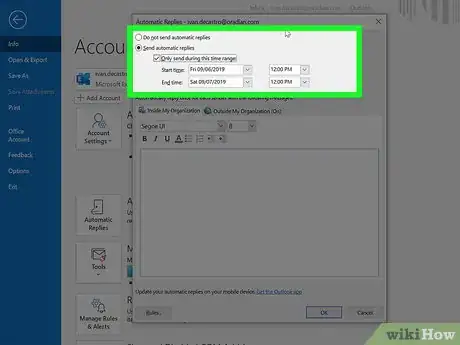
3Turn on Send automatic replies. This is the second radio button at the top of the Automatic Replies window. Once you enable this feature, you'll be able to fill out the rest of the details in the window.
- If you're on an Exchange server, you'll see two tabs on this window: Inside My Organization and Outside My Organization. By default, your automatic Out of Office replies will only be sent to people within your organization.
-
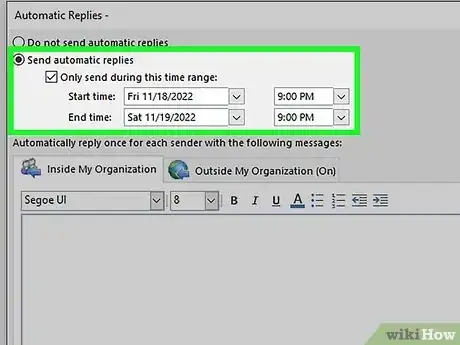
4Choose when to send automatic Out of Office replies. Once you turn on this feature, Outlook will automatically send your Out of Office message in response to all email messages you receive.
- If you want Outlook to automatically send your Out of Office response between two specific dates and times, check the box next to "Only send during this time range" and choose your time period.
- For example, if you plan on going on vacation for two weeks, select the date range during which you'll be on vacation so the automatic response will only be active while you're out.
- If you want to turn on Out of Office now and leave it on until you manually turn it off, don’t tick the box.
- If you want Outlook to automatically send your Out of Office response between two specific dates and times, check the box next to "Only send during this time range" and choose your time period.
-
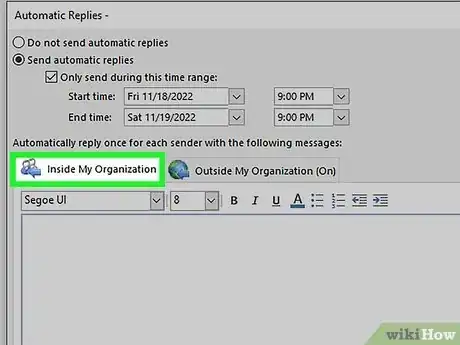
5Create your automatic reply. Now you can compose the automatic response that Outlook will send to anyone who writes while you're away.
- If you're on an Exchange server, you'll see two tabs in this window below the dates and times: Inside My Organization and Outside My Organization. Click the Inside My Organization tab and type an Out of Office message for people within your company or organization on this tab.
- If the only tab you see is Automatic replies, just create your Out of Office reply on this tab. In this case, your automatic replies will be sent to everyone who writes you while Automatic Replies is enabled.
- For example, type a message explaining the dates you'll be unavailable, and refer questions and concerns to another contact in your office.
- You may also want to allow a coworker or assistant to send emails on your behalf while you're out of the office.
-
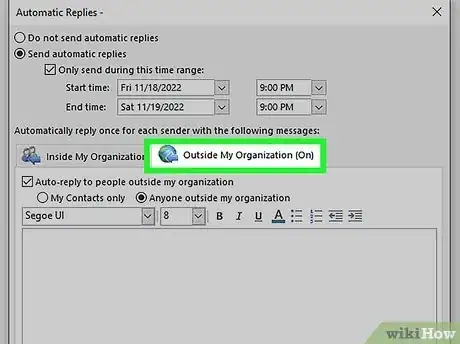
6Select your Outside My Organization preferences. If you don't see this tab, you can skip this step. If you're on an Exchange server, you can further customize your automatic replies by creating a different message or rules for emails sent by people outside of your company or organization.
- By default, the automatic reply you enter into this field will be sent all senders outside of your organization, including advertisers, newsletter senders, and even possibly spammers.[1] To avoid sending your vacation message to people you don't already associate with, consider turning on the My contacts only option instead.
-
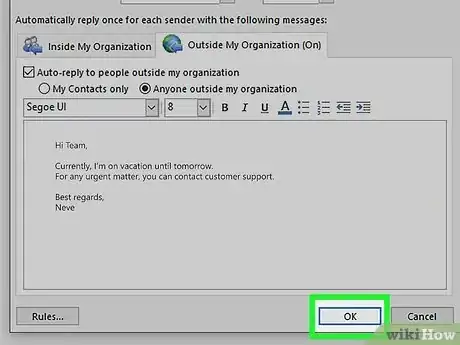
7Click OK to save your changes. If you didn't select specific dates for your automatic replies, the feature will activate immediately. If you did choose specific dates, your automatic replies will turn on and off automatically at the times you specified.[2]
- Considering upgrading your Microsoft 365 account? Check out our coupon site for Staples discounts.
Creating a Rule (Outlook Desktop)
-
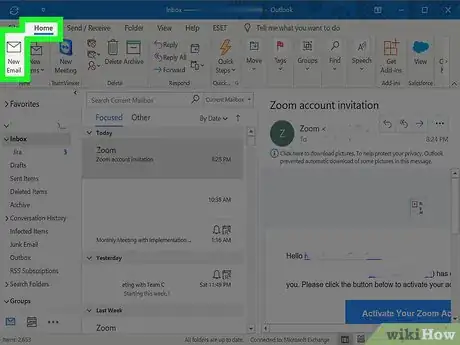
1Click New Email to compose a new message. If your version of Outlook doesn't have the option to create automatic replies while you're out of the office, you can still set up your vacation message by creating an Out of Office template and applying rules.[3] Start by creating a new email message for your template.
- Rules can also be used to keep your inbox organized.
-
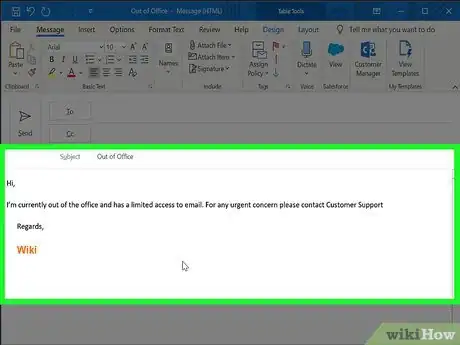
2Type a subject and body for your Out of Office message. You'll leave the "To" and "CC" fields blank, as you won't actually be sending this message.
- In the subject line, type the subject that you want to appear in each message sent in your Out of Office replies. For example, "Out of Office," or "On vacation until 9/22."
- In the body of the message, you'll usually want to list the dates you'll be out of the office, and any specific instructions the sender should follow in the meantime.
- You may also include the contact information for somebody else within your organization in case the sender needs immediate assistance.
-
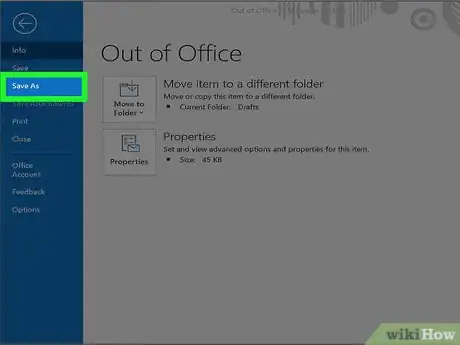
3Click the File menu and choose Save as. Although you created an email message, you'll be saving it as a template instead of sending it.
-
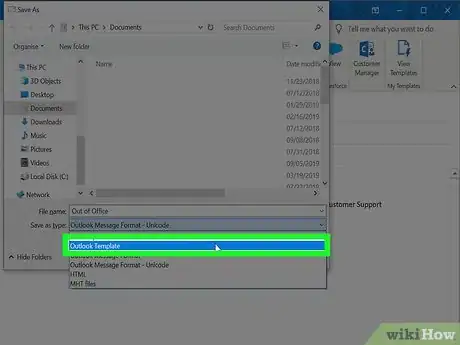
4Choose Outlook template (*.oft) as the file type and click Save. This saves your template in the default location, which is usually c:\users\yourusername\appdata\roaming\microsoft\templates.
-
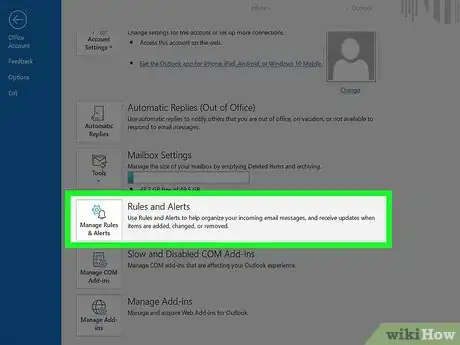
5Click the File tab and select Manage Rules & Alerts. To ensure your Out of Office message is sent automatically, you'll need to create a rule that tells Outlook when to send the message.
-
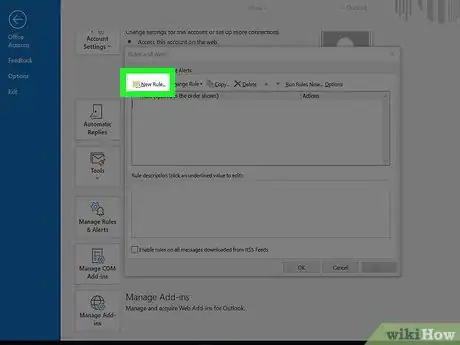
6Click the New Rule button. You'll see this under the Email Rules tab. A Rule Wizard dialog box will pop up to walk you through creating a rule.
-
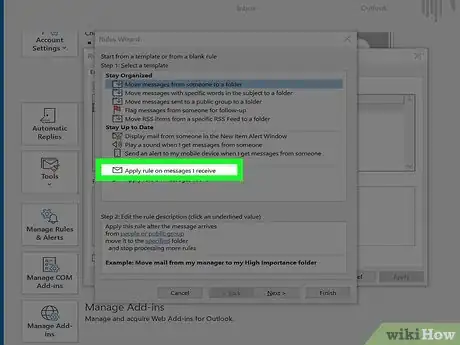
7Click to select "Apply rules on messages I receive." You'll see this under the “Start from a blank rule" header.
- Click Next to proceed to creating the rule. Although there are several options on the screen, you'll want to click Next to proceed to the next screen without making any selections.
-
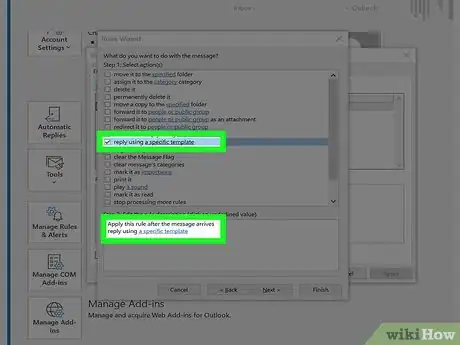
8Tick the box next to "reply using a specific template." You'll see this under the header “What do you want to do with the message?"
-
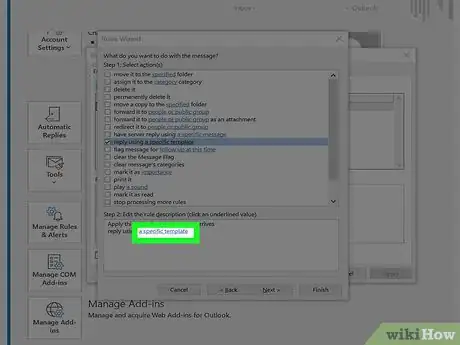
9Click the "a specific template” link. You'll see this at the bottom of the window under "Step 2."
-
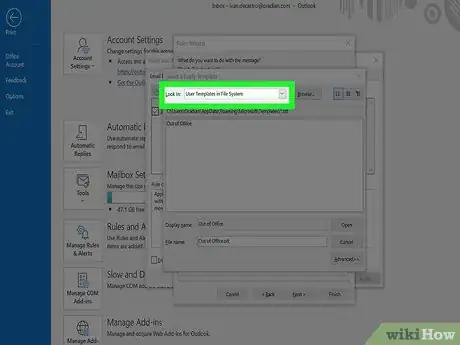
10Select User Templates in File System from the “Look In” dropdown menu. This is the menu at the top of the window.
-
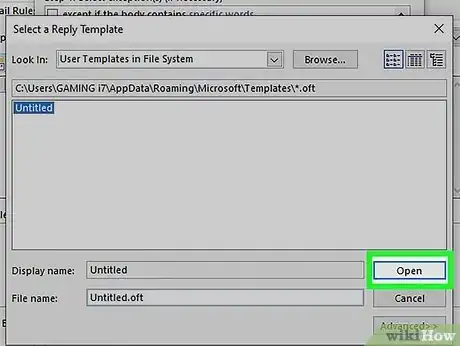
11Select your template and click Open. This is the email template you created earlier.
-
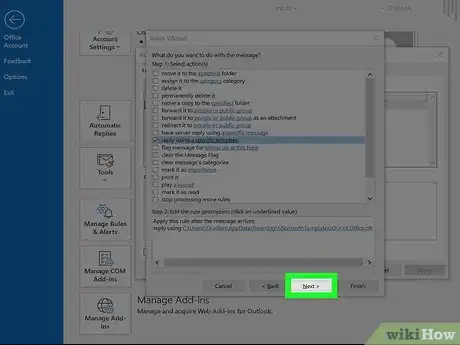
12Click Next. You're directed to the last step in the Rules Wizard where you can name your rule and set additional exceptions.
-
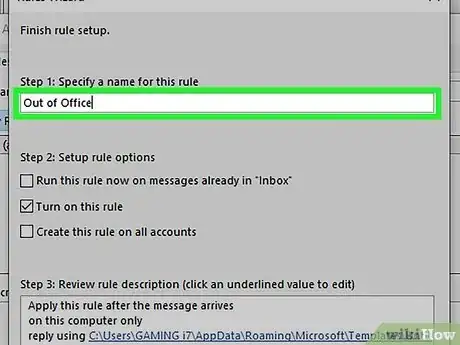
13Name and enable your rule. Type a name for your rule, such as "Out of Office." You can also choose whether to turn your rule on now or to wait until you're leaving the office.
- By default, you'll see that "Turn on this rule" is selected. This means that once you proceed to the next step, your Out of Office status will start automatically and remain on until you turn it off. If you don't want to turn on the feature yet, remove the checkmark from the box—you can return to this screen later to turn it on.
-
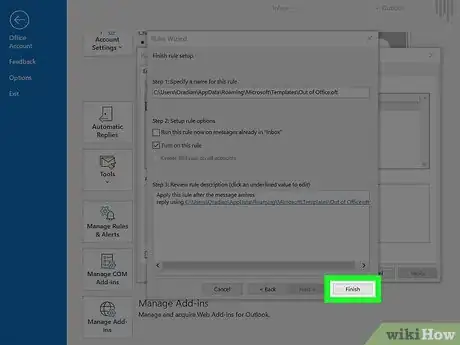
14Click Finish to save your changes. Once the rule is enabled, anyone who emails you will receive your Out of Office message.
- If you're not turning on the rule now, you can turn it on later by returning to File > Manage Rules & Alerts > E-mail Rules, checking the box next to the rule, and clicking OK.
- To turn off your rule when you return, go to File > Manage Rules & Alerts > E-mail Rules, select the rule, and click Delete.[4]
Creating an Automatic Reply (Outlook Web)
-
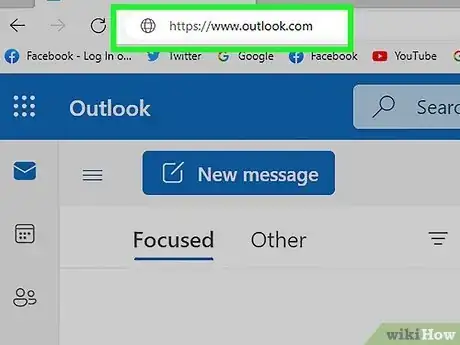
1Sign in to your email account at https://www.outlook.com. Or, if your business or organization uses Outlook 365 on the web, sign in to your work's email server in your web browser now.
- This method will also work for free Outlook.com & Hotmail.com email accounts.
-
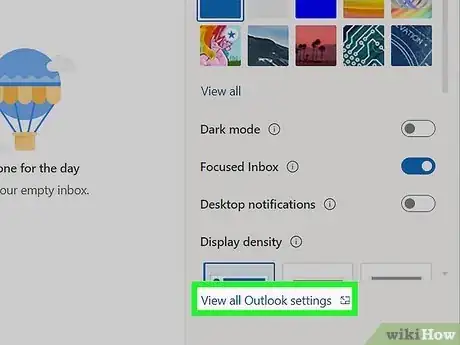
2Click the gear icon and select View all Outlook settings. You'll see the gear icon at the top-right corner of your inbox.[5]
-
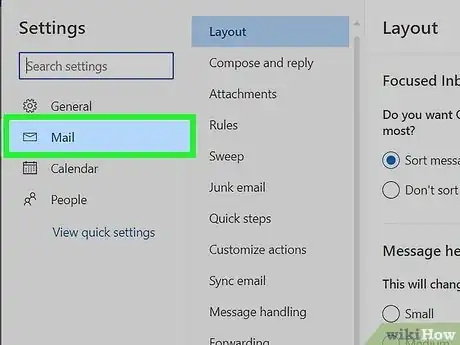
3Click the Mail tab. It's in the left panel of your settings.
-
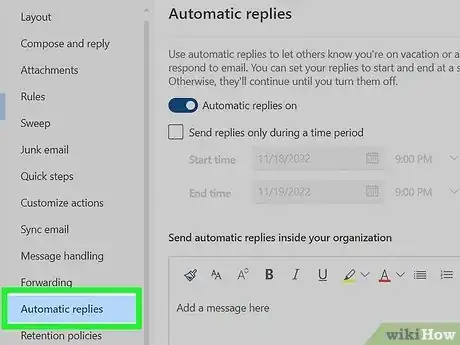
4Click Automatic replies. It's toward the bottom of the center column.
-
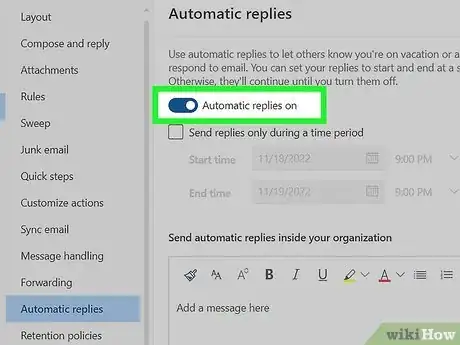
5
-
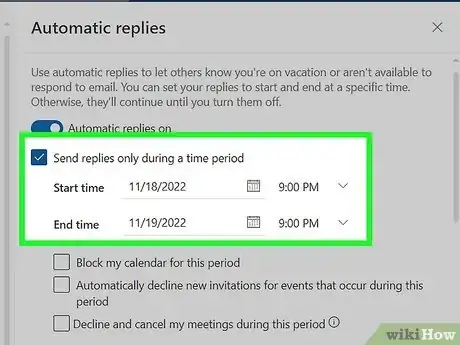
6Choose when to send your Out of Office message. If you only want your vacation message to be sent during specific dates and times, check the box next to "Send replies only during a time period," then choose the proper dates and times. To enable the feature now and leave it on until you turn it off, don't check the box.
-
7Enter your Out of Office reply. The message you type into the box will be sent in response to all email messages while you're out of the office. You can use any of the font and layout features to spruce up your message.
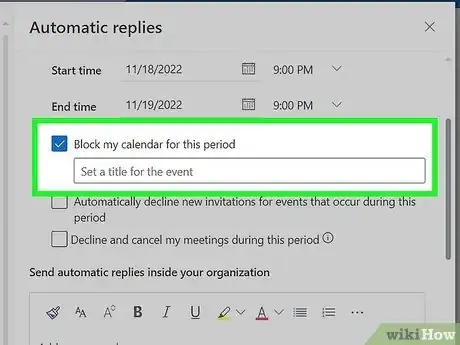
- If you're using Outlook 365 on the web through your organization's email server, you'll also have these options, which you can enable if you'd like:
- Block my calendar for this period
- Automatically decline new invitations for events that occur during this period
- Decline and cancel my meetings during this period
- If you're using Outlook 365 on the web through your organization's email server, you'll also have these options, which you can enable if you'd like:
-
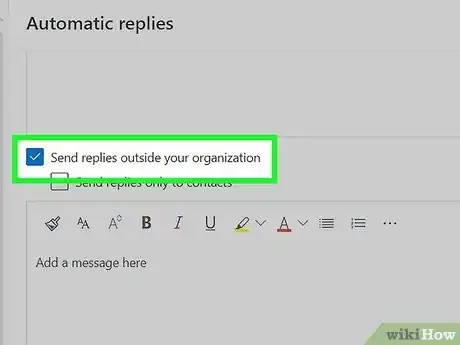
8Choose who should receive the message. If you're using your organization's email server, you'll have the option to Send replies outside your organization, which ensures that your automatic reply is sent to people outside of your company.
- If you don't see this option, you can opt to enable Send replies only to contacts to avoid sending automatic replies to advertisers, newsletters, and even spammers.
-
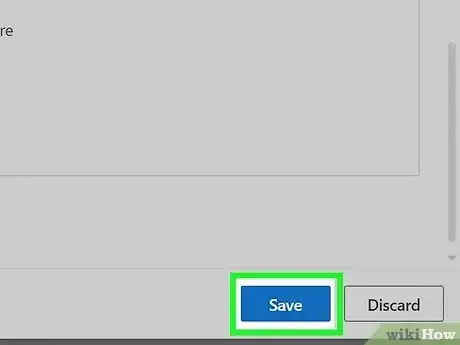
9Click Save to save your changes. If you chose a specific time period, your Out of Office replies will be sent during the time period you selected. If not, your automatic replies will begin immediately.
- To turn off automatic replies if you didn't choose an end date, return to the gear icon, select View all Outlook settings > Mail > Automatic replies, then toggle off the feature.
Using Outlook 2007
-
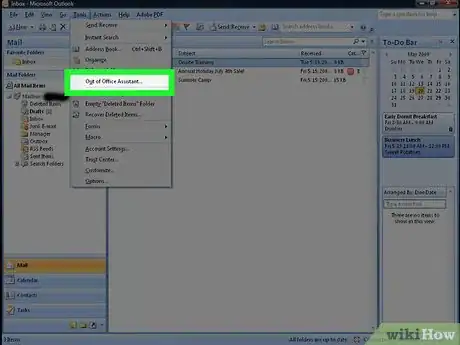
1Click Out of Office Assistant in the Tools tab. You'll find the Tools tab in the menu along the top left of the program window. The Out of Office Assistant dialog box will open.
- If this option is not available, you may be using a non-Exchange account.
-
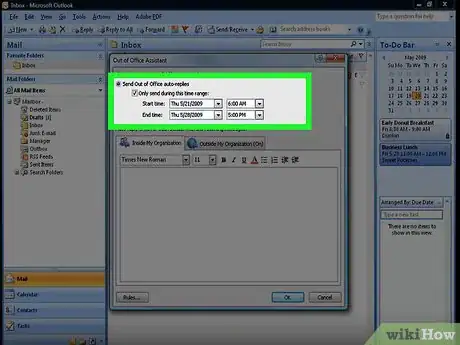
2Click to select the circle next to “Send Out of Office auto-replies.”
- If you want to specify a time, click to select the box next to “Only send during this time range,” then select a start time and end time. For example, if you plan on going on vacation for two weeks, select the date range during which you'll be on vacation so the automatic response will only be active while you're out.
-
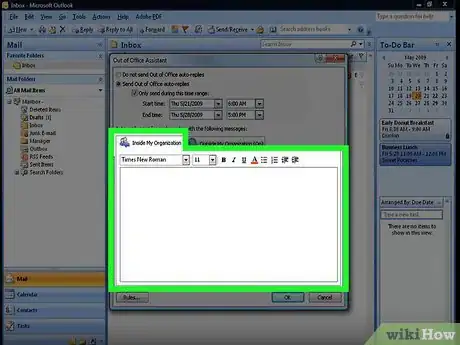
3Click the Inside my organization tab. You'll see this above the large, blank text box.
-
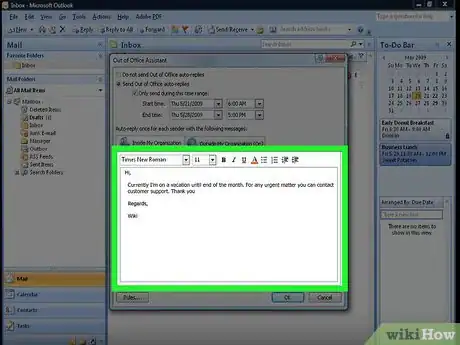
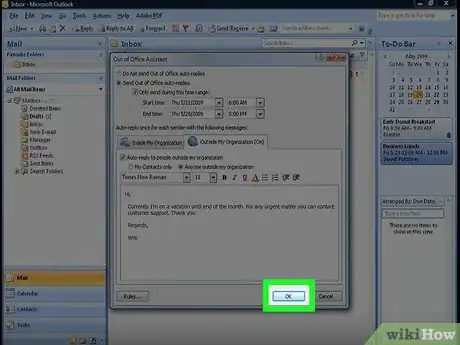
4Type the automatic reply you want sent to people who email you from your office or company. Only the addresses from the same domain (@wikiHow.com) will get the message you type here. For example, explain you'll be out of the office for the day, and that your manager will be responsible for your duties while you're gone.
-
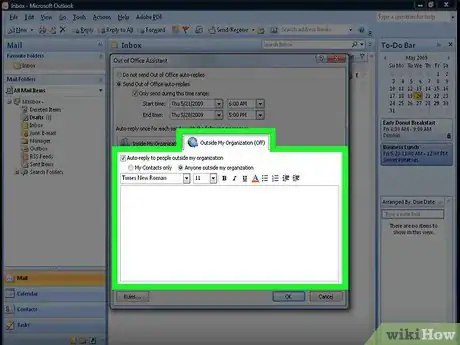
5Click the Outside my organization tab. You'll see this above the large, blank text box.
-
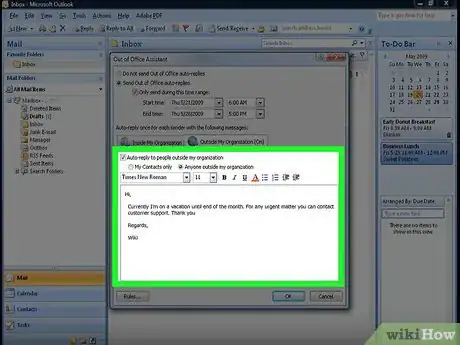
6Type the automatic reply you want sent to people who email you from outside your organization. For example, type a message explaining that you're unavailable, and refer questions and concerns to another contact from your office. Only emails sent from outside your domain (@wikiHow.com) will see the message you write here.
- There is a drop-down for font type and font size as well as buttons to format the text in your message.
-
7Click OK. Individuals who email you while you're out of the office will receive the automatic replies you created. If you did not select a time range, the automatic response will send until you turn off the feature.[6]
Community Q&A
-
QuestionHow do you set an out of office reply to go out anytime you are out of the office on the calandar? Or set it to send out of office replies every Monday if that is your day off?
 Anuj_Kumar1Community AnswerYou can choose specific date span while creating Outlook rules. Each time after that period you will need to reset the rule dates for next vacation/out of office period.
 -
QuestionHow do I stop the out-of-office reply in non-Exchange accounts?
 Anuj_Kumar1Community AnswerUse the same method which started to send auto replies. For exchange account, choose Out of Office Assistant and uncheck the option of sending auto replies. For template method, you just simply remove the rule you created.
 -
QuestionHow do I get Out of Office Assistant?
 Community AnswerYou need to have an Exchange server or Office365 account.
References
- ↑ https://support.microsoft.com/en-us/office/send-automatic-out-of-office-replies-from-outlook-9742f476-5348-4f9f-997f-5e208513bd67#bkmk_automaticreplies
- ↑ https://support.microsoft.com/en-us/kb/290846
- ↑ https://support.microsoft.com/en-us/office/use-rules-to-create-an-out-of-office-message-9f124e4a-749e-4288-a266-2d009686b403
- ↑ https://support.microsoft.com/en-us/office/delete-a-rule-2f0e7139-f696-4422-8498-44846db9067f
- ↑ https://support.microsoft.com/en-us/office/send-automatic-out-of-office-replies-in-outlook-on-the-web-0c193ab0-b9e1-4058-84be-a5b014242290
- ↑ https://support.microsoft.com/en-us/kb/290846
About This Article
1. Launch Outlook.
2. Click File and Info.
3. Click Automatic Replies.
4. Select the box next to "Send Automatic Replies."
5. Write email messages in Inside my organization and Outside my organization tabs.
6. Click OK.
