This article was co-authored by wikiHow staff writer, Darlene Antonelli, MA. Darlene Antonelli is a Technology Writer and Editor for wikiHow. Darlene has experience teaching college courses, writing technology-related articles, and working hands-on in the technology field. She earned an MA in Writing from Rowan University in 2012 and wrote her thesis on online communities and the personalities curated in such communities.
This article has been viewed 10,595 times.
Learn more...
Snapchat filters are a fun way to alter the videos and images you create in Snapchat. Maybe you want rainbows to pour out of your mouth when you open it, or maybe you want to add cat ears on you and your friends. There are many different free filters on Snapchat and you can create your own! Since the app does not feature filter-creation, this wikiHow teaches you how to make Snapchat filters by using a web browser computer.
Steps
-
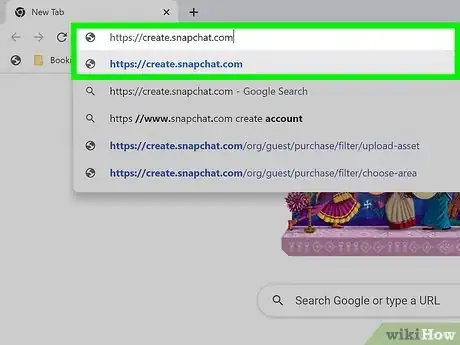
1Go to https://create.snapchat.com. You can use any web browser to make your own Snapchat filters. Popular ones include Firefox, Chrome, and Safari.
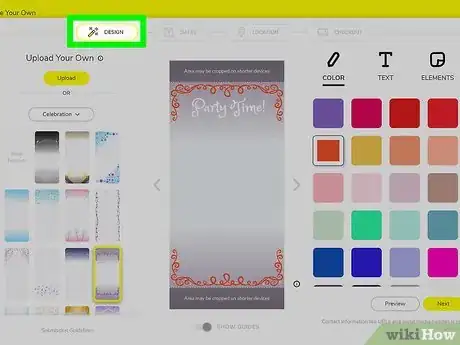
- The filter editor will load with a preview of what your filter will look like on a phone.
- On the left side of the page, you'll see templates that you can use.
- On the right side of the page, you can change editing tools between Color, Text, and Elements.
-
2Design your filter. You can use a template then add color, text, and elements like Bitmoji to your filter.
- If you decide to upload an image from your computer, the max file size you can upload is 300KB with a recommended resolution of 72 DPI. It should be 1080px wide and 2340px high and saved in a PNG format with a transparent background.[1]
Advertisement -
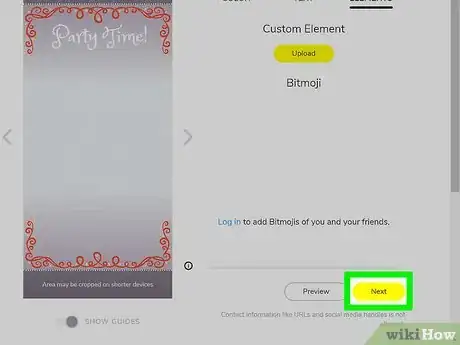
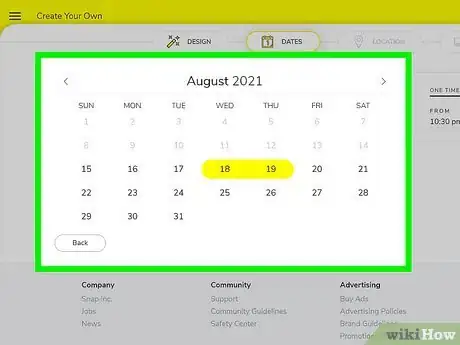
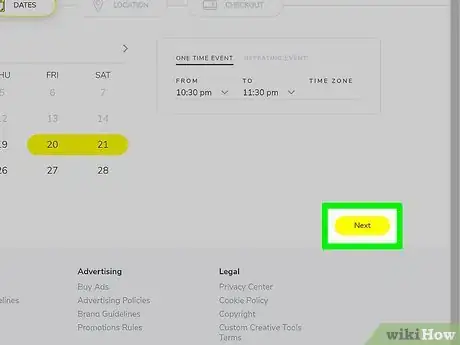
3Click Next. You'll see this yellow button near the bottom right corner of your web browser. A calendar of how long you want your filter to be available will load.
-
4Pick the dates you want your filter to be available. You can click the calendar to choose the dates you want your filter available or you can select the box next to "Run indefinitely, renewing annually" to make your filter forever available.
-
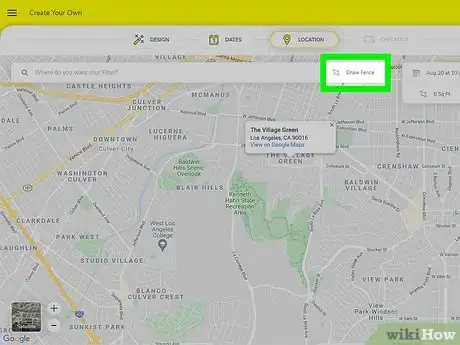
5Click Next. You'll see this yellow button near the bottom right corner of your web browser. A map will appear.
-
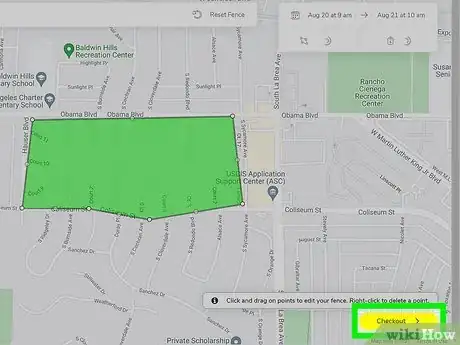
6Select where you want your filter available. You have to create a geofence around the area where you want your filter to be available. Only Snapchatters in the geofence will be able to apply the filter to their Snaps.
- Use the search bar to enter a location and outline the geofenced area.
-
7Click Checkout. It's a button near the bottom right corner of your web browser. A page will load for you to enter payment information, opt to log in, and view your order summary.
-
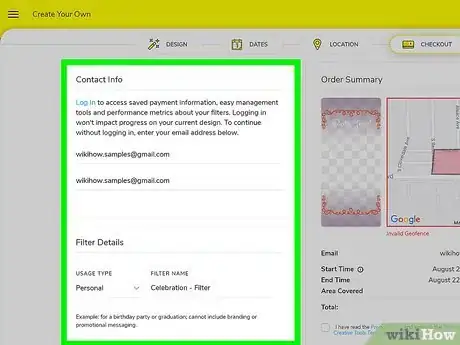
8Fill out the order details. Use the drop-down menu under "Usage Type" to designate if your filter is for personal or business-related usage, then give your filter event a name (optional).
- Under the "Payment" header, enter your payment information including your card number and the name on the card.
- Make sure the information under "Order Summary" is correct before continuing. If not, navigate back to the areas you want to change.
-
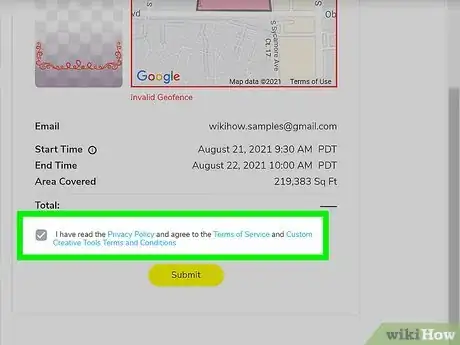
9Click the box next to "I have read…" to check it. If you haven't read the Privacy Policy or Terms of Service as well as the Custom Creative Tool Terms and Conditions, do that before checking the box and continuing.
-
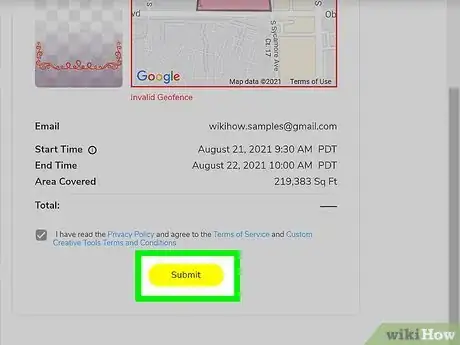
10Click Submit. Your filter will be submitted and you will receive an email when it’s accepted and ready to use.
References
About This Article
1. Go to https://create.snapchat.com.
2. Design your filter.
3. Click Next.
4. Pick the dates you want your filter to be available.
5. Click Next.
6. Select where you want your filter available.
7. Click Checkout.
8. Fill out the order details.
9. Click the box next to "I have read…" to check it.
10. Click Submit.
