This article was co-authored by wikiHow Staff. Our trained team of editors and researchers validate articles for accuracy and comprehensiveness. wikiHow's Content Management Team carefully monitors the work from our editorial staff to ensure that each article is backed by trusted research and meets our high quality standards.
The wikiHow Video Team also followed the article's instructions and verified that they work.
This article has been viewed 62,558 times.
Learn more...
Pillow shams are decorative covers for your pillows. You can replace the covers of old pillows with new shams, or you can change the pillow shams to decorate for special occasions. You can also remove the shams and wash them to keep the surface of your pillows clean. Making pillow shams is easy with some basic sewing knowledge and materials, so try making your pillow shams instead of buying new ones!
Steps
Measuring and Cutting the Fabric
-
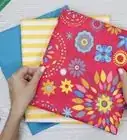
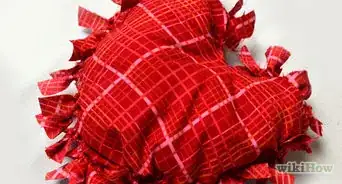
1Choose your fabric. You can use a print or a solid fabric to make a pillow sham. Or, you can use 1 type of fabric in the front and another kind in the back of the pillow sham. Select a fabric that will be easy to work with and that will make a nice cover for your pillow.
- Cotton or linen is a good lightweight option and most craft stores carry a wide range of cotton and linen fabrics.
- You can also look at upholstery fabrics if you want something heavier and more durable, such as velvet, canvas, or tapestry fabric.[1]
-
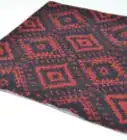
2Measure the pillow. You can cover any type of pillow with a sham, but a full pillow may look better in the sham than a thin one. The measurement of your pillow will be the base for calculating the dimensions of your sham fabric pieces. Use a tape measure to find the width and the length of the pillow from seam to seam.
- For example, if you have a rectangular pillow, then the measurement might be something like 20.5 by 26 inches (52 by 66 cm). If you have a square pillow, then the measurement might be something like 16 by 16 inches (41 by 41 cm).
Advertisement -
3Determine how wide to make the flanges. The flanges are the excess fabric on the edges of the pillow sham cover. You can make small flanges that are 2 inches (5.1 cm) wide or larger flanges that are 4 inches (10 cm) wide.
- Larger flanges can help to give your pillow a more luxurious look, while a pillow with smaller flanges will be more subdued.
-
4Add the flange width times 2 to the pillow measurements. To find the total width and length of the front panel of your sham, you will need to add your pillow measurements to the flange widths. There will be a flange on each side of the pillow, so multiply the flange size by 2 before adding it to your pillow measurements.
- For example, if you have a pillow that is 20.5 by 26 inches (52 by 66 cm) and you want your flanges to be 2 inches (5.1 cm) wide, then your new measurement for the fabric would be 24.5 by 30 inches (62 by 76 cm).
- Or, if you are making a square cover for a 16 by 16 inches (41 by 41 cm) pillow and want 4 inches (10 cm) flanges, your new fabric measurement would be 24 by 24 inches (61 by 61 cm).
-
5Divide the width of the front panel by 2 and add 5. To get the back panel measurements, you will need to divide the width (the largest measurement) of the back panel by 2 and then add 5 inches (13 cm) to that measurement.
- For example, if your pillow plus flange measurement is 24.5 by 30 inches (62 by 76 cm), then divide 30 inches (76 cm) by 2 and you will get 15 inches (38 cm). Then, add 5 inches (13 cm) for a total of 20 inches (51 cm).
- If your pillow plus flange measurement is 24 by 24 inches (61 by 61 cm), then divide 24 inches (61 cm) by 2 and you will get 12 inches (30 cm). Then, add 5 inches (13 cm) for a total of 17 inches (43 cm).
-
6Add the pillow height and flange width for the back panel height. To calculate the second measurement for the back panels, all you need is the pillow height plus the amount you added for the flanges.
- For example, if your pillow plus flange measurement is 24.5 by 30 inches (62 by 76 cm), then the height of your back panels will be 24.5 inches (62 cm).
- If your pillow plus flange measurement is 24 by 24 inches (61 by 61 cm), then your back panel back panel height measurement will be 24 inches (61 cm).
-
7Cut your fabric pieces. Once you have the measurements for the front and back panels of the flange, use them to cut out all of the pieces to sew the pillow sham. Trace the measurements for each of the pieces onto the fabric using a piece of chalk and ruler. Then, cut along the lines. You will need to cut out the following pieces:
- 1 front panel
- 2 back panels


Hemming the Back Panel Pieces
-
1Fold over 1 inch (2.5 cm) of fabric on one of the height edges. The height edges are the longest edges of your back panel pieces. Fold over 1 inch (2.5 cm) of 1 of these edges so that the raw edge is going in towards the wrong (unprinted) side of the fabric.
- If your fabric is a solid color with no obvious front or back, then you can make the fold on either side.
-
2Iron along the fold. To crease the fold, press the folded edge with an iron. Use the lowest possible setting to avoid damaging the fabric. You may also want to place a t-shirt or towel over the fabric to protect it.
- Ironing the fold is optional. You may skip this if you are not concerned about having creased edges.
-
3Fold the fabric and pin it in place. Fold the same edge over again going in the same direction. This will hide the raw edge of the fabric that you folded in towards the wrong side.
- Place a pin about every 2 to 3 inches (5.1 to 7.6 cm).
- Make sure that the pins are perpendicular to the folded edge.
-
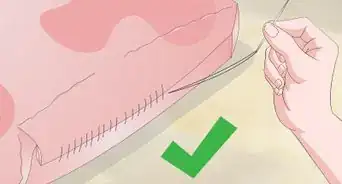
4Sew 0.25 inches (0.64 cm) from the edge of the inner fold. To secure the hem of the back panel, sew a straight stitch 0.25 inches (0.64 cm) from the inner edge of the folded fabric. Sew from the top to the bottom of the folded fabric.
- You may use a different stitch setting, if you prefer, such as the zigzag stitch setting.
-
5Repeat this process on the other back panel piece. You will also need to hem 1 edge of the other back panel piece. Follow the same process to hem the other piece.

Sewing the Sham Pieces Together
-
1Spread out the front panel piece with the print side up. Lay your front panel piece on a flat work surface, such as a clean table or a clean space on your floor. The print side of the fabric should be facing up so that it is visible. Smooth out the fabric so that it lays flat.
- If your fabric is a solid and both sides look the same, then it will not matter which side is facing up.
-
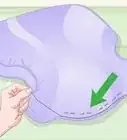
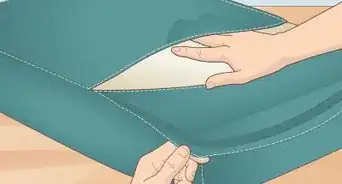
2Lay the back panels over the front panel. Make sure that the print sides are pointing down. Align the raw edges of the back panels with the raw edges of the front piece. Position the hemmed edges in the center of the pillow sham so they are overlapping.
- If the back panel fabric is a solid, then position them so that the folded over fabric at the center of the panels is facing out.
-
3Pin around the edges of the pillow sham. Place pins all around the edges of the pillow sham to secure the front and back panels together while you sew.
- You may want to insert the pins so they are perpendicular to the edges of the fabric.[2] This will make it easier to remove them as you sew.
-
4Sew a straight stitch 0.5 inches (1.3 cm) from the edges of the fabric. Set your sewing machine to the straight stitch setting and start sewing along the edges of the pillow sham. Sew in a straight line about 0.5 inches (1.3 cm) from the raw edges.
- Make sure to remove the pins before you sew over each section. Do not sew over the pins.
-
5Pivot the fabric each time you reach a corner. When you get to a corner, take your foot off of the pedal to stop the machine. Pivot the fabric by 90 degrees to change directions and then continue sewing. Do this each time you come to a corner.
- Another option is to sew off of each edge when you reach a corner, snip the excess threads, and then pivot the fabric and sew along the next edge.
-
6Continue sewing all the way around the edges. Keep sewing around the edges of the sham until you have secured all of them. Sew right off of the edge of the last corner and then cut the excess threads.
Finishing the Sham
-
1Cut a notch in each of the corners. The excess fabric in the corners of the sham may cause the sham to look bulky at the corners after you turn it right side out. To prevent this, snip from the tip of the corner to where the stitching begins. This will allow the fabric to overlap when you invert the pillow sham.
- Do not cut through the stitches.
-
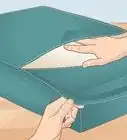
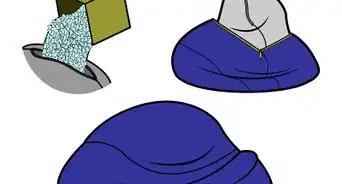
2Turn the pillow sham right side out. Reach in through the gap between the back panels and grasp the sham fabric from the inside. Pull this fabric out through the gap between the back panels until it is completely inverted. Press your fingers into the corners of the sham to push out the fabric.[3]
-
3Iron the edges of the pillow sham. Ironing the sham around the edges will help to ensure that the flanges look neat and flat after you sew them. Use an iron on the lowest setting to iron around the edges of the sham.
- You may iron the whole sham if desired, but this is optional.
-
4Measure and mark where to place the flanges. Identify where you want the flanges to begin and end using the flange measurement you decided on. Measure from the edges of the sham to the desired flange measurement and draw a line in chalk to indicate this measurement.
- You can use a ruler or other straight edge to create a straight line with the chalk.
-
5Pin around the edges. This will help to keep the fabric lined up properly as you sew. Place 1 pin every 2 to 3 inches (5.1 to 7.6 cm). Use a ruler to create a straight edge for sewing.
- Insert the pins perpendicular to the lines you have drawn.[4]
-
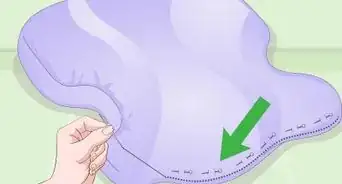
6Sew a straight stitch along the lines. Use the lines to guide you as you sew. Keep sewing over the lines until you have secured the entire inner edge of the pillow sham flanges.
- Remove the pins before you sew over each area to avoid sewing over them.
-
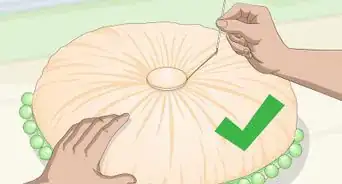
7Cut the excess threads. After you have secured the flanges, stop your machine and raise the presser foot to release the sham. Use a sharp pair of scissors to cut the excess threads left over from sewing the flanges into place.
-
8Dust off the chalk and put the sham on your pillow. Give the pillow case a good shake and pat it vigorously with your hands to remove the chalk. Then, put the sham onto your pillow. It is ready to use!


Community Q&A
-
QuestionHow do I do the back side if my pillow is not a square?
 Community AnswerYou do it exactly the same as if it were square. Measure each side, then add one inch to get the fabric size you need. Follow the article's instructions from there.
 -
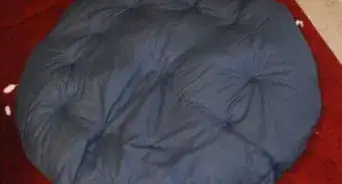
QuestionDoes it matter how fluffy the pillow is?
 Community AnswerYes and no. You can make a sham for any type of pillow, but the sham may look better on a fluffy pillow than on a thin one.
Things You’ll Need
- Fabric
- Measuring tape
- Ruler
- Chalk
- Pins
- Sewing machine
- Thread
References
About This Article