This article was co-authored by wikiHow Staff. Our trained team of editors and researchers validate articles for accuracy and comprehensiveness. wikiHow's Content Management Team carefully monitors the work from our editorial staff to ensure that each article is backed by trusted research and meets our high quality standards.
The wikiHow Video Team also followed the article's instructions and verified that they work.
This article has been viewed 150,337 times.
Learn more...
Neck pillows have many uses, depending on how they are shaped and what they are stuffed with. If you are going on a trip, and need to take a nap, a horseshoe-shaped pillow stuffed with polyester stuffing will make your nap more comfortable. If you wake up with a stiff neck, then a tube-shaped pillow stuffed with rice will make you feel better (after you heat it up, of course!).
Steps
Making a Traveling Pillow
-
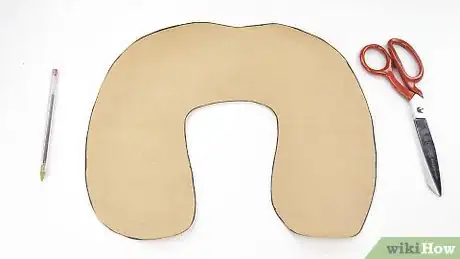
1Draw a horseshoe shape on a sheet of paper, then cut it out. It needs to be 14 inches (35.56 centimeter) tall and 20 inches (50.8 centimeters) wide. It should be 8 inches (20.32 centimeters) thick at the arms, and 7 inches (17.78 centimeters) thick at the top.[1]
- If you are having trouble drafting your own pattern, you can find one online.
- If you want the pattern to by symmetrical, draw a half-horseshoe shape on a folded sheet of paper, cut it out, then unfold it.
-
2Transfer to pattern to your fabric, then cut it out. Stack two pieces of fabric together, right sides facing in. Pin the pattern on top of the fabric, cut around it, then remove it. Re-pin the to fabric pieces.[
- Choose a soft fabric, such as flannel or fleece. Jersey or cotton ill also work.
- You can use the same color and pattern for both sides, or coordinating ones. Consider using a solid color for one side and a pattern for the other.[2]
Advertisement -
3Sew the pillow, but leave a small gap for turning and filling. Begin and finish sewing at one of the side edges, leaving a 4-inch (10.16-centimeter) gap. Use a matching thread color and a ¼ to ½-inch (0.64 to 1.27-centimeter) seam allowance.[3]
- Backstitch at the start and end of your sewing. This will keep your stitches strong and prevent them from unraveling.
-
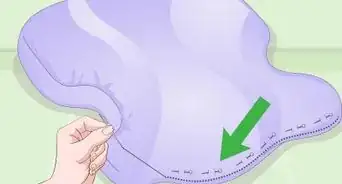
4Cut V-shaped notches into the seams. Cut as close as you can to the stitching without actually cutting through it. The notches will help the pillow lay smoother once you turn it right side out.[4]
-
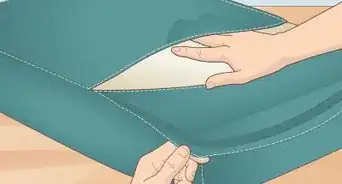
5Turn the pillow right side out. Stick your hand into the pillow, grab the opposite end, then pull it through the opening. Use your finger or a knitting needle to help push out the seams, if needed.
-
6Stuff the pillow with polyester stuffing. You can stuff it as much or as little as you'd like.[5] If you want to use this as a therapeutic pillow, you can stuff it with rice instead; this way, you can heat it up in the microwave, then drape it around your neck.
- If you are making a therapeutic pillow, consider adding about ¼ cup (10 grams) of dried lavender into the rice.
-
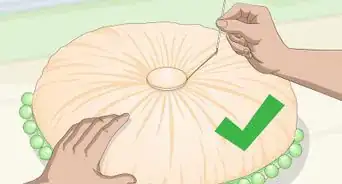
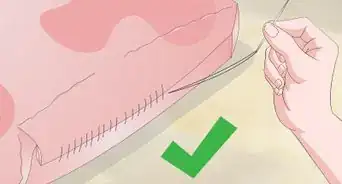
7Sew the opening of the pillow shut. Fold the cut edge into the pillow by ½ inch (1.27 centimeters), then hand sew it shut. Keep your stitches tight and small so that the rice doesn't fall through.
- If you made a therapeutic pillow, heat it in the microwave at 1-minute intervals until it reaches the temperature you want. Shake the pillow between each interval to distribute the heat evenly.
Making a Sock Pillow
-
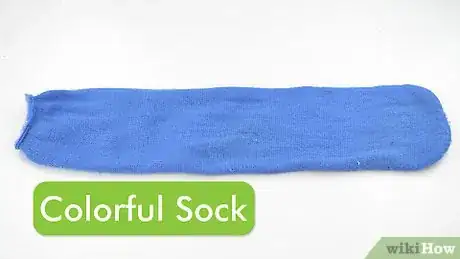
1Get a clean, colorful sock. A crew sock that comes past your ankle will work well for this, but you can also use a knee sock as well. Do not use an ankle sock; it won't be long enough to drape around your neck.
-
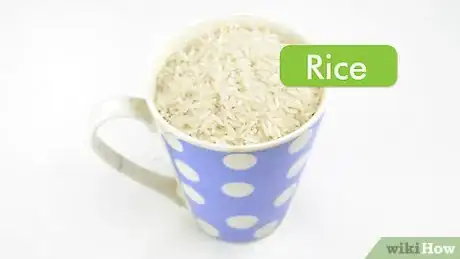
2Pour enough uncooked rice to fill your sock into a measuring cup. Plan on using about 2 to 3 cups (370 to 555 grams) of rice. You can pour the rice straight into the measuring cup; if the cup isn't big enough to hold all the rice, use another container that has a spout. This will make it easier to pour the rice.[6]
-
3Stir some essential oil into your rice, if desired. Add 10 to 15 drops of essential oil, then stir it in well so that it gets mix in evenly. You can use just one type of essential oil or a combination of different types.[7] Lavender and peppermint are a great combination because of how relaxing they are.[8]
- If you don't have essential oil but still want a bit of aromatherapy, try dried lavender, mint, or rose petals instead.[9]
-
4Pour the rice into the knee sock until it is mostly full. You want the sock full enough so that you can still move it around. Leave about 2 to 3 inches (5.08 to 7.62 centimeters) of space at the top of the sock so that you can sew it shut. You may not end up using all of the rice.[10]
- If you have rice left over and you added essential oil to it, do not reuse it for cooking.
- If you don't have enough rice, pour some more in. If you used essential oil earlier, you may want to add in a couple more drops.
-
5Fold the top edge of the sock down twice. Most socks have a thin band at the top; use this as a guide. If your sock doesn't have such a band, fold it down twice by about 1/2 inch (1.27 centimeters).[11]
- You will be sewing in the next step. If you do not know how to sew, do not fold the sock down.
-
6Sew the folded edge down. You can do this on a sewing machine, or you can do it by hand with a needle and thread. Whichever method you choose, keep your stitches small and tight so that the neck pillow doesn't come apart.[12]
- If you are using a sewing machine, backstitch at the start and end of your sewing to ensure that the stitches don't come apart.
- If you do not know how to sew, wrap a piece of yarn around the top of the sock a few times, then tie it into a secure knot. You can also use ribbon, string, rubber bands, or even a hair ties.
-
7Use the pillow. Place the pillow into the fridge or freezer to keep it nice and cool. When you need to use it, drape it around your neck. Most socks have a natural arch to them, so you can drape this part around the back of your neck.
- You can also heat the pillow up in the microwave at 1-minute intervals until it reaches the temperature you want. Shake the pillow between each interval.
Sewing a Simple Pillow
-
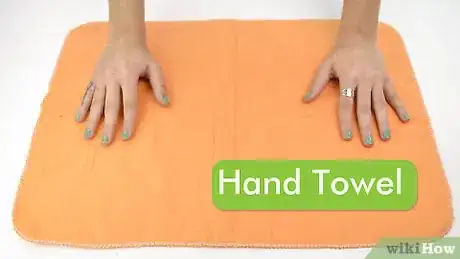
1Find a terrycloth hand towel. Trim off any tags or labels. If you can't find a hand towel, you can use a larger towel or even a pillow case or t-shirt--jut be sure to cut them apart first. It needs to be at least 20 by 12 inches (50.8 by 30.48 centimeters).
-
2Fold the towel in half lengthwise. Most towels are the same on both sides, but if you have a fancier towel, it may have a right and wrong side. In this case, make sure that the right side is on the inside and the wrong side is on the outside.
-
3Sew along the long edge and one of the short edges. Use a matching thread color and a ⅝-inch (1.6-centimeter) seam allowance. It would be easier to do this on a sewing machine, but you can do it by hand too, as long as you keep your stitches small and tight.[13]
- If you are using a larger towel or material, the dimension within the stitching need to be 18 by 5 inches (45.72 by 12.7 centimeters).[14]
- If you are using a sewing machine, backstitch at the start and end of your sewing.
-
4Turn the pillow inside out. If you made your pillow using a larger piece of material, trim the seam allowances down to about ⅝ inch (1.6 centimeters) first.
-
5Add some dried lavender to your rice, if desired. Measure out enough rice to fill your pillow two-thirds of the way. This will be about one bag's worth. Add ¼ cup (10 grams) of dried lavender, then stir it in.[15]
- You can also use another dried, fragrant herb, such as mint or rose.
-
6Fill the pillow two-thirds of the way with rice. This will ensure that the pillow is full enough to drape comfortable around your neck, but not so full that it feels stiff.[16]
-
7Fold the top edge of the pillow in. Tuck the remaining edge of the pillow in by about ⅝ inch (1.6 centimeters). If you need to, secure it with sewing pins.
-
8Sew the top edge of the pillow shut. You can do this either on a sewing machine or with a needle and thread. Keep the stitches small and tight. If you are using a sewing machine, remember to backstitch at the start and end of your sewing.[17]
-
9Use the neck pillow. Heat the pillow in the microwave at 1-minute intervals until it reaches the temperature you want. After every minute, pause the microwave and shake the pillow; this will help distribute the heat more evenly. Once the pillow is hot enough for you, drape it around your neck.[18]
Community Q&A
-
QuestionAre buckwheat hulls better than rice?
 Community AnswerOne is not necessarily better than the other; both will perform more or less the same. If you are using a loosely-woven fabric, however, buckwheat might be less-likely to slip through the weaving.
 -
QuestionHow much material will I need to make a neck pillow?
 Constance EverettCommunity AnswerWidth and length depends on your neck measurement and how thick you want the pillow to feel. I'd start with at least 24 inches, because it gets folded. I would draw out your potential pattern on some old scrap material (baste it), newspaper, or paper bag (staple it).You need to see if the size suits you before attacking the actual fabric.
Warnings
- Do not wash your pillow if you filled it with rice. Polyester-filled pillows can be washed.⧼thumbs_response⧽
- Do not use corn kernels. They will pop when you heat the pillow.[21]⧼thumbs_response⧽
- Be careful when placing a heated pillow against your skin. Avoid heating heated pillows to young children or babies.[22]⧼thumbs_response⧽
Things You'll Need
Making a Traveling Pillow
- Fabric
- Thread
- Needle
- Scissors
- Sewing pins
- Sewing machine
- Polyester stuffing or rice
Making a Sock Pillow
- Crew sock
- Rice
- Essential oil or dried lavender (optional)
- Thread
- Needle
- Scissors
Sewing a Simple Pillow
- Fabric
- Rice
- Dried lavender (optional)
- Thread
- Needle
- Scissors
- Sewing pins
- Sewing machine
References
- ↑ http://www.annestravels.net/diy-adult-travel-neck-pillow/
- ↑ https://www.youtube.com/watch?v=feGTn58jcBM
- ↑ http://www.annestravels.net/diy-adult-travel-neck-pillow/
- ↑ http://www.annestravels.net/diy-adult-travel-neck-pillow/
- ↑ http://www.annestravels.net/diy-adult-travel-neck-pillow/
- ↑ http://www.jollymom.com/aromatherapy-neck-pillow-tutorial-mydawnsummer/
- ↑ http://www.jollymom.com/aromatherapy-neck-pillow-tutorial-mydawnsummer/
- ↑ http://happyhourprojects.com/aromatherapy-pillow/
- ↑ https://www.theartofdoingstuff.com/diy-warming-neck-pillow-a-dollar-store-diy/
- ↑ http://happyhourprojects.com/aromatherapy-pillow/
- ↑ http://happyhourprojects.com/aromatherapy-pillow/
- ↑ http://happyhourprojects.com/aromatherapy-pillow/
- ↑ https://www.theartofdoingstuff.com/diy-warming-neck-pillow-a-dollar-store-diy/
- ↑ https://www.theartofdoingstuff.com/diy-warming-neck-pillow-a-dollar-store-diy/
- ↑ https://www.theartofdoingstuff.com/diy-warming-neck-pillow-a-dollar-store-diy/
- ↑ https://www.theartofdoingstuff.com/diy-warming-neck-pillow-a-dollar-store-diy/
- ↑ https://www.theartofdoingstuff.com/diy-warming-neck-pillow-a-dollar-store-diy/
- ↑ https://www.theartofdoingstuff.com/diy-warming-neck-pillow-a-dollar-store-diy/
- ↑ http://www.comfycountrycreations.com/mcneckpillows.htm
- ↑ http://www.comfycountrycreations.com/mcneckpillows.htm
- ↑ http://www.comfycountrycreations.com/mcneckpillows.htm
- ↑ http://www.comfycountrycreations.com/mcneckpillows.htm
About This Article
To make a neck pillow, start by drawing a horseshoe shape on a piece of paper that's about 14 inches tall and 20 inches wide. Make the arms 8 inches thick and the top 7 inches thick. Then, cut out the pattern, pin it to 2 stacked pieces of fabric, and cut out the fabric. Next, with the pieces of fabric still stacked and the right sides facing in, sew around the edges of the fabric with a sewing machine, leaving a small gap. When you're finished, turn the pillow right-side out and fill it with polyester stuffing. Finally, hand sew the gap in the pillow shut. To learn how to make a neck pillow using rice and a sock, scroll down!
