This article was co-authored by Lois Wade. Lois Wade has 45 years of experience in crafts including sewing, crochet, needlepoint, cross-stitch, drawing, and paper crafts. She has been contributing to craft articles on wikiHow since 2007.
This article has been viewed 107,872 times.
With a little patience and sewing practice, you can easily create your own bean bag chair! Once you settle on which fabrics and filling material to use, it’s simply a matter of cutting out the appropriate pieces for your bags and sewing them together. By adding a zipper, you can then fill your bean bag with foam or other stuffing and zip it shut quickly, and you’re good to go!
Steps
Selecting Materials
-
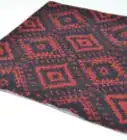
1Buy a cheap fabric for the interior. To make a bean bag chair, you will need to create two bags: an inner bag that will hold the “beans,” and an exterior cover to go over it. Since the inner bag will be out of sight, go with something simple and affordable, like white cotton quilting fabric. Save your money for the cover’s material.[1]
- You can alter the dimensions as you wish, but these instructions are for a bag 28 inches (71 cm) high with a 50 inches (130 cm) diameter.
- For this size, each length of fabric needs to be 6 yards (5.5 m) and 60 inches (150 cm) wide.
-
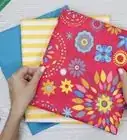
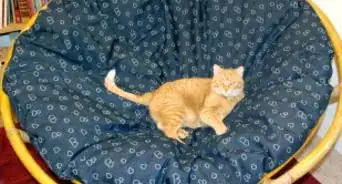
2Choose something comfy for the cover. Buy an equal length and width of fabric for the chair’s exterior. Since this will be on the outside, pick whatever fabric pleases you most. Consider both its visual appeal and how it feels to the touch. This could be anything from:[2]
- Corduroy
- Denim
- Flannel
- Fleece
- Velour
Advertisement -
3Pick your filler. For durability, go with expanding foam. However, be aware that expanding foam is vacuum-sealed when packaged, so expect it to expand very quickly as soon as you open the package. This means you have to work just as quickly once it’s time to fit it into your inner bag. If you think you will have some difficulty with this, consider an alternate material.[3]
- For this size chair, you will need a 30 pounds (14 kg) package of foam measuring 36” x 36” x 48” (0.91 x 0.91 x 1.22 m).
- As an alternate material, you could also use packing peanuts. Just be sure they are the type that won’t dissolve when exposed to water, just in case you spill anything over your bean bag chair.[4]


Cutting Fabric
-
1Lay out your fabric. You will be making identical cuts from each, so start with either fabric. The first thing you will be cutting out is a circle with a circumference of 170 inches (430 cm), so unroll a little more than 54 inches (140 cm), which is the diameter. Spread the fabric nice and flat on your worktable.[5]
- In case you need a refresher, the circumference of a circle is the total distance around its edge.
- The diameter is the distance of a straight line drawn from one side, through the center, to the opposite side.
- The radius is the distance of a straight from the center to one side.
-
2Find the center of your circle. Start by stretching a measuring tape out to 54 inches (1.37 m). Measure the fabric lengthwise down its middle and make a mark at least 27 inches (0.69 m) from its free end. Then measure the fabric’s width along this mark to double-check that you still have 27 inches of fabric on either side of it.[6]
- If you don’t, simply make a second mark that is even with the first and at least 27 inches from either side.
- Use a fabric pencil or chalk to make your marks and outlines, since these will wash away when you’re all done.
-
3Trace your circle’s outline. Ask a partner to help you with this. First, cut a length of string roughly 40 inches (1 m) long. Tie one end to your fabric pencil or chalk. Now use your measuring tape to measure 27 inches (0.69 m) along the string. Carefully tie the other end to a straight pin, capped pen, or similar object, so that the string is exactly 27 inches long when pulled tight. Then:
- Have your partner place the point of their pen, pin, or whatever in the center mark of your circle.
- Pull the string tight between the two of you so that your chalk or fabric pencil is exactly 27 inches away from their pen or pin.
- Have your partner keep their pen or pin perfectly still and straight as you circle the table, tracing a perfect circle over your fabric as you go.
- Be sure to keep the string pulled tight between the two of you until you complete your circuit.
- Also make sure that both of you keep your tools perfectly vertical, not at an angle, as you pull the string tight between them.
-
4Cut your circle out and repeat. Once you have drawn your first outline, use fabric scissors to cut the circle out. After that, unroll another 54 inches (1.37 m) or so from the same fabric. Create a second outline of equal size and cut that out. Then do the same with your other fabric.[7]
- Once you’re done, you should have two identical circles cut from each fabric, all of the same size, for a total of four circles.
-
5Cut two rectangles from each fabric. Unroll at least 87 inches (2.21 m) of either fabric. Use your measuring tape and chalk or fabric pencil to mark an outline that is 87 inches long by 32 inches (0.81 m) wide. Then use your fabric scissors to cut this shape out of your fabric. Once you have, repeat the process once more with the same fabric.[8]
- Once you have two equal rectangles from one fabric, do the same with the other, for a total of four rectangles of equal size, with two of each of fabric.


Sewing Cutouts
-
1Create two long rectangles. Take your four rectangles and pair them off by fabric. With each pair, lay one rectangle on top of the other, with the right sides facing each other. Line the edges up perfectly. Then use a sewing machine to sew them together along one of the shorter ends to create one long rectangle of the same fabric.[9]
- Once you’re done, each rectangle should measure 170 inches (4.32 m) long by 32 inches (0.81 m) wide.
- In sewing, the “right side” refers to the “pretty” side: the one that’s meant to be on display on the outside of whatever you’re sewing.
-
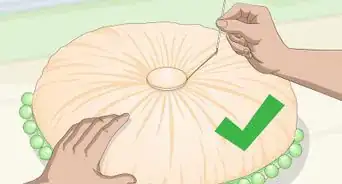
2Sew one circle to the rectangle. Again, pair your pieces together according to fabric. For each type, take a circle of the same fabric as your rectangle and pin its edges along one of the rectangle’s long sides, keeping their right sides together. Then sew the two together with a seam allowance between a quarter- and half-inch (0.64 and 1.27 cm). Once you have sewn the entire circle along the rectangle’s long side, finish by sewing the rectangle’s two short ends together.[10]
- The seam allowance refers to the distance between the edge of the fabric and the seam that you are sewing.
- The heavier the fabric, the larger your seam allowance should be.
- When sewing, remove each pin as you come to it.
-
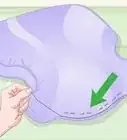
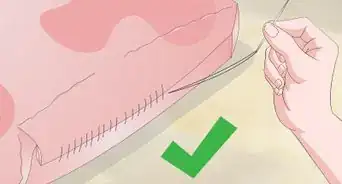
3Begin pinning your bottom circle. For each fabric, the first circle that you sewed all the way around your rectangle is now the top of that bag. Now move on to its bottom. With each bag, take the second circle of the same fabric and pin the edges along the rectangle’s long side, as you did with the top circle. This time, however, stop short of pinning all the way around. Leave enough room for your zipper.[11]
- The zipper isn’t strictly necessary for the inner bag.
- If you’d rather do without one, simply sew the bottom circle to the rectangle as you did with the top.
- Only this time, leave an open gap roughly 24 to 36 inches (0.61 to 0.91 m) long.
- Later, once you are done stuffing the filler inside the bag through that gap, sew it shut.
- That said, if you are using expanding foam, a zipper is strongly advised. This way you don’t have to sew the gap shut as the foam expands inside the bag.
-
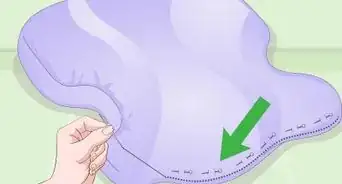
4Add your zipper and sew. For each bag, use one that is at least 48 inches (1.22 m) long.[12] Zip it all the way shut, then unzip it about a finger’s length at most. Pair the right side of one half with the right side of your bottom circle and then pin them together. Then pair the other half’s right side with the right side of your rectangle, and do the same.[13]
- Continue unzipping the zipper a little bit at a time, pinning its halves to the bottom circle and rectangle as you go, until you reach the end.
- Start sewing the zipper first, using your sewing machine’s zipper foot, with a seam allowance of a quarter inch (0.61 cm).
- Once the zipper is sewn to both the bottom circle and the rectangle, sew the circle and rectangle together as you did with the first circle.
-
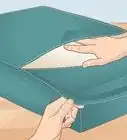
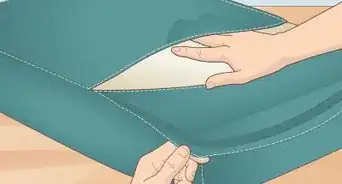
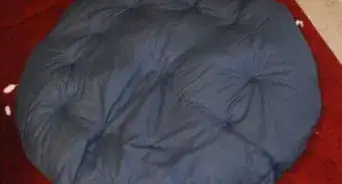
5Fill your bags. If you are using an alternate filler, like packing peanuts or plastic chips, simply pour it into the inner bag through the open zipper or gap. If you are using expanding foam, place the sealed package inside the inner bag. Then slit it open, remove the packaging, and zip the bag shut as the foam expands.[14]
- If you didn’t use a zipper for the inner bag, pin and sew the gap shut once your filler is inside.
- Once your inner bag is sealed, stuff it into your cover, zip your cover shut, and you’re done!


Community Q&A
-
QuestionWhy does there have to be a beanbag inside a beanbag?
 T. ChinsenTop AnswererIt is extremely difficult to prevent beans from falling out when attempting to sew a bean bag shut. Better-quality fabrics like canvas or vinyl are relatively stiff, and the beans would spill out while you are trying to sew it shut. In addition, if the outer layer becomes damaged (such as by seam separation), the inner bag stops everything falling out and making a mess.
 -
QuestionFor the inside liner, could I use an old blanket?PhoebeAmelia24Community AnswerYes, you totally could. As long as the blanket provides enough material, then it will work well.
-
QuestionHow many beans would I need to fill this bean bag?
 DiamondWarrior649Top AnswererEveryone has their own preferences on the firmness of their beanbag. Make sure you have quite a quantity of pellets. Continue to fill it up until it's comfortable for you.
Things You’ll Need
- Two lengths of fabric, each 6 yards long by 60 inches wide (5.49 m by 1.54 m)
- Measuring tape
- Chalk or fabric pencil
- String
- Pen, straight pin, or similar object
- Fabric scissors
- Sewing machine
- Sewing thread
- Sewing pins
- Two zippers, each at least 48 inches (1.22 m) long
References
- ↑ http://www.somuchtomake.com/2016/04/giant-bean-bag-chair-tutorial.html
- ↑ http://www.somuchtomake.com/2016/04/giant-bean-bag-chair-tutorial.html
- ↑ http://www.somuchtomake.com/2016/04/giant-bean-bag-chair-tutorial.html
- ↑ http://www.budget101.com/content.php/232-homemade-bean-bag-furniture
- ↑ http://www.somuchtomake.com/2016/04/giant-bean-bag-chair-tutorial.html
- ↑ http://www.somuchtomake.com/2016/04/giant-bean-bag-chair-tutorial.html
- ↑ http://www.somuchtomake.com/2016/04/giant-bean-bag-chair-tutorial.html
- ↑ http://www.somuchtomake.com/2016/04/giant-bean-bag-chair-tutorial.html
- ↑ http://www.somuchtomake.com/2016/04/giant-bean-bag-chair-tutorial.html
- ↑ http://www.somuchtomake.com/2016/04/giant-bean-bag-chair-tutorial.html
- ↑ http://www.somuchtomake.com/2016/04/giant-bean-bag-chair-tutorial.html
- ↑ http://www.somuchtomake.com/2016/04/giant-bean-bag-chair-tutorial.html
- ↑ http://www.somuchtomake.com/2016/02/t-shirt-pillow-tutorial.html
- ↑ http://www.somuchtomake.com/2016/04/giant-bean-bag-chair-tutorial.html
About This Article

To make a bean bag chair, start by choosing a comfy, durable fabric, like corduroy, for the outer bag. For the inner bag, pick a simple and affordable fabric, such as white cotton quilting fabric. Next, cut out 2 circles with a circumference of 170 inches and 2 rectangles that are 87 inches by 32 inches from each fabric. Then, sew each circle to the long sides of the rectangles to create a top and bottom side for your chair, add a zipper, and fill the inner bag with packing peanuts. For more tips, like how to cut out a perfect circle from your fabric, read on!