X
This article was co-authored by wikiHow staff writer, Jack Lloyd. Jack Lloyd is a Technology Writer and Editor for wikiHow. He has over two years of experience writing and editing technology-related articles. He is technology enthusiast and an English teacher.
The wikiHow Tech Team also followed the article's instructions and verified that they work.
This article has been viewed 486,315 times.
Learn more...
This wikiHow teaches you how to create a password-protected disk image (DMG) folder on a Mac.
Steps
Part 1
Part 1 of 2:
Creating a Folder
-
1
-
2Click Desktop. It's on the left side of the Finder window.Advertisement
-
3Click File. This option is in the upper-left corner of the screen. A drop-down menu will appear.
-
4Click New Folder. It's in the File drop-down menu. Doing so will add a new folder to your Mac's desktop with the name field selected.
-
5Enter a name for your folder. Type in the name that you want to use for your folder, then press ⏎ Return.
- The name that you use here doesn't really matter since you're going to rename the password-protected version of the folder.
-
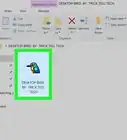
6Add files to the folder. Once you've created your folder, you can add the files which you want to password-protect to it by doing the following:
- Go to the files' location.
- Select files to move to the folder by holding down ⌘ Command and clicking each file.
- Press ⌘ Command+X to copy and cut the files.
- Open the folder that you created.
- Press ⌘ Command+V to paste in the files.


Advertisement
Part 2
Part 2 of 2:
Adding the Password
-
1
-
2Click File. It's in the upper-left side of the screen. A drop-down menu will appear.
-
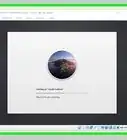
3Select New Image. This is near the top of the File drop-down menu. Selecting it will prompt a pop-out menu to appear.
-
4Click Image from Folder…. It's in the pop-out menu. Doing so will open a new window.
-
5Select the folder that you created. Go to the Desktop folder by clicking the drop-down box at the top of the window and clicking Desktop in the drop-down menu, then click your created folder.
-
6Click Open. It's in the bottom-right corner of the window.
-
7Enter a title for your folder. Type whatever you want to name your protected folder into the "Save As" text box.
- You cannot use the same title as the folder that you created or any other folder on your desktop.
- You can also select a save location by clicking the "Where" drop-down box and then selecting a folder in the drop-down menu.
-
8Click the "Encryption" drop-down box. It's near the bottom of the window. Clicking it prompts a drop-down menu.
-
9Click 128-bit AES encryption (recommended). You'll find this option in the drop-down box. Doing so opens the password window.[1]
-
10Create a password. Type your preferred password into both the "Password" text box and the "Verify" text box, then click Choose in the bottom-right corner of the password window.
-
11Click Save. It's a blue button at the bottom of the window. Doing so will save your settings and create your password-protected folder.
-
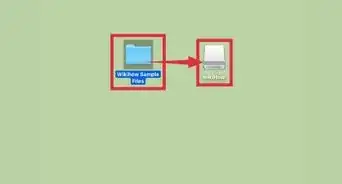
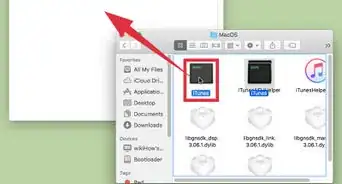
12Use the password-protected folder. To open the folder, double-click it, then enter the password that you set for it when prompted. The folder will open, and a drive-shaped icon will appear on your desktop.
- You may have to restart your Mac before the folder will ask for your password.
- You can close and re-protect the folder by moving the drive-shaped icon into the Trash and then restarting your Mac.


Advertisement
Community Q&A
-
QuestionHow I can open the utility disk and see the hidden information?
 Community AnswerAfter hitting "eject," the disk image you created goes away. To reopen it, find that .dmg file that was created, and it will request you to enter the password. Then the disk image will reappear.
 -
QuestionIf I later move this map to an external source, USB or other hard-drive, will the map and files still be coded?
 Community AnswerYes, they will. It works the same as a zip file. The only downside is that you can only open it on Macs. For Windows you will need additional software.
 -
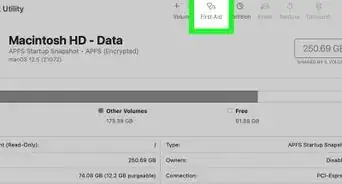
QuestionWhy was another "operating drive" icon created on my desktop that I can't get rid of?Community AnswerThe only reason for this would be that the computer recognized another drive, maybe a time machine backup drive? If not, this could be an SSD or a flash drive, or an SD card that may be in your computer. If this is the system drive duplicated, this would be a partition issue. To view the drives on a Mac, go to Spotlight (the search icon in the top right corner) then search for the app titled "Disk Utility." Here you can view all the drives you have active, and also preform first aid and corrections if a drive is improperly partitioned. If this is a time machine drive, navigate to the Time Machine app to manage these preferences.
Advertisement
Warnings
- DMG files aren't usable on non-Mac computers.⧼thumbs_response⧽
Advertisement


References
About This Article
Jack Lloyd
wikiHow Technology Writer
This article was co-authored by wikiHow staff writer, Jack Lloyd. Jack Lloyd is a Technology Writer and Editor for wikiHow. He has over two years of experience writing and editing technology-related articles. He is technology enthusiast and an English teacher. This article has been viewed 486,315 times.
How helpful is this?
Co-authors: 15
Updated: July 28, 2022
Views: 486,315
Categories: Mac
Advertisement