This article was co-authored by wikiHow staff writer, Travis Boylls. Travis Boylls is a Technology Writer and Editor for wikiHow. Travis has experience writing technology-related articles, providing software customer service, and in graphic design. He specializes in Windows, macOS, Android, iOS, and Linux platforms. He studied graphic design at Pikes Peak Community College.
This article has been viewed 203,681 times.
Learn more...
MacOS is a very different operating system than Windows. It has its own look and functions very differently. It even has its own unique set of apps and programs. Perhaps you are in the market for a new computer and want to try macOS to see if you like it before buying a new Mac. Maybe there is some Mac-only apps that you really want to try. It is possible to install macOS on a Windows (or Linux) computer either as a dual boot or by using a virtual machine. This wikiHow teaches you how to install macOS on a virtual machine using VirtualBox.
Steps
Downloading the Things You Will Need
-
1Download VirtualBox. VirtualBox is a virtual machine created by Oracle. Virtual machines are programs that emulate a computer system. You can install an operating system on a virtual machine and run it inside another computer. Use the following steps to download and install VirtualBox:
- Go to https://www.virtualbox.org/wiki/Downloads in a web browser like Google Chrome.
- Click Windows hosts below "VirtualBox 6.1.18 platform packages." If you are using Linux, you will need to click Linux Distributions and download the installation file for your version of Linux.
- Click the VirtualBox installation executable (.exe) file in your web browser or Downloads folder.
- Click Next on the title screen to continue.
- Click the checkbox next to any custom installation items you want and click Next.
- Click Browse to select an install location and click Next. It is recommended you install the virtual machine at its default location. Don't change the install location unless you know what you are doing.
- Click Yes to acknowledge it may temporarily disconnect your internet.
- Click Install.
-
2Download the VirtualBox expansion pack. This expansion pack enables USB 3.0 for keyboard and mouse support. Use the following steps to download the VirtualBox expansion pack:
- Go to https://www.virtualbox.org/wiki/Downloads in a web browser.
- Scroll down and click All supported platforms below "VirtualBox 6.1.18 Oracle VM VirtualBox Extension Pack."
- Double-click the expansion pack file in your web browser or Downloads folder to install it.
- Click Install.
- Scroll down to the bottom of the text and click I agree.
Advertisement -
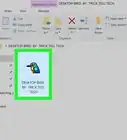
3Download a macOS disk image. You will need an image file for macOS. Download a zip file containing an image file for macOS Big Sur.
-
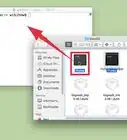
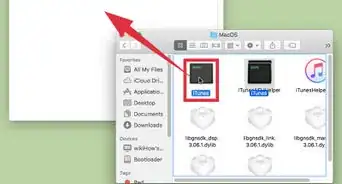
4Extract the macOS image file. After you download macOS, you will need to extract the image file. You can do so using an archive program like WinRAR. 7-Zip, or Windows File Manager. Open the zip file in your web browser or Downloads folder. Then click Extract all or whichever option extracts the entire contents of the zip file. Be sure to save the contents to a location that you can remember.


Creating a New Virtual Machine
-
1Create a new virtual machine in VirtualBox. VirtualBox has an icon that resembles a computer screen in the shape of a cube. Use the following steps to create a new virtual machine in VirtualBox:
- Open VirtualBox.
- Click New below the blue icon that resembles a circle with jagged edges.
- Type a name for the new computer next to "Name".
- Click the arrow pointing down next to "Machine Folder" and select a folder to install the virtual machine.
- Use the drop-down menu next to "Type" to select "MacOS X."
- Use the drop-down menu next to "Version" to select "MacOS X (64-bit)."
- Click Next.
-
2Allocate memory to the virtual machine and click Next. Click and drag the slider bar to allocate memory to the virtual machine. You can also type the amount of memory in megabytes (MB) in the box to the right of the slider bar. MacOS needs at least 4 GB (8 GB recommended) to run macOS Big Sur. The more memory you can allocate, the better it will run. You cannot allocate more memory than your computer has.
- Be sure to leave at least 2GB of RAM available for your Windows operating system to run. [1]
-
3Ensure the radio option next to "Create a virtual hard disk now" is checked. It's the second option below "Hard disk."
-
4Click Create. This creates a new virtual machine. The next step is to create a virtual hard disk.
-
5Select where you want to save the virtual hard disk drive. Click the folder icon to the left of the bar below "File Location" to select where you want to save the virtual hard drive to. If your primary hard drive has plenty of space (at least 100 GB), it's recommended you leave it at the default location. If you have a secondary hard drive for data storage, it's recommended that you save the virtual hard drive to the largest internal hard drive on your computer.
-
6Set the virtual hard drive size. Click and drag the slider bar below "File Size" to set the size of the virtual hard drive. You can also type the number of GB in the box to the left. Keep in mind that macOS requires at least 35 GB of free space to install. You will need additional space for apps and files. It's recommended you allocate at least 128 GB of hard disk space for your virtual drive.[2]
- If your computer hard drive doesn't have enough space to install macOS Big Sur, you can install macOS Catalina instead. MacOS Catalina requires about 18.5 GB of available storage to install and 4 GB of RAM.[3]
-
7Check the radio option next to "VHD (Virtual Hard Disk)." It's the second option below "Virtual Hard Disk" to the left.
-
8Click Create. It's in the lower-right corner. This creates a new virtual hard disk.


Setting the Virtual Machine Settings
-
1Select the macOS virtual machine. Simply click the macOS virtual machine you just created in the list of virtual machines to select it.
-
2Click Settings. It's the yellow icon that resembles a gear. This allows you to tweak the virtual machine settings.
-
3Click System and uncheck "Floppy." "System" is in the menu panel to the left. Click this option and then click the checkbox next to "Floppy" in the "Boot order" box. This ensures that the virtual machine will not try to boot from a floppy disk.
-
4Ensure "ICH9" is selected next to "Chipset." This drop-down menu is below the "Boot order" box. If it does not read "ICH9" by default, click the drop-down menu and select "ICH9" as the chipset.
-
5Click the Processor tab and ensure "Enable PAE/NX" is checked. The Processor tab is at the top. Click this tab and then ensure the checkbox next to "Enable PAE/NX" is checked. You need to select this option if you are going to be installing a 32-bit system, or if you need more than 4 GB of memory to run the operating system installed in VirtualBox.
- You do not need to enable "Nested VT-x/AMD-V" unless you plan on running another virtual machine from within the macOS virtual machine.[4]
-
6Set at least 2 CPU cores for the macOS. Click and drag the slider bar below "Processor(s)" to set the number of processor cores you want to allocate towards the macOS virtual machine. The more cores you can allocate, the better it will run. It's recommended you allocate at least 2 cores.
- The red line above the slider bar indicates how many CPU cores are needed for your current operating system to run. To avoid performance issues, do not drag the slider bar past the green line.
-
7Click Display in the menu panel to the left. This opens the Display menu for the virtual machine.
-
8Allocate at least 128 MB of video memory. The "Video Memory" slider bar is at the top of the menu. Click and drag the slider to allocate video memory. You can also type the amount of video memory you want to allocate in the box to the right. Make sure you are allocating at least 128 MB of video memory.
-
9Click Storage and ensure "Use Host I/O Cache" is checked. The "Storage" menu option is in the menu bar to the left. Click the "Storage" menu option and ensure the checkbox next to "Use Host I/O Cache" is checked. If it is not, click the checkbox to check it. This allows the macOS to cache the image file itself. This results in better performance.[5]
-
10Load the macOS Big Sur iso file into the empty optical drive. Use the following steps to load the macOS Big Sur iso file you downloaded into the empty optical drive:
- Click Empty below "Storage devices."
- Click the CD icon next to "Optical Drive" in the top-left.
- Click Choose a disk file.
- Navigate to and select the macOS 11.0 Big Sur ".iso" file.
- Click Open.
-
11Switch the macOS virtual hard disk and optical drive places. If you don't switch the place of the "macOS.vhd" and "macOS Big Sur iso file," it might not install properly. Use the following steps to switch the places for the two drives.
- Click the "macOS.vhd" disk drive below "Storage devices."
- Use the drop-down menu next to "Hard Disk" on the left to switch the SATA Port from "0" to "2."
- Click the macOS Big Sur file below "Storage Devices."
- Use the drop-down menu next to "Optical Drive" to set the SATA Port from "1" to "0."
- Click the "macOS.vhd" disk drive below "Storage devices."
- Switch the "macOS.vhd" SATA Port from "2" to "1."
-
12Click USB and select "USB 3.0 (xHCI) Controller." The USB menu option is in the menu panel to the left. Click it and then click the radio option next to "USB 3.0 (xHCI) Controller."
-
13Click Network and then click the Adapter 2 tab. The Network menu is where you can select your network settings that allow the virtual machine to get online. Click the "Network" menu option in the menu panel to the left and then click the Adapter 2 tab at the top. Enabling a backup adapter gives the virtual machine a backup option incase it isn't able to connect to the first network adapter.
-
14Check "Enable Network Adapter" and select "Bridged Adapter." This gives the virtual machine a backup network adapter in case Adapter 1 can't connect to the internet. Click the checkbox next to "Enable Network Adapter" at the top. Then select "Bridged Adapter" in the drop-down menu next to "Attached to."
-
15Select a wireless adapter. Use the drop-down menu next to "Name" to select a wireless adapter, such as "Intel(R) Wireless AC 9560" or whichever type of wireless adapter you have installed on your computer.
-
16Click OK. It's in the lower-right corner. This saves your settings.


Patching the Virtual Machine
-
1Quit VirtualBox. It's important that you quit VirtualBox before executing the following code. If you do not, it might not install properly.
-
2Open the Command Prompt as an Administrator. Before you can run the virtual machine, you have to manually patch it using the Command Prompt. Use the following steps to open the Command Prompt as an administrator:
- Click the Windows Start menu.
- Type "CMD".
- Right-click the Command Prompt.
- Click Run as Administrator.
- Click Yes.
-
3Change to the location of the VirtualBox installation in Command Prompt. By default, the VirtualBox installation is in the "Oracle" folder in "Program Files". To change to the location of the VirtualBox installation in the command prompt, type cd "C:\Program Files\Oracle\VirtualBox\" and press Enter.
- If you installed VirtualBox in a different location on your computer, you will need to type "cd" followed by the exact location of the VirtualBox install location in parenthesis.
-
4Enter the following commands and press ↵ Enter. You'll need to enter the following commands in the Command Prompt and press "Enter" after each command to patch the virtual machine. Replace [macOS_VM_Name] with the actual name you gave your virtual machine (i.g. macOS, macOS_Big_Sur, MyMac, etc). The commands are as follows:
- VBoxManage.exe modifyvm "[macOS_VM_Name]" --cpuidset 00000001 000106e5 00100800 0098e3fd bfebfbff
- VBoxManage setextradata "[macOS_VM_Name]" "VBoxInternal/Devices/efi/0/Config/DmiSystemProduct" "iMac11,3"
- VBoxManage setextradata "[macOS_VM_Name]" "VBoxInternal/Devices/efi/0/Config/DmiSystemVersion" "1.0"
- VBoxManage setextradata "[macOS_VM_Name]" "VBoxInternal/Devices/efi/0/Config/DmiBoardProduct" "Iloveapple"
- VBoxManage setextradata "[macOS_VM_Name]" "VBoxInternal/Devices/smc/0/Config/DeviceKey" "ourhardworkbythesewordsguardedpleasedontsteal(c)AppleComputerInc"
- VBoxManage setextradata "[macOS_VM_Name]" "VBoxInternal/Devices/smc/0/Config/GetKeyFromRealSMC" 1


Installing macOS on the Virtual Machine
-
1Open VirtualBox. To open VirtualBox, simply click the VirtualBox icon on your Desktop or Windows Start menu.
-
2Select the virtual machine you want to run. Virtual machines are listed in the panel to the left. Click the virtual machine you want to run to select it. It will be highlighted in blue.
-
3Click Start. It's the button with the green arrow at the top. It may take several minutes for macOS to finish initializing. Especially the first time you launch macOS.
-
4Select your language and click the arrow icon. Click whichever language you speak in the list and then click the arrow icon pointing right in the lower-right corner.
-
5Select Disk Utility and click Continue. You will need to format the virtual drive in order to install macOS Big Sur. You can do that in Disk Utility.
-
6Select VBOX HARDDISK Media and click Erase. Click "VBOX HARDDISK Media" on the panel to the left and then click Erase at the top. It has an icon that resembles a hard drive with an "x" in front of it.
-
7Type a name for the hard disk and click Erase. Use the bar at the top of the pop-up to type a name for the hard drive (i.g. "macOS HD") and click Erase to format the drive.
-
8Quit Disk Utility. To quit Disk Utility, click Disk Utility at the top of the screen.Then click Quit Disk Utility in the drop-down menu.
-
9Select Install macOS and click Continue. It's the second option in the menu. Select this option and click Continue in the lower-right corner to begin the installation process. Click Continue again on the next page.
-
10Agree to the Terms and Conditions. To agree to the Terms and Conditions, click Agree at the bottom of the page. Then click Agree again in the pop-up.
-
11Select the newly formatted hard drive and click Continue. The hard drive you just formatted should be listed at the bottom of the screen. Click this hard drive and click Continue to begin installing macOS Big Sur.
-
12Go through the macOS setup process. The first time you launch macOS, you will need to go through a setup process. Once the setup process is complete, you can launch macOS Big Sur by opening VirtualBox, selecting the macOS virtual machine and clicking Start. Use the following steps to complete the macOS setup process:
- Select your Country and click Continue.
- Choose a keyboard layout and click Continue.
- Turn on the vision, motor, hearing, and cognitive accessibility features or click Not Now to skip them.
- Read the Data & Privacy policy and click Continue.
- Transfer your data from your previous Mac or from your Windows PC or click Not Now to continue.
- Follow the instructions to create a new Apple ID.
- Click Agree to accept the Terms and Conditions and click Continue.
- Enter your name, username, and password and click Continue.
- Click Customize Settings to customize Express Setup or click Continue to skip this step.
- Click Continue on the Analytics page.
- Set your screen time (and parent control) setting or click Set Up Later to skip this step.
- Select an appearance theme and click Continue.


Warnings
- Apple does not support installing macOS on a non-Apple computer. You will not be able to get customer support for any Apple products installed on a non-Apple computer.⧼thumbs_response⧽


-Step-27.webp)
References
- ↑ https://www.zdnet.com/article/how-much-ram-does-your-windows-10-pc-need-2019-edition/
- ↑ https://www.macworld.co.uk/news/dont-update-big-sur-128gb-mac-3798034/
- ↑ https://support.apple.com/kb/SP803?locale=en_US
- ↑ https://www.nakivo.com/blog/hyper-v-nested-virtualization-explained/
- ↑ https://docs.oracle.com/en/virtualization/virtualbox/6.0/user/iocaching.html
About This Article