This article was co-authored by Josef Storzi and by wikiHow staff writer, Megaera Lorenz, PhD. Josef Storzi is an Apple and Mobile Phone Repair Specialist and the Owner of Imobile LA, a mobile phone repair company based in Los Angeles, California. Josef specializes in repairing screens, charging ports, batteries, water damage, speakers, and microphones on all mobile phone brands including Apple, Samsung, LG, Nokia, and Sony. He also specializes in tablet, laptop, and computer repairs as well as the pros and cons of recent mobile software updates.
There are 8 references cited in this article, which can be found at the bottom of the page.
The wikiHow Tech Team also followed the article's instructions and verified that they work.
This article has been viewed 240,713 times.
If you want to change the display resolution on your MacBook or Mac desktop computer, you can easily do so in the Displays settings. In this article, we’ll explain how to change the resolution of your built-in display or an external display, as well as how to run apps in low-resolution mode and troubleshoot common problems.
Things You Should Know
- Change your screen resolution by opening System Preferences and selecting Displays.
- You can also change the screen resolution of an external monitor in the Display Settings menu.
- If you choose a resolution option that isn’t supported and your screen goes black, you can usually reset by pressing Esc.
Steps
Built-in Display
-
1Open the Apple Menu. Your Mac’s resolution should already be optimized for its built-in display, but you can change the resolution using the preset options in the Displays menu. Start by clicking the Apple Menu in the top left corner of your screen.[1]
- If you can’t see the Apple Menu because of your current resolution settings, press ⌘ + Space on your keyboard to launch Spotlight, then type in system preferences. Click the System Preferences icon when it comes up in the search results.
-
2Select System Preferences. Click System Preferences… near the top of the Apple Menu. This will open a new window.[2]Advertisement
-
3Click Displays. Select Displays from the System Preferences window. The icon looks like a blue computer monitor.[3]
-
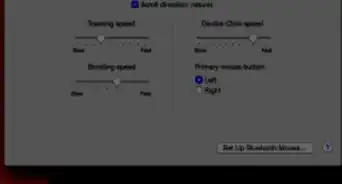
4Toggle on the Scaled radio button. By default, the resolution should be set to Default for Display. Next to the Resolution heading, click the radio button next to Scaled to view other resolution options.[4]
-
5Select your preferred scale option. Once you select Scaled, you’ll see a series of thumbnails showing different resolution options. Choose the one that fits your needs best.[5]
- For example, select Larger Text (1024 x 640) to display text, apps, icons, and other objects on your screen at a larger scale.
- If you’d rather have more space on your screen, choose an option like More Space (1680 x 1050) to make text, windows, icons, and other objects on your screen look smaller.
-
6Click OK to confirm your selection. Depending on the resolution you select, a dialog box may pop up asking you if you’re sure you want to change your display resolution. Click OK to confirm your choice or Cancel to exit the dialog box without making any changes.
- This dialog only pops up if you choose a scale that is likely to hide parts of your screen, such as the Larger Text scale option. Otherwise, the changes are automatically applied when you click on the resolution you want.


External Display
-
1Connect your external display. If you’re using an external display, such as a monitor or a TV, you can adjust the resolution using the System Preferences menu on your Mac. Start by connecting the display to your computer. Depending on what type of Mac you are using, you can do this by:[6]
- Plugging the display into your HDMI or Thunderbolt port.
- Plugging the display into your Mac using an adapter that supports DisplayPort Alt Mode, Thunderbolt 3, or Thunderbolt 4.
- Connecting to the display wirelessly using AirPlay.
-
2Click on the Apple Menu. Once your external display is connected, open the Apple Menu in the top left corner of your screen.[7]
-
3Open System Preferences. Select System Preferences… from the menu. A System Preferences window will pop up.[8]
-
4Select Displays. In the System Preferences menu, click the Displays button. It looks like a blue computer monitor.[9]
-
5Click Display Settings. Once you add a new display, you will see this additional option in the Displays menu. Click the Display Settings… button to change your resolution and make other adjustments.[10]
-
6Choose your display from the sidebar. In the Display Settings dialog box, click the display you want to adjust in the menu on the left side of the window.[11]
-
7Select the resolution you want from the Scaled pop-up menu. Depending on what kind of device you are using as an external monitor, you may see an option to adjust the resolution. The resolution should be automatically optimized for the device selected in the Optimize for dropdown menu.[12] To change the resolution:
- Click the radio button next to Scaled.
- Click on the scaled resolution you want from the thumbnails that appear below the Scaled option.
- Depending on the option you select, the resolution may change immediately, or a dialog box may pop up asking you to confirm your selection.
-
8Click Done to confirm your selection. When you’ve chosen the resolution you want, click Done to close the Display Settings dialog box.[13]


Low-Resolution Mode (Big Sur and Earlier)
-
1Quit the app you’d like to view in low-resolution mode. Some apps may not display properly at your Mac’s default resolution. In Mac OS 11 (Big Sur) and earlier Mac operating systems, it is possible to run apps in low resolution mode, which may improve how they look on your screen. If you’re already running the app, quit it so you can relaunch it in low-resolution mode.[14]
- As of September 2022, low-resolution mode is not available in Mac OS 12 (Monterey).
-
2Open the Applications folder. Once you’ve quit the app, launch a Finder window and click on Applications in the side menu.[15]
-
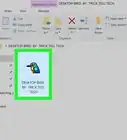
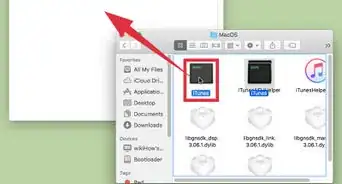
3Click the app once to select it. Locate the app you want to run in low-resolution mode in the Applications folder. Select the app by clicking it once, but don’t launch it.[16]
-
4Open the File menu. With the app still selected, click the File menu at the top of the screen.[17]
-
5Select Get Info. In the File menu, click on Get Info. This will launch a dialog box with information about the app.[18]
- You can also open the Get Info dialog box by pressing ⌘ Command+I with the app selected.
-
6Check the box next to Open in Low Resolution. In the Get Info window, look for an option to Open in Low Resolution. Click the box next to this option to turn it on.[19]
- Depending on which operating system you’re running, you might not see this option. Some apps are also automatically set to run in low-resolution mode.
-
7Close the Get Info window. Once you’ve made your selection, click the red Close button in the top left corner of the Get Info window to close the dialog.[20]
-
8Re-launch the app. After you close the Get Info window, double-click the app to open it again. It should now run in low-resolution mode.[21]


Troubleshooting
-
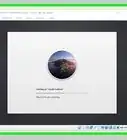
1Wait 15 seconds if your screen goes black after changing the resolution. If you selected a resolution that isn’t supported, you might see a black screen after changing the resolution. If this happens, wait 15 seconds to see if your screen resets automatically.[22]
-
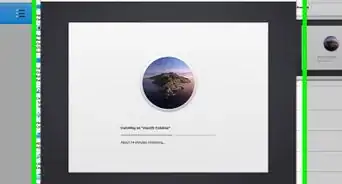
2Press Esc if the resolution doesn’t reset. If waiting doesn’t work, touch the Esc key. This should revert your screen’s resolution back to your previous selection.[23]
-
3Restart your Mac in Safe Mode if you still can’t reset your display. In some cases, you may need to reset the resolution in Safe Mode.[24] To do this:[25]
- Open the menu and select Shut Down.
- Wait 10 seconds after your computer finishes shutting down.
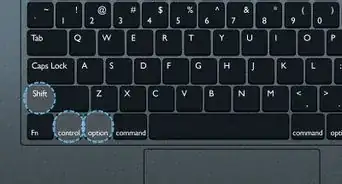
- If your Mac is Intel-based, restart your computer and quickly press and hold the ⇧ Shift key. Let go of the ⇧ Shift key as soon as you see the Login window.
- If you have a Mac with Apple silicon, press and hold the Power button until you see the Startup Options window. Then, press ⇧ Shift, select Continue in Safe Mode, and let go of ⇧ Shift.
-
4Open the Apple Menu once your Mac starts. After your Mac starts up in Safe Mode, click the Apple Menu in the top left corner of your screen.[26]
-
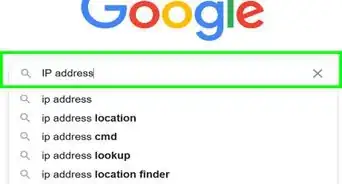
5Select System Preferences. Click System Preferences in the menu to launch the System Preferences window.[27]
-
6Click Displays. In System Preferences, click on the Displays icon. It looks like a blue computer monitor.[28]
-
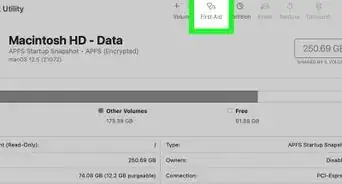
7Select Display Settings. In the Displays window, click Display Settings or Display, depending on your OS.[29]
-
8Choose Default for Display. Next to the Resolution header, click the radio button next to Default for Display. This should reset your computer back to its default screen resolution.[30]
-
9


Expert Q&A
Did you know you can get expert answers for this article?
Unlock expert answers by supporting wikiHow
-
QuestionHow do I reset my screen resolution on a Mac?
 Josef StorziJosef Storzi is an Apple and Mobile Phone Repair Specialist and the Owner of Imobile LA, a mobile phone repair company based in Los Angeles, California. Josef specializes in repairing screens, charging ports, batteries, water damage, speakers, and microphones on all mobile phone brands including Apple, Samsung, LG, Nokia, and Sony. He also specializes in tablet, laptop, and computer repairs as well as the pros and cons of recent mobile software updates.
Apple & Mobile Phone Repair SpecialistOpen your System Preferences. You can find this by either searching "preferences" in Spotlight search, or you can open "Finder," navigate to "Applications," then choose System Preferences." Once that's open, click on "Displays." There, you'll see an option for "Resolution." Change that from the default to "Scaled." Once you click on "Scaled," the resolutions available for your display will appear. You may select any resolution you desire.
Support wikiHow by unlocking this expert answer.
-
QuestionHow do I change it to my own resolution that these methods do not support?
 H. S.Community AnswerYou cannot change your screen's resolution to custom values. This is because these apps aforementioned do not support it; you have to look for a third-party app that supports this function.


References
- ↑ https://support.apple.com/guide/mac-help/change-your-displays-resolution-mchl86d72b76/12.0/mac/12.0
- ↑ https://support.apple.com/guide/mac-help/change-your-displays-resolution-mchl86d72b76/12.0/mac/12.0
- ↑ https://support.apple.com/guide/mac-help/change-your-displays-resolution-mchl86d72b76/12.0/mac/12.0
- ↑ https://support.apple.com/guide/mac-help/change-your-displays-resolution-mchl86d72b76/12.0/mac/12.0
- ↑ https://support.apple.com/guide/mac-help/change-your-displays-resolution-mchl86d72b76/12.0/mac/12.0
- ↑ https://support.apple.com/en-us/HT202351
- ↑ https://support.apple.com/guide/mac-help/change-your-displays-resolution-mchl86d72b76/12.0/mac/12.0
- ↑ https://support.apple.com/guide/mac-help/change-your-displays-resolution-mchl86d72b76/12.0/mac/12.0
- ↑ https://support.apple.com/guide/mac-help/change-your-displays-resolution-mchl86d72b76/12.0/mac/12.0
- ↑ https://support.apple.com/guide/mac-help/change-your-displays-resolution-mchl86d72b76/12.0/mac/12.0
- ↑ https://support.apple.com/guide/mac-help/change-your-displays-resolution-mchl86d72b76/12.0/mac/12.0
- ↑ https://support.apple.com/en-us/HT202471
- ↑ https://support.apple.com/en-us/HT202471
- ↑ https://support.apple.com/en-us/HT202471
- ↑ https://support.apple.com/en-us/HT202471
- ↑ https://support.apple.com/en-us/HT202471
- ↑ https://support.apple.com/en-us/HT202471
- ↑ https://support.apple.com/en-us/HT202471
- ↑ https://support.apple.com/en-us/HT202471
- ↑ https://support.apple.com/en-us/HT202471
- ↑ https://support.apple.com/en-us/HT202471
- ↑ https://support.apple.com/en-ca/guide/mac-help/mchlp2660/12.0/mac/12.0
- ↑ https://support.apple.com/en-ca/guide/mac-help/mchlp2660/12.0/mac/12.0
- ↑ https://support.apple.com/en-ca/guide/mac-help/mchlp2660/12.0/mac/12.0
- ↑ https://support.apple.com/guide/mac-help/start-up-your-mac-in-safe-mode-mh21245/11.0/mac/11.0
- ↑ https://support.apple.com/en-ca/guide/mac-help/mchlp2660/12.0/mac/12.0
- ↑ https://support.apple.com/en-ca/guide/mac-help/mchlp2660/12.0/mac/12.0
- ↑ https://support.apple.com/en-ca/guide/mac-help/mchlp2660/12.0/mac/12.0
- ↑ https://support.apple.com/en-ca/guide/mac-help/mchlp2660/12.0/mac/12.0
- ↑ https://support.apple.com/en-ca/guide/mac-help/mchlp2660/12.0/mac/12.0
- ↑ https://support.apple.com/en-ca/guide/mac-help/mchlp2660/12.0/mac/12.0
About This Article