This article was co-authored by wikiHow staff writer, Jack Lloyd. Jack Lloyd is a Technology Writer and Editor for wikiHow. He has over two years of experience writing and editing technology-related articles. He is technology enthusiast and an English teacher.
The wikiHow Tech Team also followed the article's instructions and verified that they work.
This article has been viewed 1,805,701 times.
Learn more...
This wikiHow teaches you how to run macOS High Sierra on your Windows computer. To do this, you will need to download Niresh Catalina. You will also need Transmac or a Mac along with a supported Windows computer and a blank hard drive.
Steps
Preparing to Install
-
1Check your computer's specifications. Your Windows computer must have an Intel Core i3, i5, i7 or i9 processor in order to run macOS Catalina, as well as a minimum of four gigabytes of RAM. To check these specs:
- Open Start .
- Type in system information.
- Click System Information at the top of the menu.
- Look at the name of the processor to the right of the "Processor" heading.
- Scroll down and look at the number to the right of the "Installed Physical Memory" heading.
-
2Check your computer's BIOS type. Next to the "BIOS Mode" heading in the System Information menu, check to see whether it says "UEFI" or "BIOS". Keep this information in mind for later.
- You can exit System Information after this point.
Advertisement -
3Determine your computer's bit type. There are two types of computer: 32-bit, and 64-bit. Your computer must be able to support 64-bit operation in order to install macOS.
-
4Make sure you have access to a recent model of Mac. The Mac in question must be able to download macOS Catalina.
- If your Mac can't run macOS Catalina, try finding another one.
-
5Gather the required equipment. In order to install macOS High Sierra on your Windows computer, you will need the following hardware:[1]
- USB drive - Find a flash drive that can hold at least 16 gigabytes.
- Blank hard drive - Find a USB external hard drive that holds at least 100 gigabytes (this is where you'll install your macOS stuff, so the bigger, the better).
- USB-C adapter - If you're working with a Mac that doesn't have traditional USB ports, you'll need a USB-C-to-USB-3.0 adapter.


Downloading Niresh Catalina
-
1Go to the Hackintosh Zone download site. Go to https://www.hackintoshzone.com/. Make sure you sign in with you account by clicking.
-
2Click Log in or Register. It's in the upper-right side of the page. A menu will appear at the top of the page.
-
3Enter your email address. Do so in the "Email address" field. Make sure this is an email address that you can easily access—you'll need to log in and verify the email address later.
-
4Check the "No, create an account now" box. It's near the bottom of the menu.
-
5Click Sign up. Doing so takes you to the Create an Account page.
-
6Enter the required information. Fill out the following fields:
- Name — Enter the name you want to use for your account.
- Password — Enter a password you'd like to use for the login.
- Confirm Password — Repeat the password you entered above.
- Date of Birth — Select the month, day, and year of your birth.
- Location — Type in your country's name.
-
7Check the "I agree to the terms and rules" box. It's near the bottom of the page.
-
8Click Sign up. This button is at the bottom of the page. Doing so creates your account and sends a confirmation email to your provided email address.
-
9Go to your email inbox. Go to the email address that you selected for your account. You may have to log in with your email address and the email account's password to open the inbox.
-
10Open the confirmation email. Click the email from "tonymacx86.com" to open it.
-
11Click the confirmation link. Click the link below the "Confirm Account" text in the middle of the email. This will take you back to the Unibeast download site.
-
12Double-click the Downloads tab. It's on the right side of the row of tabs that's near the top of the page. The Downloads page should open.
- If you just see a drop-down menu appear, click the Downloads tab once more.
-
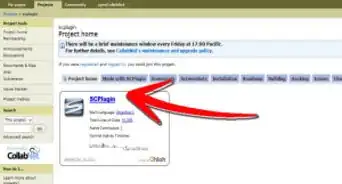
13Click Hackintosh then download Hackintosh Catalina.
- For example, the current release of
-
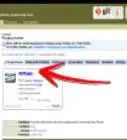
14Click Download Now. It's in the top-right corner of the page. Doing so will download Unibeast onto your Mac.
-
15Download Multibeast. This program, which is hosted on the same site as Unibeast, will allow you to install drivers so that you can use things like your PC's speakers, the Internet, and so on:
- Double-click the Downloads tab again.
- Click Multibeast - High Sierra 10.2.0
- Click Download Now in the upper-right corner of the page.


Downloading the macOS High Sierra Installer
-
1
-
2Click the search bar. It's in the upper-right side of the App Store window.
-
3Search for High Sierra. Type high sierra into the search bar, then press ⏎ Return.
-
4Click Download. It's to the right of the High Sierra icon. Doing so will prompt the installer to begin downloading onto your Mac.
-
5Wait for the installer window to open. Once it does, you'll need to close it immediately.[2]
-
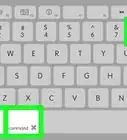
6Press ⌘ Command+Q when the window opens. This will close the installer window.
-
7
-
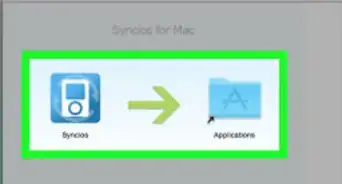
8Click the Applications folder. It's on the left side of the Finder window.
-
9Make sure that the installer is there. The installer will be called "Install macOS High Sierra" or something similar and will have an image of a ridge of mountains on it. As long as the installer is present in the Applications folder, you can proceed.
- If the installer isn't there, try downloading High Sierra again.


Formatting Your USB Drive
-
1Plug your USB drive into your Mac. This is the 16-gigabyte minimum flash drive that you'll use to install macOS High Sierra on your computer.
- If your Mac doesn't have traditional USB ports on it, attach your USB-C to USB-3.0 adapter first.
-
2
-
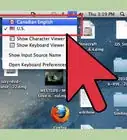
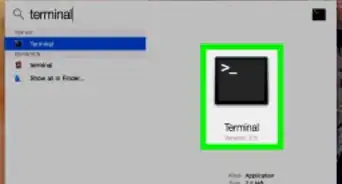
3Type disk utility into Spotlight. This will search your Mac for the Disk Utility app.
-
4Click Disk Utility. It's below the Spotlight search bar. Doing so will open Disk Utility.
-
5Select your USB drive. Click the USB drive's name in the upper-left side of the window.
-
6Click the Erase tab. It's near the top of the window. A pop-up box will appear.
-
7Click the "Format" drop-down box. You'll find this in the middle of the pop-up box. Clicking it prompts a drop-down menu.
-
8Click OS X Extended (Journaled). This will set your USB drive's file system to that of your Mac.
-
9Click the "Scheme" drop-down box. It's below the "Format" drop-down box.
-
10Click GUID Partition Map. This option is in the "Format" drop-down menu.
-
11Click Erase. Doing so will reformat your USB drive to your Mac's file system.
-
12Click Done when prompted. You can now proceed with creating your installation drive.


Creating the Unibeast Installation Tool
-
1Open the Unibeast folder. Double-click the Unibeast folder to unzip and open it.
-
2Open Unibeast. Double-click the Unibeast PKG file to open it.
-
3Click Open when prompted. Doing so will open the Unibeast setup window.
- If your Mac is currently running macOS Sierra or higher, you'll have to verify the Unibeast installation before continuing.
-
4Click Continue four times. It's in the bottom-right corner of the first four pages of the Unibeast setup window.
-
5Click Agree when prompted. It's at the top of the window.
-
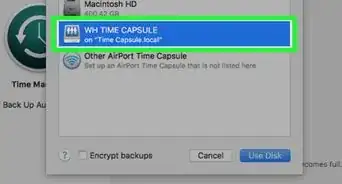
6Select your USB drive, then click Continue. Click the USB drive's name to select it.
-
7Select High Sierra, then click Continue. You should see High Sierra in the middle of the page.
-
8Select a motherboard type. Depending on whether your Windows computer has a UEFI- or a BIOS-type motherboard, your choice will vary:
- UEFI — Click UEFI Boot Mode, then click Continue.
- BIOS — Click Legacy Boot Mode, then click Continue.
-
9Select a graphics card option if necessary, then click Continue. Check the box next to Inject [card name] for your preferred graphics card settings.
- If your graphics card supports macOS High Sierra by default, skip this step.
-
10Click Continue. It's in the bottom-right corner of the page. Doing so will prompt you to enter your Mac's password.
-
11Enter your Mac's password. Type in the password you use to log into your Mac.
-
12Click OK. This will prompt Unibeast to begin installing to the USB drive. Once the installation process is complete, your USB drive will be ready to install macOS High Sierra on your PC. While the Unibeast installation finishes up, you should change your Windows computer's boot order.


Changing Windows Boot Order
-
1Unplug any USB items from your Windows computer. Make sure that you don't have any USB drives, in particular.
-
2Enter your computer's BIOS or UEFI settings page. This process varies from computer to computer, but you will typically restart your computer and then repeatedly press a key (e.g., Del) immediately as the computer begins to start up.
-
3Locate the "Boot Order" section. This section is normally on the main page of the BIOS, though you may need to use the arrow keys to navigate over to the "Boot" or "Advanced" tab.
- The "Boot Order" section varies from BIOS to BIOS. If you can't find your BIOS' "Boot Order" page, consult your motherboard's manual or look up your computer model online to find direct instruction for your specific BIOS page.
-
4Select Removable Devices. Use the arrow keys to move the blinking bar down to Removable Devices.
- On some pages, this section may instead be called USB Devices or something similar (e.g., Peripherals).
-
5Move your selected location to the top of the list. Typically, you'll press the + key with the boot location you want to use selected until it's at the top of the "Boot Order" list.
- You can double-check the key that you're supposed to use in the legend that's usually on the right side or the bottom of the BIOS page.
-
6Save your settings and exit the BIOS. Look for the key you're supposed to press to save and exit in the legend on the right side of the page, then press it. Doing so will shift your Windows computer's boot priority so that installation USB drive will be selected as the boot point once you plug it in.
- You may have to press another key to confirm this choice.


Installing macOS on Your PC
-
1Place Multibeast on the USB drive. Open the USB drive's folder, then drag the Multibeast file into the folder. You'll need to use Multibeast later, so having it on the flash drive will make using it when necessary as simple as possible.
-
2Eject the Unibeast USB drive from the Mac. Open the Finder, then click the ⏏ Eject icon to the right of the USB drive's name in the upper-left corner of the Finder window. After doing so, you can remove your USB drive.
- You should make sure that the Unibeast installation is complete before doing this.
-
3Shut down your Windows computer. Press and hold the Power button on your Windows computer until your computer shuts down completely. This will usually occur one or two seconds after the computer's display turns off.
-
4Plug both the Unibeast USB drive and the blank hard drive into your computer. These should both fit into USB ports on your computer.
-
5Start your Windows computer. Press the Power button to start the computer. Once the computer has a chance to begin booting, it should select your plugged-in USB drive as a place from which to boot.
-
6Select your USB drive when prompted, then press ↵ Enter. This will begin the macOS installation process.
-
7Select a language, then click →. Doing so takes you to the next page of the installer.
-
8Click Continue twice. It's in the bottom-right corner of the pages.
-
9Click Agree when prompted. You'll see this at the top of the screen.
-
10Click the Utilities menu item. This menu item is in the top-left side of the screen. A drop-down menu will appear.[3]
-
11Click Disk Utility. It's in the drop-down menu.
-
12Select the blank hard drive. Click the blank hard drive's name on the left side of the page.
-
13Click the Erase tab. It's near the top of the page.
-
14Format the blank hard drive. Change the following fields:
- Format — Click the drop-down box, then click Mac OS X Extended (Journaled)
- Scheme — Click the drop-down box, then click GUID Partition Map
-
15Click Erase. Doing so will reformat your blank hard drive for macOS' file system.
-
16Click Done when prompted, then close the Disk Utility window. You can now proceed with installing macOS High Sierra on the hard drive.
-
17Click the blank hard drive's name, then click Continue. This will both select the hard drive as the installation point and begin installing macOS High Sierra.
-
18Wait for macOS High Sierra to finish installing. This process should take around 15 minutes.
-
19Follow the on-screen prompts. You'll be prompted to enter specific information, such as your name, a password, your preferred language, your location, and so on. Once you complete this setup process, macOS' software will be completely set up on your Windows computer.


Enabling Drivers with Multibeast
-
1
-
2Double-click the Multibeast file. Doing so will open the Multibeast window.
-
3Click the Bootloaders tab. It's at the top of the window.
-
4Select the proper bootloader. Check the "Clover UEFI Boot Mode" box if you selected the UEFI boot mode for your motherboard during the Unibeast tool creation, or check the "Clover Legacy Boot Mode" box if you used legacy boot mode.
-
5Click the Drivers tab. You'll find this option at the top of the window.
-
6Click Audio. It's on the left side of the window.
-
7Select audio drivers. Click the current audio item's heading in the middle of the window to expand it, then check the box next to your computer's audio provider's name.
-
8Click Misc. This option is on the left side of the window.
-
9Check the "FakeSMC" box. You'll find it near the top of the window.
-
10Click Network. It's on the left side of the window.
-
11Select an Internet driver. Click the name of your Internet card, then check the box next to the driver's name.
-
12Click the Customize tab. It's at the top of the window.
-
13Select the proper graphics options. Check the box next to your computer's graphics card name, then check the "Fixup" box for your graphics card's manufacturer.
- For example, to install drivers for a NVIDIA card, you would check both the "NVIDIA Web Drivers Boot Flag" box and the "NVIDIA Graphics Fixup" box.
- Leave the "Inject" options blank.
-
14Click System Definitions. It's on the left side of the window.
-
15Select a Mac which most closely resembles your computer. Click the heading of the type of Mac (e.g., iMac) which resembles your computer, then check the box next to the type of Mac which uses your computer's graphics card settings.
-
16Click the Build tab. It's at the top of the window.
-
17Select a drive. Click the "Select Install Drive" box on the right side of the window, then click your macOS drive's name in the resulting drop-down menu.
-
18Install the drivers. Once you complete this process, you should be able to use your macOS PC with minimal trouble:
- Click Install in the bottom-right corner.
- Click Agree when prompted.
- Enter your Mac's password when prompted.
- Click Install Helper


Community Q&A
-
QuestionWill this work on AMD systems?
 Community AnswerNo, it won't, unfortunately.
 -
QuestionWhy do high system requirement applications like Android Studio, After Effects, Photoshop, etc., run so smoothly on a Mac but are quite slow in Windows?Community AnswerThis is very much dependent on the hardware you are using. It may be that the Windows PC you are using has lower specs or has other software which is slowing it down.
-
QuestionCan I use other virtual programs like VirtualBox or VMWare to use Mac OS?
 Community AnswerYou can; VMware will be the best for using it because it provides for functions and runs smoothly on Windows. You should allocate 4 GB RAM for Mac OS.
Warnings
- Only do this if your computer has sufficient amount of RAM installed.⧼thumbs_response⧽
- Installing macOS on a Windows computer violates the Apple End User License Agreement.⧼thumbs_response⧽


References
About This Article
Installing macOS on a Windows computer is tricky, but not impossible. You'll need to download the macOS High Sierra installation file on a Mac and then transfer the installer over to Windows by using a macOS-formatted USB drive running a program called Unibeast; after this point, you can use the USB drive to install macOS over onto a blank hard drive that you've also formatted for macOS. Once you've installed macOS, it's a good idea to run Multibeast from the flash drive in order to install drivers needed for things like sound, Internet, and graphics cards.