This article was co-authored by wikiHow staff writer, Nicole Levine, MFA. Nicole Levine is a Technology Writer and Editor for wikiHow. She has more than 20 years of experience creating technical documentation and leading support teams at major web hosting and software companies. Nicole also holds an MFA in Creative Writing from Portland State University and teaches composition, fiction-writing, and zine-making at various institutions.
There are 7 references cited in this article, which can be found at the bottom of the page.
The wikiHow Tech Team also followed the article's instructions and verified that they work.
This article has been viewed 28,363 times.
Learn more...
This wikiHow teaches you how to install apps on a computer, phone, or tablet.
Steps
iPhone and iPad
-
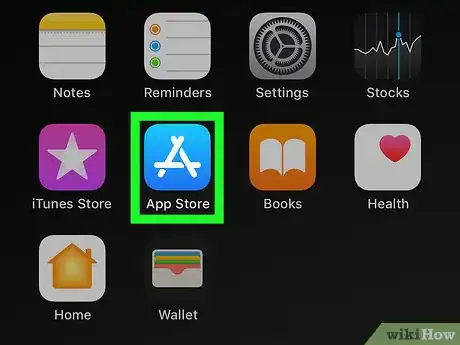
1
-
2Tap Apps. It's the icon at the bottom-center part of the screen.Advertisement
-
3Browse or search for an app.
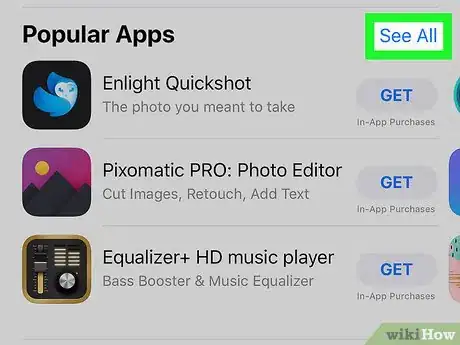
- Scroll down to check out recommended apps under headers like "New Apps We Love" and "Popular." Tap See All next to a one of these options to view the entire list.
- To view apps by category or function, scroll down to "Top Categories," then tap See All.
- To search for an app, tap Search at the bottom-right corner of the store, type an app's name (or a some words that describe what you're looking for), then tap the Search key to view the results.
-
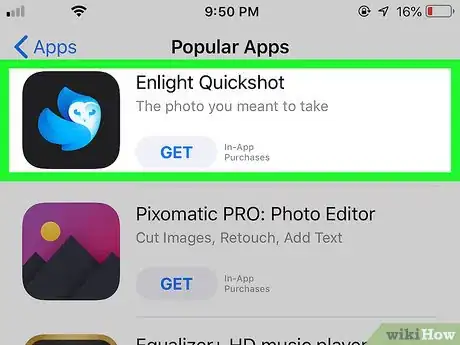
4Tap an app to learn more about it. Each app has its own info page that contains screenshots, ratings, reviews, technical details, and pricing information.
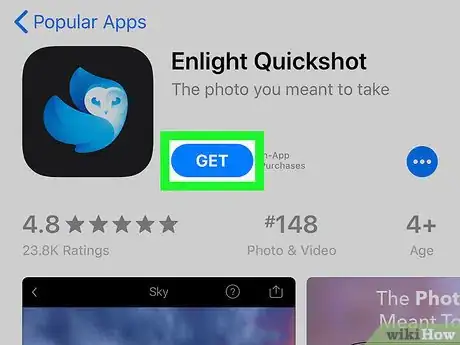
- If an app costs money, the price will appear on the blue button near the top-right corner of the app's page. If it's free, the button displays the word "GET." If you've downloaded the app in the past, the button will display a cloud with a downward-pointing arrow.
-
5Tap GET or the price to install the app. It's the blue button near the top-right corner of the app's page.
-
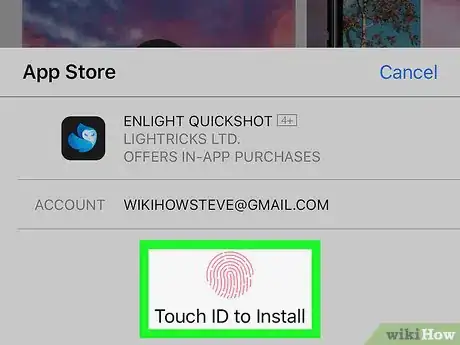
6Confirm your identity to download the app. Before an app downloads, you'll need to verify your identity:[1]
- If you've already signed in with your Apple ID, follow the on-screen instructions to verify using Touch ID, Face ID, or a password. This installs the app and adds a new icon to your home screen.
- If you haven't signed in, follow the on-screen instructions to log in with your Apple ID username and password and start the install. This installs the app and adds a new icon to your home screen.
-
7Open the app. When the app is finished installing, the "GET" or price button will change to one that says "OPEN." Tap OPEN to launch the app from the App Store, or tap the app's icon on the home screen.
- App icons are automatically added to the home screen upon installing. The most recently-installed app will appear at the very end of the icon list.
Android
-
1
-
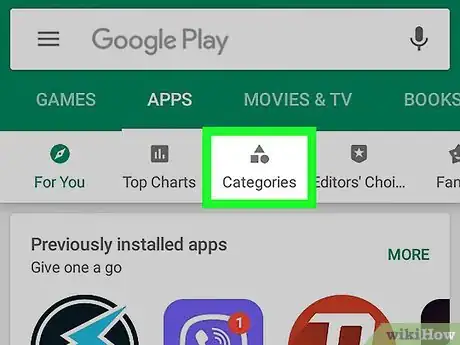
2Browse or search for an app.[2]
- To browse by category, tap Categories at the top of the store to view the list, then tap a category to see what's available.
- To find a particular app, tap the Search box at the top of the screen, type the app's name (or a keyword that describes it), and then tap the magnifying glass to search.
-
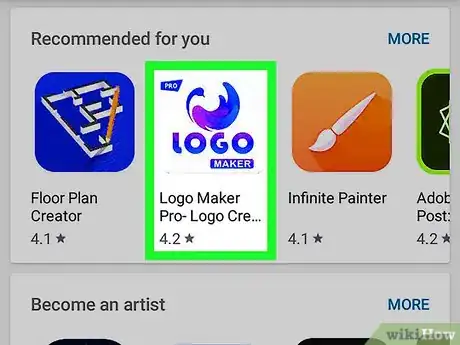
3Tap an app to learn more about it. Each app has its own page on the Play Store that displays a description, screenshots, the cost (if any), reviews, and technical specifications.
- If the app is free, the green button at the top-right corner of the page will say "INSTALL." If it costs money, the green button will display its price.
-
4Tap INSTALL or the price to install the app. This is all you'll need to do to install some apps, though other apps may ask you to confirm your identity or allow certain permissions to continue. Once the app is installed, the "INSTALL" or price button will change to "OPEN," and a new icon will be added to the app drawer.
- If an app costs money, you'll be prompted to select or enter a payment method.
-
5Open the app. Tap OPEN to launch the app from the Play Store, or tap the app's icon in the app drawer.
Windows (Microsoft Store)
-
1
-
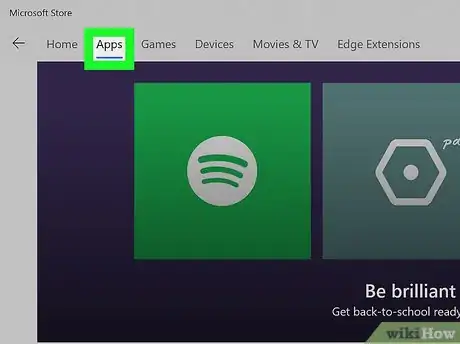
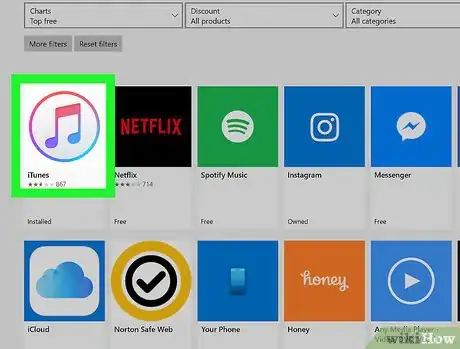
2Click Apps. It's at the top of the store. This is where you'll find various lists of apps you can install without having to download extra files from the internet.
-
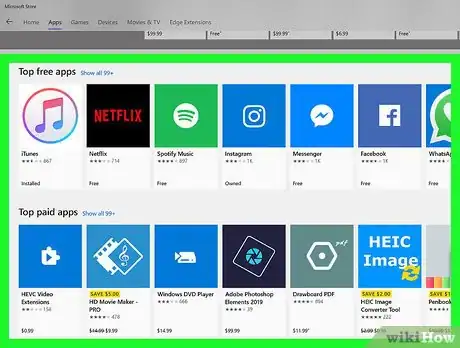
3Browse or search for an app.
- Scroll down to see curated collections of apps, such as Best Selling and Top Free Apps. Scroll down even more to find the Categories list, where you can browse by topic/function.
- If you're looking for something in particular, click Search at the top-right corner, type an app name or keyword, and then press ↵ Enter to see the results.
-
4Click an app to view its details. This is where you'll find a description, details, system requirements, and reviews of the app. If the app costs money, the price will appear near the top of the page (right above the blue "Buy" button).
-
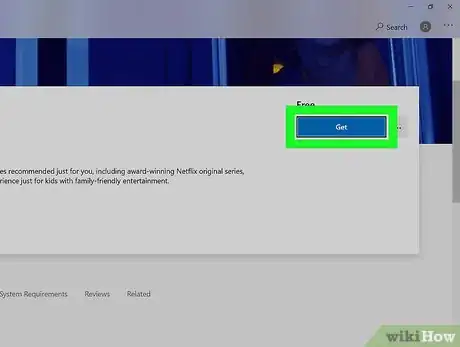
5Click Get or Buy to install an app. It's near the top of the page.
-
6Follow the on-screen instructions to complete the download. If you aren't logged in with your Microsoft account, follow the on-screen instructions to do so when prompted. Once the app is installed, you'll find it in the Start menu.
- If you are purchasing a paid app, follow the on-screen instructions to select or enter your payment information and start the download.
Windows (Downloading from the Internet)
-
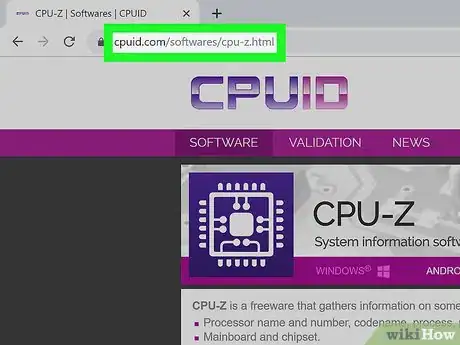
1Go to the website of the app you want to install. If you want to install an app that is not available on the Microsoft Store, you can typically do so by going to the app developer's website.
-
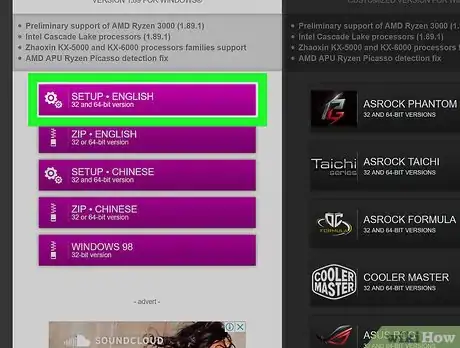
2Click the download link for the app. This downloads the app's installer to your Downloads folder.
- Depending on your settings, you may have to click Save or OK on a confirmation window to start the download.
-
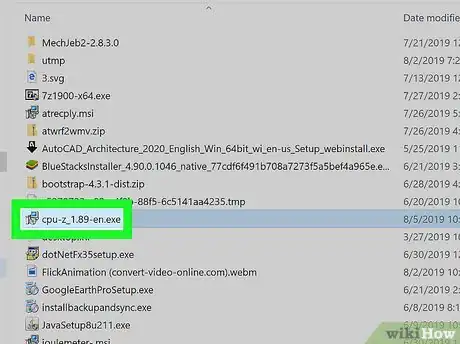
3Double-click the installer you downloaded. If you see the file's name at the bottom-left corner of your browser, click it to run the installer. If not, open the Downloads folder (press ⊞ Win+e and click Downloads), then double-click the file to install it.
- If the file you downloaded ends with ".zip," you'll have to unzip it first. Right-click the file, click Extract All, then click Extract. Once extracted, double-click the new folder (it should have a similar name as the .zip file) and then double-click the installer/setup file inside.
-
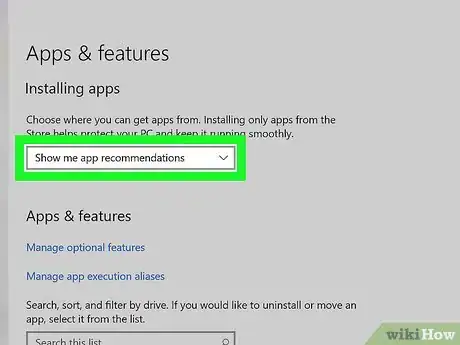
4Allow the app through your security settings if you get an error. If you see a warning or security message that prompts you to confirm the action, follow the on-screen instructions to do so. But if you see an error that says you can only install apps from the Microsoft Store, follow these steps:
- Click the menu and select Settings .
- Click Apps.
- Click Apps & features in the left panel.
- Click the drop-down menu under "Installing apps" (the one that's currently set to "Allow apps from the Store only") at the top of the right panel, then select Show me app recommendations instead.
- If you don't see this option, click All apps from anywhere instead.[3]
- Run the installer again.
-
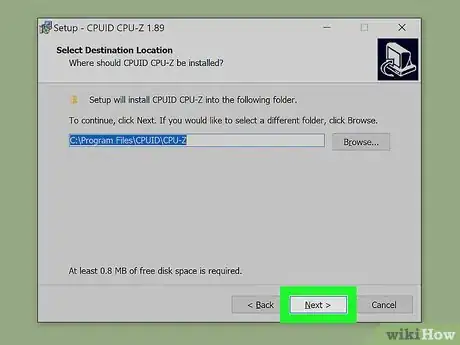
5Follow the on-screen instructions to complete the installation. You'll usually have the opportunity to choose an install location, install optional components, and/or opt to place an icon on the desktop. Once the app is finished installing, a new icon will typically be added to the Start menu.
macOS (App Store)
-
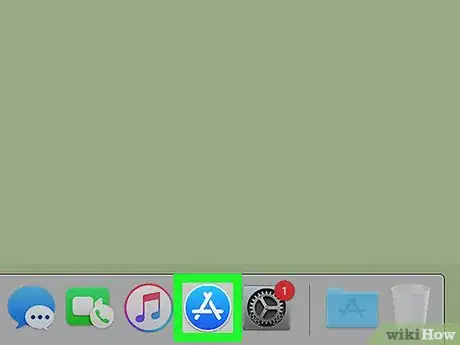
1
-
2Sign in with your Apple ID. If you don't see your Apple ID at the bottom-left corner of the store, follow these steps to sign in now:[4]
- Click Sign In at the bottom-left corner. If you're using an earlier version of the App Store, click the Store menu at the top of the screen to find the Sign In link.
- Type your Apple ID login and password.
- Click Sign In.
-
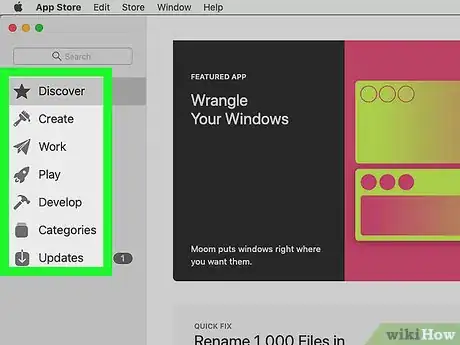
3Browse or search for an app. Click a category in the left panel to browse by app type. If you want to search for a specific app (or type of app), type your search term(s) into the Search bar at the top-left corner of the window, and then press ⏎ Return.
- If you're using an earlier version of the App Store, click Categories at the top-center part of the window instead.
-
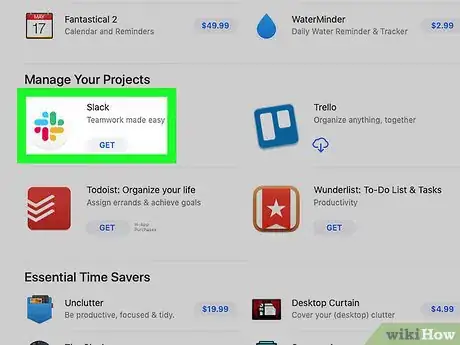
4Click an app to view its details. This is where you can check out screenshots, reviews, ratings, and other details about the app.
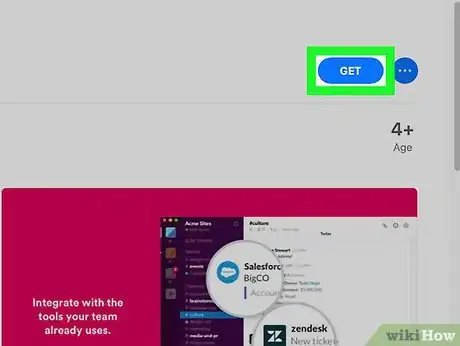
- If the app is free, you'll see a button that says "GET" at the top of the page. If the app costs money, the button will display the app's price.
- If you've downloaded an app in the past, the button will display a cloud icon with a downward-pointing arrow.
-
5Click GET or the price to download an app. The button will turn green and display one of the following options:[5]
- If you clicked GET, the button should now display the word "INSTALL."
- If you clicked a price, the button should now display the words "BUY APP."
-
6Confirm your download. Depending on your settings, you may have to sign in once more with your Apple ID or enter a passcode. Once the app is finished installing, you'll be able to find it in the Applications.
- If you're buying an app, follow the on-screen instructions to select or enter your payment information.
macOS (Downloading from the Internet)
-
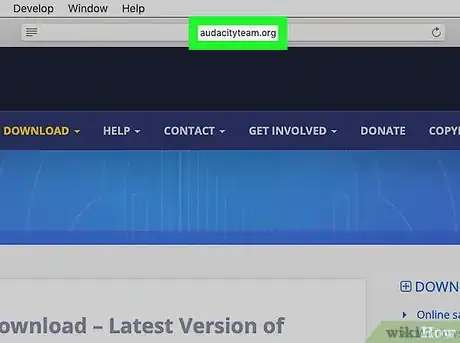
1Go to the website of the app you want to install. If you want to install an app that is not available on the App Store, you can typically do so by going to the app developer's website.
-
2Click the download link for the app. This downloads the app's installer to your Downloads folder.
- Depending on your settings, you may have to click Save or OK on a confirmation window to start the download.
-
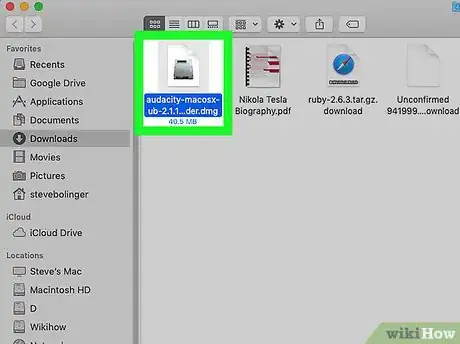
3Double-click the downloaded file. It usually ends with ".dmg" or ".pkg." You'll find it in the Downloads folder, which you can access by opening a Finder window and clicking Downloads. It'll usually end with .dmg.
- If the file you downloaded ends with .zip, double-click it to unzip the files. The installer (usually ending with .dmg or .pkg) will be inside.
-
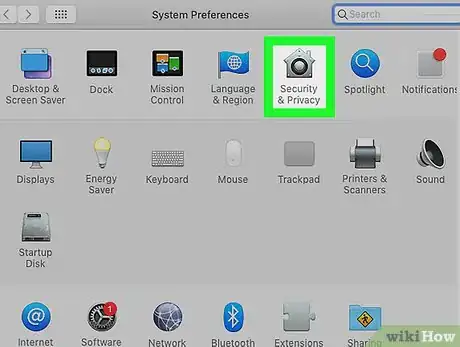
4Change your security settings if you get a "can't be opened" error. If you see a pop-up that says "(the app) can't be opened because it is from an unidentified developer," you'll have to manually allow that app through your security settings. Here's how:[6]
- Click the menu and select System Preferences.
- Click Security & Privacy.
- Click the General tab.
- Click Open Anyway near the bottom of the window.
- Click Open on the confirmation window.
-
5Follow the on-screen instructions to install the app. Once the app is installed, it will be added to the Applications folder.[7]
- If you double-clicked on a file that ends with .dmg, a window will appear containing some icons. Drag the icon for the app you'd like to install over to the Applications folder icon (on the right side of the window) to install.
- If you're installing from a .pkg file, follow any on-screen instructions you see to complete the installation.
References
- ↑ https://support.apple.com/en-us/HT204266
- ↑ https://support.google.com/googleplay/answer/113409?hl=en
- ↑ https://help.brother-usa.com/app/answers/detail/a_id/149171/~/your-pc-settings-only-let-you-install-verified-apps-from-the-store-when
- ↑ https://www.imore.com/how-start-using-mac-app-store
- ↑ https://www.imore.com/how-download-apps-mac-app-store
- ↑ https://www.macworld.co.uk/how-to/mac-software/mac-app-unidentified-developer-3669596/
- ↑ https://www.intego.com/mac-security-blog/how-to-install-applications-on-your-mac/












-Step-34.webp)
