X
wikiHow is a “wiki,” similar to Wikipedia, which means that many of our articles are co-written by multiple authors. To create this article, volunteer authors worked to edit and improve it over time.
This article has been viewed 105,800 times.
Learn more...
In Windows 7 you might want to change the location of the System Temporary folder. It stores temporary internet files, setup files, windows explorer files & history and program files. It is very easy to change it's location for easier accessibility.
Steps
-
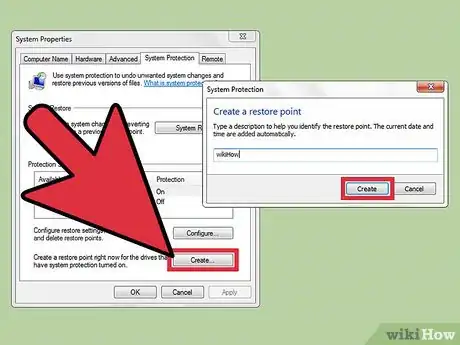
1Create a System Restore point.
-
2Open the Start Menu.Advertisement
-
3Search for "Environment Variables".
-
4Click on "Edit Environment Variables for your Account".
-
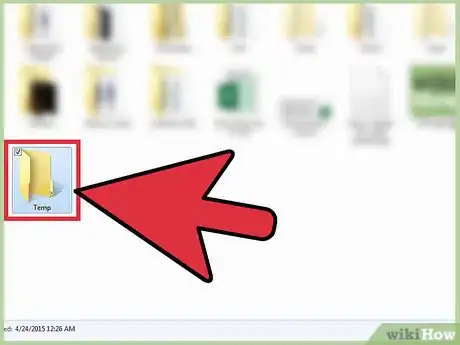
5Create a folder named "Temp" where you want the new folder to be located,(if you haven't already done so).
-
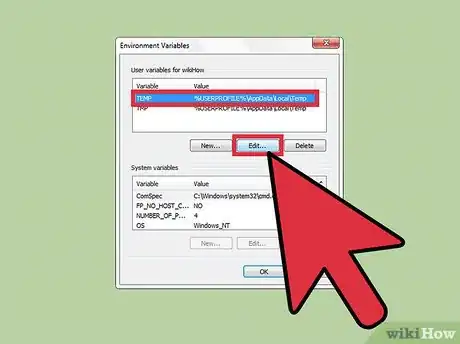
6Click on "Temp" Variable and click "Edit...".
-
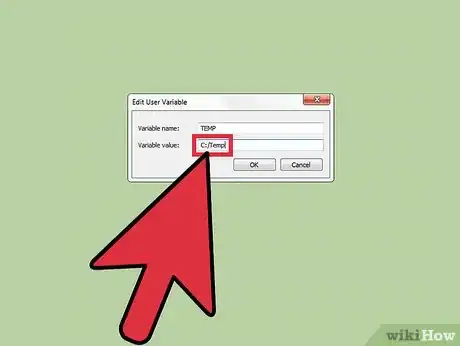
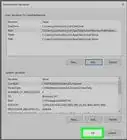
7Enter new Variable Value (the location of your new folder; e.g. "C:\Temp") and Click OK.
-
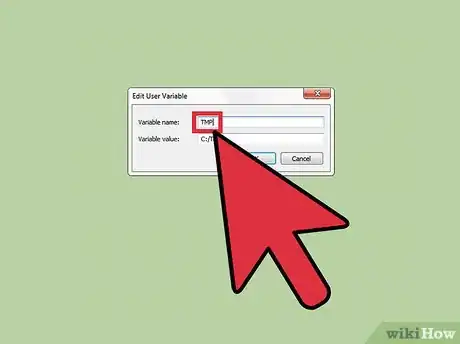
8Select "TMP" Variable and change it's value to the same folder).
-
9Click OK and Restart your Computer.
-
10Verify if the change has been correctly applied. Open Start Menu and type "%Temp%" without the quotation marks.
-
11Open the "Temp" folder which results.
-
12Check the address bar.
Advertisement
Warnings
- You must be logged in as Admin and have Admin Privileges.⧼thumbs_response⧽
- Always create a restore point. You will regret your decision if you didn't. If after restart for some reason you can't log in or receive an error about "Interactive logon process failure" - your restore point is your only hope.⧼thumbs_response⧽
- Do not attempt to install anything after the change without restarting.⧼thumbs_response⧽
- Its best to close ALL programs and terminate relevant processes BEFORE this change.⧼thumbs_response⧽
- You can choose a name other than "Temp" for the Temporary folder, but that is not recommended as most applications store Temporary files in "Temp" folder not the %Temp% folder (if you know what that means!).⧼thumbs_response⧽
Advertisement
About This Article
Advertisement
