This article was co-authored by Gonzalo Martinez. Gonzalo Martinez is the President of CleverTech, a tech repair business in San Jose, California founded in 2014. CleverTech LLC specializes in repairing Apple products. CleverTech pursues environmental responsibility by recycling aluminum, display assemblies, and the micro components on motherboards to reuse for future repairs. On average, they save 2 lbs - 3 lbs more electronic waste daily than the average computer repair store.
There are 13 references cited in this article, which can be found at the bottom of the page.
This article has been viewed 63,285 times.
An Apple Music subscription lets you access your music files on multiple devices, but by default this only includes music purchased inside the app. Fortunately, the service comes with free cloud storage for any type of music files, and it's pretty straightforward to set this up if you have access to a computer.
You can also list your own musical creations in Apple Music.
Steps
Adding Music Files using Windows
-
1Open iTunes on your computer. You can download iTunes from the Microsoft store or at https://support.apple.com/en-us/HT210384. Use your Apple ID to log in.[1]
- Your iTunes account and Apple ID are one and the same.[2]
-
2Create a new library (optional). This method adds your entire music collection to Apple Music all at once. If you only care about a few songs, it's faster to create a separate library just for them:[3]
- Quit iTunes
- Hold down ⇧ Shift and open it again.
- Select Create library and choose a location that's easy to find again.
Advertisement -
3Add your music files to iTunes. To add one file to iTunes, choose File > Add File to Library in the top menu. To add a whole folder full of audio files, choose File > Add Folder to Library. You can also drag and drop files or folders directly into the iTunes window.[4]
- If you bought the music on Windows Media Player, it might have DRM protection that prevents this from working.[5] Try converting it to an unprotected file first.
-
4
-
5Sync your music files to the cloud. From the top menu, select Edit > Preferences. In the pop-up window, click the General tab, then select iCloud Music Library.[7]
- If you don't see this option, double check that you're logged in to your Apple account inside iTunes.
-
6Click OK and wait for your music to sync. If you have a large music collection or slow internet, this could take a long time. Once completed, you should be able to play your music on any device connected to your Apple ID.[8]
-
7Go back to your old library. After the sync is done, if you created a new library earlier and want to return to your main one, just quit iTunes and reopen it while holding down ⇧ Shift. Select Choose Library... and choose the file location of your old iTunes library. The default location is C:\Users\(your username)\Music\iTunes\iTunes Media\iTunes Library.[9]


Adding Music Files using a Mac
-
1Open iTunes or Music on your computer. This pre-installed application is called Music on Mac OS 11 Big Sur, and iTunes on Mac OS X.[10]
-
2Create a new library (optional). Apple Music only lets you add a whole music library at once, not individual files. If you only care about adding a few songs, create a new library just for them:[11]
- Quit iTunes (or Music)
- Hold down Option, and open it again.
- Select Create Library... and select an easy-to-find location for a new music library.
-
3Add the audio files to your music library. You can drag and drop a file directly into your iTunes or Music window to import it. Or you can use the top menu: select File, then Add to Library or Import.[12]
- You can select a folder to import all audio files inside that folder.
- If this doesn't work, search your Mac for the folder called "Automatically add to iTunes". Drag the audio files into this folder, a few at a time.[13]
-
4Create a backup of your music library. The next step is going to sync your music files to the cloud. It's a very good idea to have a backup first, just in case something goes wrong with the transfer.[14]
- Do this for all devices connected to your Apple ID.
-
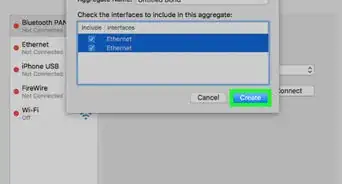
5Sync your library to iCloud. A subscription to Apple Music includes access to cloud storage for your music. Sync your music library (including the files you just added) to iCloud so you can access it using Apple Music on any device:[15]
- Mac OS 11 Big Sur: In the top menu, select Music > Preferences. Check the box next to Sync Library.
- Mac OS X: In the top menu, select iTunes > Preferences. Check the box next to iCloud Music Library.
-
6Click OK and wait for the sync. Once your music is done being uploaded to the cloud, you can play it from any device, as long as you're logged in with the same Apple ID.[16]
-
7Return to your old library. If you made a new library earlier, you can return to your old library once the sync is done without affecting your Apple Music collection:
- Quit iTunes (or Music).
- Hold down the Option key, then open the app again.
- Select Choose library... and browse your files to find the original iTunes library file. The default location is Users/(your username)/Music/iTunes/iTunes Media/iTunes Library.itl.


Selling Your Own Songs on Apple Music
-
1Prepare your songs' metadata. Your tracks might be finished, but don't forget the extra data Apple uses to make your songs easy to find. That metadata includes the composer and performer credits, song title, the language of the lyrics, and many other pieces of info. Using accurate and complete info will help your song get approved by Apple.
- For Apple's full metadata guidelines, see https://help.apple.com/itc/musicstyleguide/en.lproj/static.html/
-
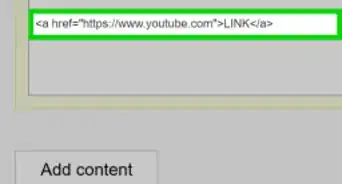
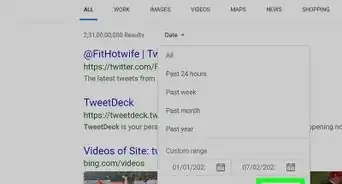
2Sign up for a music distributor. This is your go-between that gets your music on the platform and collects royalties for you. There are many distributors and each offers different terms and extra services (like publicity and publishing deals), so take your time researching them.[17] If your main focus is Apple Music and iTunes, choose an Apple-preferred distributor from the list at https://artists.apple.com/partners.
- Once you have a distributor, you'll use their service for the final steps of getting your music onto Apple's platform. If you're confused about the process, contact the distributor's customer support team.
-
3Look into joining a performing rights organization. Your "PRO" collects royalties for you when your music is used commercially.[18] This isn't something you need right away, but look into it if you've signed to a publishing deal or if your music is getting popular.[19]
- You can only be a member of one PRO at a time, so research their offers carefully. The largest PROs in the US are BMI, ASCAP, and SESAC. If you're in the UK, look into PRS for Music or PPL.


Warnings
- On the default settings, iTunes or Music doesn't make a copy of an imported file—it creates a pointer to the file's location. Make sure you don't move any of your "imported" files until after they're synced to the cloud.[21]⧼thumbs_response⧽
- After syncing, your library will automatically update to match any changes on your devices. Deleting a song on your phone will delete it on all synced devices.⧼thumbs_response⧽


References
- ↑ Gonzalo Martinez. Computer & Phone Repair Specialist. Expert Interview. 25 July 2019.
- ↑ Gonzalo Martinez. Computer & Phone Repair Specialist. Expert Interview. 25 July 2019.
- ↑ https://support.apple.com/en-gb/guide/music/mus7663a920a/mac
- ↑ https://support.apple.com/en-gb/guide/itunes/itns3081/windows
- ↑ https://support.apple.com/en-gb/guide/itunes/itns3081/12.10/windows/10
- ↑ https://support.apple.com/en-us/HT204406
- ↑ https://support.apple.com/en-us/HT204926
- ↑ https://support.apple.com/en-us/HT204926
- ↑ https://support.apple.com/en-us/HT201625
- ↑ https://support.apple.com/en-gb/guide/music/mus3081/1.0/mac/10.15
- ↑ https://support.apple.com/en-gb/guide/music/mus7663a920a/mac
- ↑ https://support.apple.com/en-gb/guide/music/mus3081/1.0/mac/10.15
- ↑ https://discussions.apple.com/thread/8147826
- ↑ https://support.apple.com/en-us/HT204406
- ↑ https://support.apple.com/en-us/HT204926
- ↑ https://support.apple.com/en-us/HT204926
- ↑ https://artists.apple.com/support/1108-get-your-next-release-on-apple-music
- ↑ https://artists.apple.com/support/1116-understanding-the-basics-of-music-publishing
- ↑ https://music.tutsplus.com/articles/should-i-join-a-performing-rights-organization--cms-21788
- ↑ https://www.imore.com/icloud-music-library-ultimate-guide
- ↑ https://support.apple.com/en-gb/guide/music/mus3081/1.0/mac/10.15
About This Article