This article was co-authored by wikiHow staff writer, Travis Boylls. Travis Boylls is a Technology Writer and Editor for wikiHow. Travis has experience writing technology-related articles, providing software customer service, and in graphic design. He specializes in Windows, macOS, Android, iOS, and Linux platforms. He studied graphic design at Pikes Peak Community College.
This article has been viewed 275,198 times.
Learn more...
NVIDIA develops software drivers for Windows PCs that control graphics cards and graphics processing units (GPUs). In the event you want to install a new GPU from another manufacturer or simply uninstall NVIDIA from your computer, you can do so from the Control Panel. You can also manually delete NVIDIA's hidden folders, and remove any NVIDIA folders from the Registry.
Steps
Deleting NVIDIA Folders
-
1
-
2Click the View tab. It's in the menu bar at the top of the screen.Advertisement
-
3
-
4Click This PC. It's in the menu bar to the left next to an icon that resembles a computer screen. This displays all the drives connected to your computer.
-
5Click the drive that contains your Windows installation. It's next to an icon of a hard drive with the Windows logo over it. This is most likely the C: drive. It may be labeled "OS (C:)", "Local Disk (C:)", "System (C:)" or the name of your computer.
-
6Click the NVIDIA folder and press Delete. If you see an NVIDIA folder in your root folder, click it and press the Delete key to remove the folder.
-
7Open the grayed-out folder labeled “ProgramData.”. It's one of the hidden folders in the root drive.
-
8Delete any NVIDIA folders. Look for any NVIDIA or NVIDIA Corporation folders in the ProgramData folders and click them to select them. Then press the Delete key.
-
9Click the back arrow to navigate back to the Windows Install (C:) drive. Click the back arrow at the top of Windows Explorer to navigate back to the Windows Install disk.
-
10Open the “Program Files" folder. It's in the Windows install (C:) drive.
-
11Delete any existing NVIDIA folders. Click any folders from NVIDIA or the NVIDIA Corporation in Program Files and press the "Delete" key. Then navigate back to the Windows Installation drive.
-
12Open the “Program Files (x86)" folder. If you have the 64-bit version of Windows, you will also have a "Program Files (x86)" folder. Click this folder to open it. It's in the Windows install (C:) drive.
-
13Delete any existing NVIDIA folders. Click any folders from NVIDIA or the NVIDIA Corporation in Program Files (x86) and press the Delete key. Then navigate back to the Windows Installation drive.
-
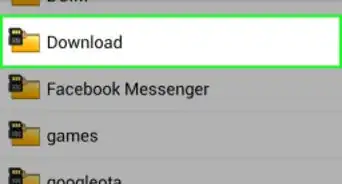
14Open the “Users” folder and click on your Windows username folder. The "Users" folder is in the Windows Install Drive. It contains a folder for each Windows user on your machine. Click the folder that has your username.
-
15Open the “AppData” folder. It's in the Users folder.
-
16Open the "Local" folder. It's in the AppData folder.
-
17Delete any NVIDIA folders. Click any folders from NVIDIA or the NVIDIA Corporation and press the Delete key.
-
18Click the back arrow. It's at the top of the Windows Explorer window. This navigates back to the AppData folder.
-
19Open the “Roaming” folder. It's in the AppData folder.
-
20Delete any NVIDIA folders. Click any folders from NVIDIA or the NVIDIA Corporation and click them. Then press the Delete key to remove the folders.


Uninstalling NVIDIA Drivers
-
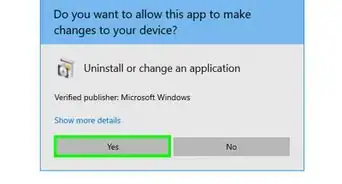
1Open the Control Panel and click Uninstall a program. It's below "Programs" in the Control Panel. A complete list of all programs and applications installed on your computer will display on-screen.
- If you are using Windows 8, right-click the Start menu and click Programs and Features.[1]
-
2Scroll down and click NVIDIA graphics driver. All programs are listed in alphabetical order in the Programs and Features page. "NVIDIA graphics driver" is the main component.
-
3Click Uninstall/Change. It's the second tab at the top of the software list. This opens the NVIDIA uninstall program.
-
4Click Uninstall. This uninstalls the NVIDIA component.
- Your screen may turn black a couple of times while uninstalling. Don't worry, this is normal.
-
5Click Restart Now. When you are finished uninstalling your graphics driver, your computer will need to restart. Go ahead and do that now.[2]
-
6Open the Control Panel. Use the following steps to open the Control Panel:
- Click the Windows Start menu in the lower-left corner.
- Type Control Panel.
- Click Control Panel in the list of search results.
-
7Click Uninstall a program. It's below "Programs" in the Control Panel. This opens the Programs and Features list.
-
8Uninstall any remaining NVIDIA components. There are likely some additional NVIDIA components still remaining. These include, "NVIDIA GeForce Experience", "NVIDIA PhysX System Software", "NVIDIA 3D Vision Controller", ect. Click one of these components and click Uninstall/Change. Follow the instructions to uninstall the component. Repeat for each NVIDIA component in the Programs and Features list.
- If asked to restart your computer, go ahead and do so.


Deleting NVIDIA Registry Keys (Advanced Users Only)
-
1
-
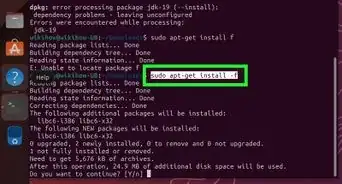
2Type regedit. This displays the Registry Editor at the top of the Windows Start menu.
- WARNING: Deleting items from the Registry can cause permanent damage to your operating system. Proceed at your own risk!
-
3Click regedit. This will open the Registry Editor window.
-
4Click the arrow next to "HKEY_CURRENT_USER". It's to the left of the folder in the sidebar to the left. This displays all folders in the "HKEY_CURRENT_USER" folder.
-
5Click the arrow next to the "Software" folder. The software folder is listed below "HKEY_CURRENT_USER" in the sidebar to the left.
-
6Delete any existing “NVIDIA” folders. Look for any NVIDIA or NVIDIA Corporation folders in the sidebar to the left. Click on them and then press the Delete key.
-
7Click the arrow next to the “HKEY_USERS" folder. It's to the left of the "HKEY_USERS" folder to the left. This folder contains a number of additional registry folders, including a “.DEFAULT” folder and several other folders with numerical titles.
-
8Click the arrow next to the DEFAULT folder. It's the first folder under “HKEY_USERS" folder in the sidebar to the left. The arrow is to the left of the folder in the sidebar.
-
9Click the arrow next to the “Software” folder. It's in the ".DEFAULT" folder.
-
10Delete any existing NVIDIA folders. Look for any folders from NVIDIA or the NVIDIA Corporation and click them. Then press the Delete key.
-
11Repeat for any additional folders under "HKEY_USERS" folder. Click the arrow, and then the "Software" folder under any other folders in the "HKEY_USERS" folder. Then delete any NVIDIA or NVIDIA Corporation folders in these folders.
-
12Restart your computer after you've deleted all Nvidia folders. All existing NVIDIA drivers will now be completely removed from your Windows registry.[3]


Warnings
- Do not change the values of any registry keys in Registry Editor, since doing so could cause major software problems or corrupt your Windows operating system. In the event, you accidentally modify registry keys, follow these steps to do a system restore or reinstall Windows to wipe your hard drive and resolve problems with your OS.⧼thumbs_response⧽


References
About This Article

1. Click on the Windows Start Menu.
2. Type "Control Panel".
3. Click on the Control Panel icon.
4. Click Uninstall a program.
5. Click NVIDIA graphics driver.
6. Click Uninstall/Change.
7. Click Uninstall.
8. Restart your computer.
9. Open the Control Panel again.
10. Click Uninstall a program.
11. Uninstall any remaining NVIDIA programs.
.