This article was co-authored by wikiHow staff writer, Travis Boylls. Travis Boylls is a Technology Writer and Editor for wikiHow. Travis has experience writing technology-related articles, providing software customer service, and in graphic design. He specializes in Windows, macOS, Android, iOS, and Linux platforms. He studied graphic design at Pikes Peak Community College.
This article has been viewed 209,364 times.
Learn more...
XAMPP is one of the most robust personal web server applications. It is available for Linux, Windows and Mac OS environments. It is also very easy to install, configure and use. Using a personal web server allows you to work locally from your own laptop or PC for development purposes. It provides you a secure, private environment for developing that can be shared later. It allows you to configure all of the necessary components of a web server for you without the complication. This wikiHow teaches you the basic setup and configuration steps needed to set up your own personal web server using XAMPP.
Steps
Installing the Web Server Application
-
1Go to https://www.apachefriends.org/index.html in a web browser. This is the web page do download the XAMPP client.
-
2Click the link for your operating system. XAMPP is available for Windows, Linux, and macOS. Click the download button for whichever system your computer runs on. You will be redirected to a download page and your download will start automatically.
- If your download does not start automatically, click the green text that says click here at the top of the page.
Advertisement -
3Double-click the install file. Once the install file is finished downloading, you can open the downloaded file in your web browser or Downloads folder. The install file is "xampp-windows-x64-X.X.X-0-VC15-installer.exe" on Windows, "xampp-osx-X.X.X-0-vm.dmg" on Mac, and "xampp-linux-x64-X.X.X-0-installer.run" on Linux.
- If you receive an alert that informs you that your Antivirus software may interfere with the installation, temporarily disable your antivirus software and click Yes to continue the installation.
-
4Click Next. When you see the XAMPP installer welcome screen, click Next to continue.
-
5Select which services you want to install and click Next. XAMPP has a variety of services, including PHP, MySQL, Apache, phpMyAdmin, and more. Click Next to install everything, or uncheck the boxes next to the services you don't want to install and click Next.[1]
-
6Select a folder to install XAMPP to and click Next. Here you are asked where you would like to install the personal web server application. The default is to the C:\ drive when installing on a PC. This is probably the best location. To change folder locations, click the icon that resembles a folder and select a folder to install XAMPP to.
- On Mac, when you see the XAMPP icon with an arrow pointing to the Applications folder, click and drag XAMPP.app to the Applications folder as indicated to copy it to your Applications folder.
-
7Continue clicking Next until XAMPP starts to install. When you see the information screen about Bitnami, click Next to continue.
-
8Click Finish. Once the installation process is complete, click Finish.
-
9Select your language and click Save. Click the flag that represents your language (English or German). Then click Save. XAMPP will open automatically once the installation is complete.


Configuring your Personal Web Server
-
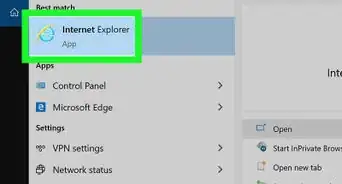
1Double-click on the newly created XAMPP icon. It has an orange icon that resembles an "X". This will display the XAMPP Control Panel.
-
2Click Start buttons next to Apache and MySQL. This starts the personal web service or Apache and MySQL.
- On Mac, click Start under the General tab. Then click the Services tab and select Apache and click Start. Then select MySQL and click Start.
- you may see a couple of Windows Messages after clicking Start.
- There are times when you may click on “Start” to start the Web Server and it does not want to start. This is usually due to another program using the same port as the webserver. The most common conflict is with Skype. If your web server will not start and you are running Skype, close Skype and try to start the webserver again.
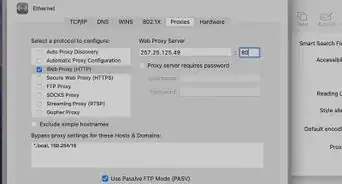
- To change the port number, click Config next to "Apache" and open the "httpd.conf" file. Then change the port number next to "Listen" to any free port number. Then open the "httpd-ssl.conf" file under "Config" and change the port number next to "Listen" to any free port number. Click Netstat to see a list of what port numbers are being used by each program.[2]
-
3Click Admin next to Apache. If everything is working properly, you should see the XAMPP Dashboard. You can click one of the icons at the bottom of the screen to see a list of additional modules you can install and use with XAMPP. These include WordPress, Drupal, Joomla!, Mautic, OpenCart, OwnCloud, phpList, phpBB, and more.
-
4Click Admin next to "MySQL". This opens the phpMyAdmin dashboard. Here you can configure your PHP databases.
-
5Create a new database (optional). If you want to create a new database to test features for a website with, use the following steps:
- Click Databases to see a list of databases.
- Enter the name of a database where it says "Database name".
- Click Create.
-
6Add a password for your database (optional). If you want to provide a password for your MySQL root user, Use the following steps:
- Click User accounts.
- Click Edit Privileges next to "Local Host" with the username "root".
- Click Change password.
- Enter a password in the spaces provided.
- Click Go in the lower-right corner.
-
7Fix the "Access Denied" error. After setting a password for your PHP database, you may receive an error message when trying to connect to phpMyAdmin. Use the following steps to fix the "Access Denied" error. Then you will be asked to enter a password when you connect to phpMyAdmin:[3]
- Click Explorer to the right in the XAMPP Control Panel.
- Open the "phpMyAdmin" folder.
- Open the "config.inc.php" file in NotePad or another text editor.
- Change "config" to "cookie" next to "$cfg['Servers'][$i]['auth_type'] = 'config';"
- Change "true" to "false" next to "On $cfg['Servers'][$i]['AllowNoPassword'] = true;"
- Click File.
- Click Save.


Community Q&A
-
QuestionI run XAMPP on Windows. Is there any panel like cpanel I can use and how? I am selling Web hosting servers from my own server and really need something similar to cpanel.
 Community AnswerYou need a web reseller hosting. With XAMPP it will be way harder. More information can be found on the wikipedia page called "Reseller web hosting".


References
About This Article

1. Download the XAMPP installer from https://www.apachefriends.org/index.html.
2. Double-click the installer file and follow the instruction to install XAMPP.
3. Double-click the XAMPP icon to open the XAMPP Control Panel.
4. Click Start next to "Apache" and "MySQL" to start the local servers.
5. Click Admin next to "Apache" to open the Apache Dashboard.
6. Click the icons at the bottom to see a list modules you can use with XAMPP.
7. Click Admin next to "MySQL" to open the myPHPAdmin dashboard.
8. Click "Databases" to see a list of local databases.
9. Enter the name of a new database name where it says "Database name" and click Create.