This article was co-authored by wikiHow staff writer, Darlene Antonelli, MA. Darlene Antonelli is a Technology Writer and Editor for wikiHow. Darlene has experience teaching college courses, writing technology-related articles, and working hands-on in the technology field. She earned an MA in Writing from Rowan University in 2012 and wrote her thesis on online communities and the personalities curated in such communities.
This article has been viewed 283,509 times.
Learn more...
Creating proxy servers can increase your computer's security as well as save a company's bandwidth since they act as a mediator (middle-man) between your computer and the internet. Much of the time, you have to pay a subscription fee or service fee to use a proxy; however, there are proxies that are advertised as free, which probably means they don't prioritize your safety and are thus riskier. This wikiHow will teach you how to create a proxy on Windows and Mac computers once your administrator or IT department has set up a proxy server.
Steps
Using Automatic Setup in Windows
-
1Open Settings. Press the Windows + I keys or open your Start menu and click the gear icon.
-
2Click Network & Internet. It's next to an icon of a gridded globe.Advertisement
-
3Click Proxy. You'll see this option at the bottom of the panel on the left side of the window next to the same gridded globe icon.
-
4
-
5Enter the script address you were given and click Save. To access and use the proxy, enter the address that either your company, school, or employer gave to you, then click Save to continue. Once you close the Settings window, the changes you've selected should become effective immediately.


Using a Manual Setup in Windows
-
1Open Settings. Press the Windows + I keys or open your Start menu and click the gear icon.
-
2Click Network & Internet. It's next to an icon of a gridded globe.
-
3Click Proxy. You'll see this option at the bottom of the panel on the left side of the window next to the same gridded globe icon.
-
4
-
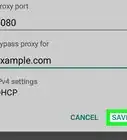
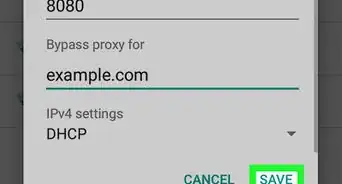
5Enter an IP address and port number in the appropriate text fields then click Save. Once you've created your own proxy server (usually a task left to your company's administrators or IT department), you should have at least an IP address and Port number to use. Enter that information, then click Save and your changes will be effective immediately.[1]


Using Safari in Mac
-
1Open Safari. This app icon looks like a blue compass with a red dial. You can find it in your Dock or the Applications folder in Finder.
-
2Open System Preferences. With Safari in focus, click Safari from the menu at the top of your screen, then choose Preferences > Advanced.
-
3Click Change Settings. You'll see this next to "Proxies" and another window will appear.
-
4Change the proxy settings according to the information from your network administrator. When your company, school, or employer set up a proxy, they should have given the information to you so you could use it as well.
-
5Click Ok. This will save and apply the information you entered for each instance of Safari you use.


Community Q&A
-
QuestionIt says it couldn't connect to host after running it on 000webhost.com. What now?
 Community AnswerThere are many ways to access restricted websites, most of which are discussed here. One way that is glossed over in that article and may not have been the easiest to understand, was proxies. This article will go over each type of script in more detail.


References
About This Article

1. Open Settings.
2. Click Network & Internet > Proxy.
3. Click the switch next to "Use setup script" to turn it on.
4. Enter the script address you were given and click Save.