wikiHow is a “wiki,” similar to Wikipedia, which means that many of our articles are co-written by multiple authors. To create this article, volunteer authors worked to edit and improve it over time.
This article has been viewed 49,765 times.
Learn more...
A lot of people love Windows 7, but a lot less love Windows 8. If you've upgraded but want to go back, you have a couple of different options. You can install Windows 7 alongside Windows 8, which allows you to choose which one you want to use when your computer turns on. You can also install Windows 7 inside a "virtual machine", which is a simulated computer that runs on your desktop. This allows you to use Windows 7 and Windows 8 at the same time on one computer. Finally, if you just want to go back, you can reinstall Windows 7, wiping out Windows 8 in the process.
Steps
Installing Windows 7 Alongside Windows 8
-
1Start with Windows 7. Windows 8 includes a new boot manager, which is the software your computer uses to determine which operating system to load. This means that if you want to dual-boot Windows 7 and Windows 8, Windows 8 needs to be installed last, or Windows 8 won't be able to boot.
-
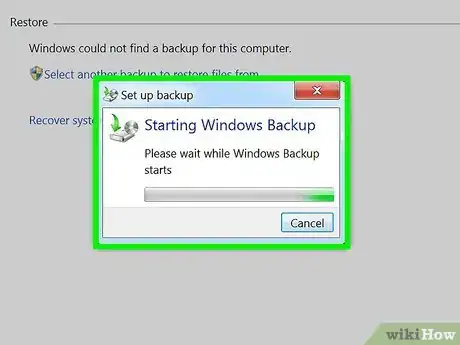
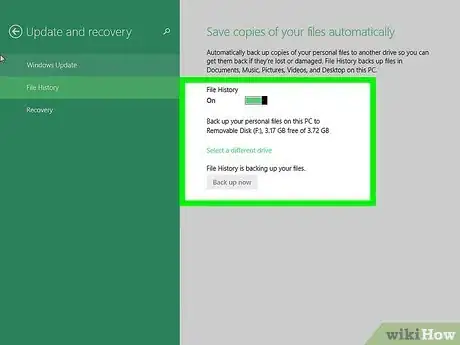
2Backup any important data. Before installing your two operating systems, you'll want to make sure that any important data has been safely backed up to a secure storage location. Installing operating systems will wipe anything that's currently on the disc. Click here for detailed instructions on backing up your data.Advertisement
-
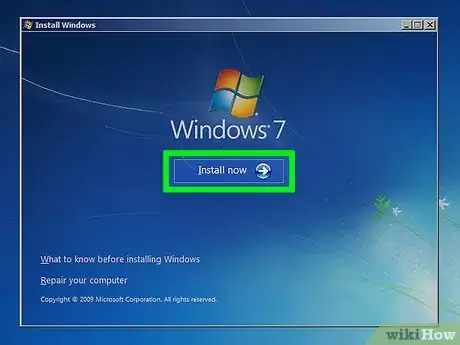
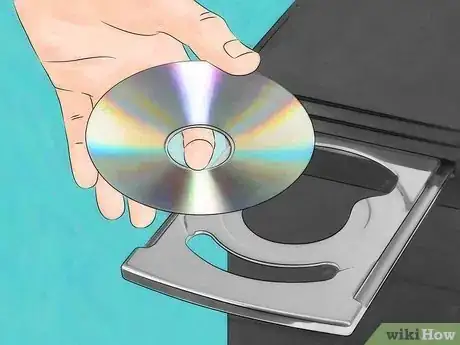
3Start the Windows 7 installation. Insert the Windows 7 DVD into your computer and boot from it to begin the Windows 7 installation process. Select "Custom (advanced)" as your installation type and follow the prompts until you get to the "Where do you want to install Windows?" screen.
- Click here for details on starting the installation process.
-
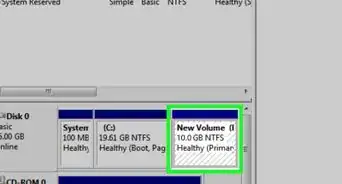
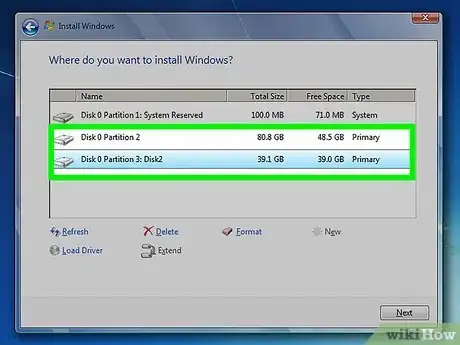
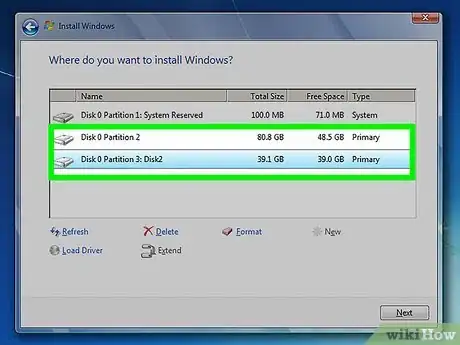
4Create two different partitions. The "Where do you want to install Windows?" screen allows you to create and format partitions on your hard drive. A partition is a segment of your drive that is formatted separately and given its own drive letter. Each partition acts like a separate hard drive. Note: If you have two separate physical drives, you don't have to worry about partitioning, as you can install each operating system to its own drive.
- Click the "Drive options (advanced)" option.
- Delete all of your existing partitions. All of the space on your drive will be combined into one chunk of "Unallocated space".
- Select the unallocated space and click "New". Set how large you want the Windows 7 drive to be. Repeat this to create the partition for Windows 8 (you'll use it later but creating it now makes things easier down the road). Make sure each partition is at least 25 GB, more if you plan on installing a lot of programs.
-
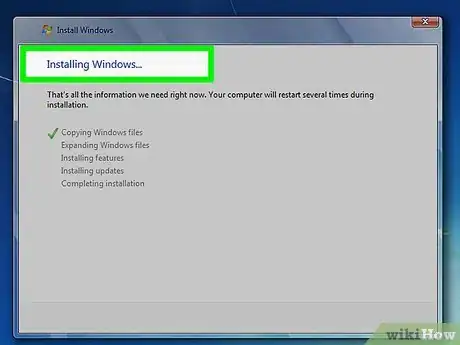
5Proceed installing Windows 7 on the first partition you created. Follow the guide linked above to finish the installation as normal.
-
6Insert your Windows 8 disc and install it after installing Windows 7. Once Windows 7 has been successfully installed on the first partition, you can go ahead and install Windows 8 on the second partition.
- Click here for detailed instructions on installing Windows 8.
- Select "Custom: Install Windows only (advanced)" for the installation type.
- Make sure you select the correct partition in the "Where do you want to install Windows?" screen. The one with Windows 7 installed on it will be marked "System" in the "Type" column.
-
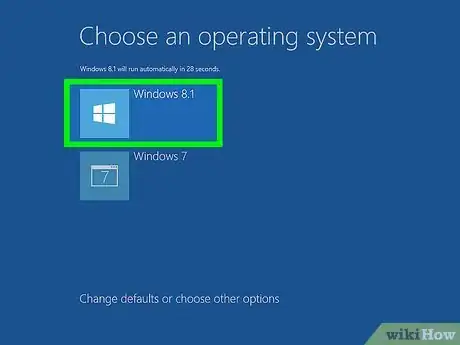
7Boot into Windows 8. After installing Windows 8, it will be set as your primary operating system. It will start automatically if you don't select an operating system from the boot manager.
-
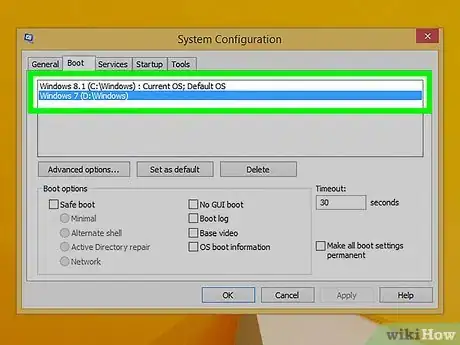
8Change your boot settings. If you'd prefer to automatically boot into Windows 7, or want to adjust the time that you have to select your option when the computer starts up, you can make changes to your computers boot settings from within Windows 8.
- Press ⊞ Win+R, type msconfig, and press ↵ Enter
- Click the Boot tab.
- Select the operating system you want to automatically boot to and click Set as default.
- Change the time you have to select your operating system when the computer starts by changing the "Timeout" value.
- Click Apply when you are satisfied with your changes.
Using a Virtual Machine
-
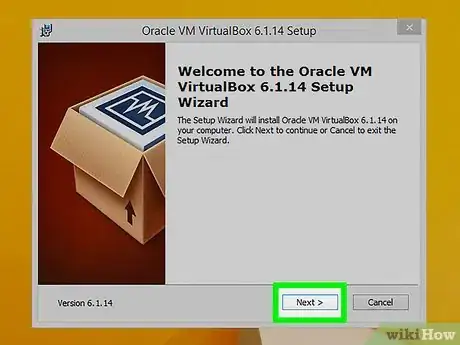
1Download and install Oracle VM VirtualBox. This program allows you to create a virtual hard drive on your computer which you can then install Windows 7 on. You can then boot up Windows 7 in a window while you're running Windows 8.
- Most users can leave the installation options at their defaults. You can download from Oracle VM VirtualBox virtualbox.org/
- Oracle VM VirtualBox is a free program, though there are other options available as well.
- This method is great for getting quick access to Windows 7 without having to reboot, but graphic-intensive programs such as games will not perform well on the virtual machine.
-
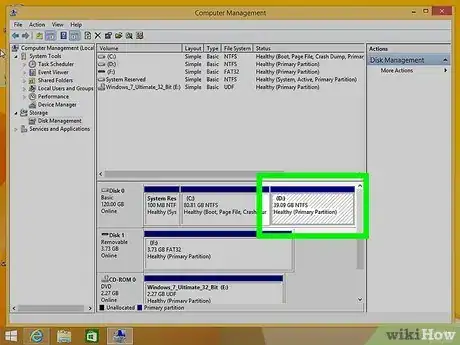
2Ensure you have enough free space to install Windows 7. When using VirtualBox, you'll be creating a virtual drive out of the free space on your hard drive. You'll want to be able to dedicate at least enough space for the operating system to install and run properly (about 20 GB), more if you want to be able to install programs.
- Make sure that you are leaving enough space for Windows 8 programs and files as well.
-
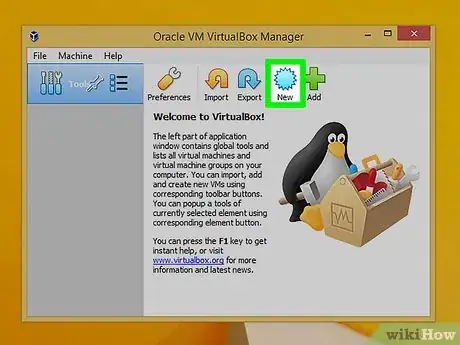
3Click the "New" button at the top of the VirtualBox window. This will start the process for installing a new virtual operating system.
-
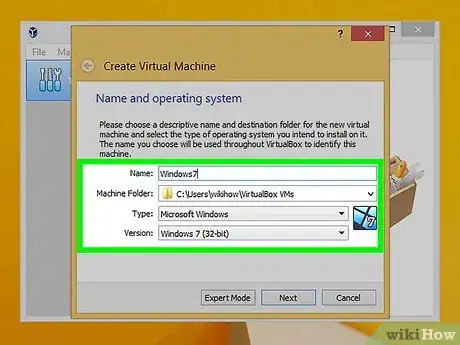
4Enter in the basic information for your virtual machine. You will be prompted to give the machine a name and select the operating system.
- You can name the virtual machine anything, though simply naming it "Windows 7" might be the most convenient.
- Select "Microsoft Windows" as the type.
- Select "Windows 7 (32 bit)" or "Windows 7 (64 bit)" depending on the version you are installing. Your Windows installation disc will say which version it is. You cannot run a virtual 64-bit machine on a 32-bit computer. Click here for details on determine what version computer you have.
-
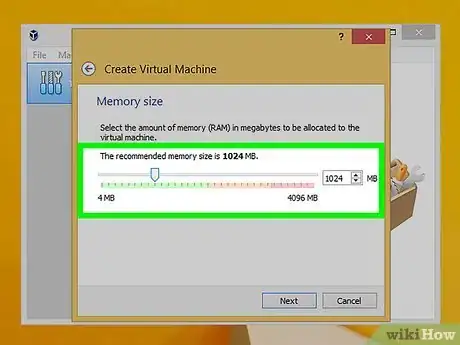
5Set the amount of memory (RAM) you want to dedicate to the machine. You can only dedicate RAM from the physical amount installed on your computer. Windows 7 requires 1 GB (1024 MB) of RAM, and it is recommended that you allocate about half of your available RAM for good performance.
- Don't allocate all of your RAM, or your regular operating system will encounter errors when the virtual machine is running.
-
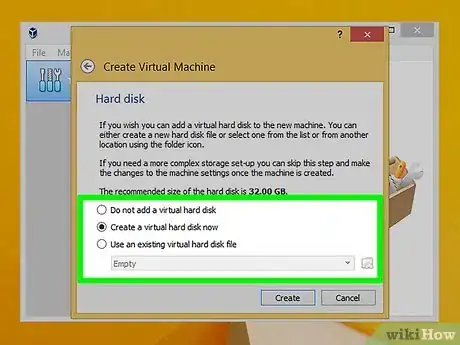
6Select "Create a virtual hard drive now". This will start the process for creating a new virtual drive to install Windows 7 on.
-
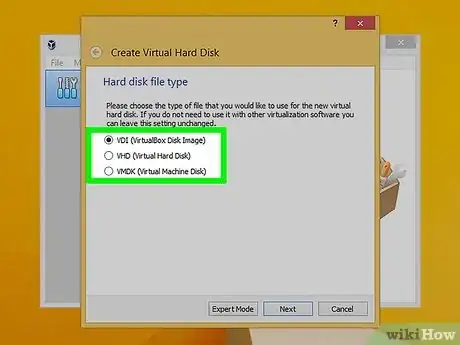
7Select "VDI" as the hard drive file type. If you know you'll need the hard drive image file for other programs, you can choose the appropriate file type, but most users can leave "VDI" selected.
-
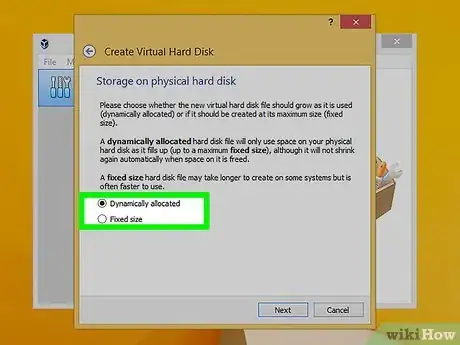
8Select between a "Dynamically allocated" or "Fixed size" drive. The choice is up to you. A fixed size drive will offer improved performance, but the dynamic drive may take up less space on the computer.
- If you select "Dynamic", you'll still need to set a maximum size.
-
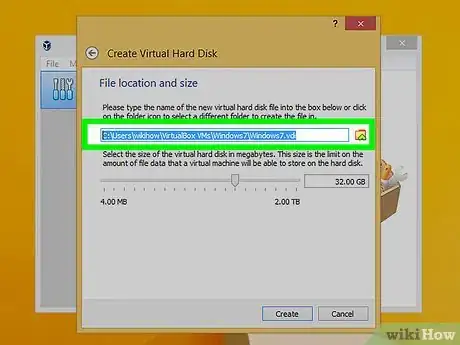
9Select a location for the virtual drive. Click the Folder icon next to the drive name to select where you want it saved. This is especially useful if you want to store your virtual machines on a storage drive.
-
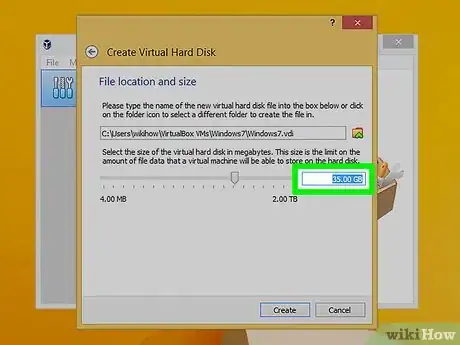
10Set the drive size or limit. Beneath the virtual drive name, you'll see a slider that allows you to set the size or limit. Make sure that you include at least enough space to comfortably install Windows 7 (20 GB).
-
11Wait for the drive to be created. This may take a while, especially if you are creating a large fixed drive.
-
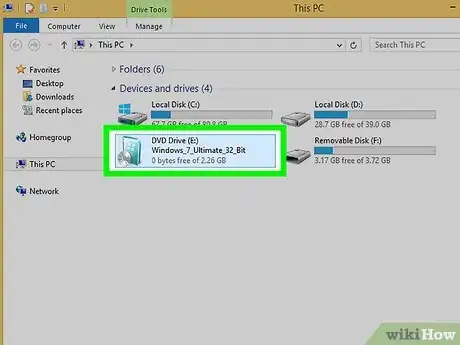
12Download the Windows 7 ISO file, or insert your installation disc in your DVD drive. You can install Windows 7 from an ISO file just like you would an installation DVD. Both require a valid Product Key.
- If you purchased Windows 7 from the Microsoft website, you'll most likely be using an ISO.
-
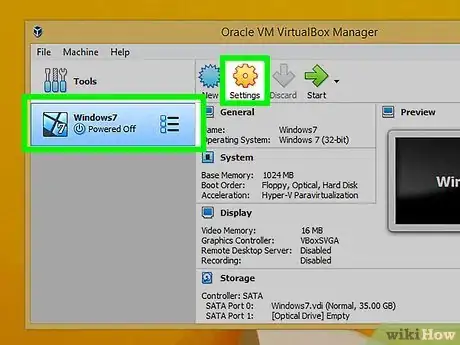
13Select your new virtual machine in the VirtualBox main window. You'll see the details of the system in the main frame.
-
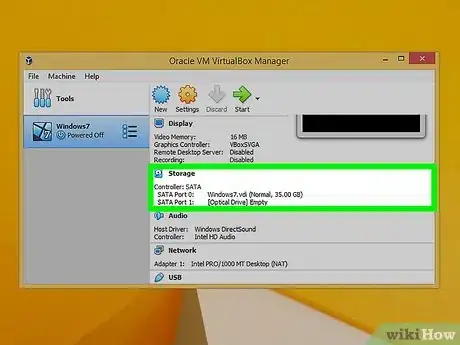
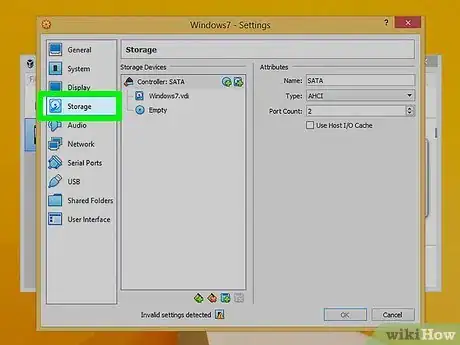
14Click the "Storage" header. This will open the Storage menu, where you can select your installation disc or ISO.
-
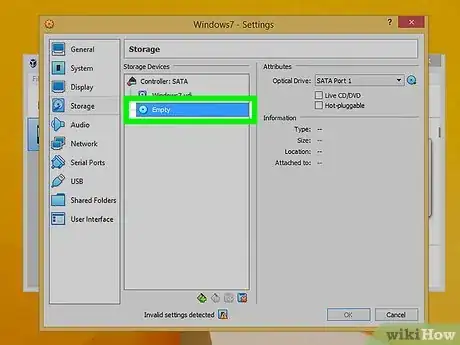
15Select the virtual CD/DVD drive. it will likely say "Empty". You will see the Attributes and Information on the right.
-
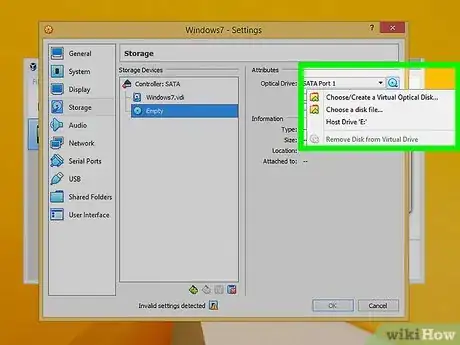
16Click the small Disc button in the Attributes section. Select how you would like to load the installation disc.
- If you have an installation disc inserted in your computer, select the appropriate "Host Drive". The term "Host" refers to your physical computer.
- If you are installing from an ISO, select "Choose a virtual CD/DVD disk file". This will open a file browser, allowing you to find and select your ISO file.
-
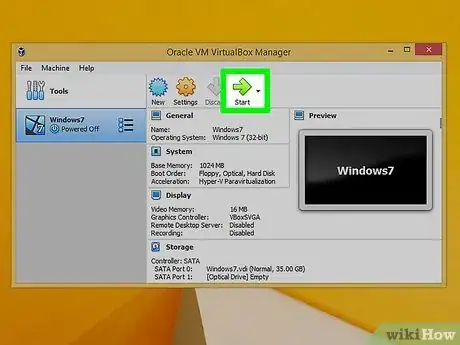
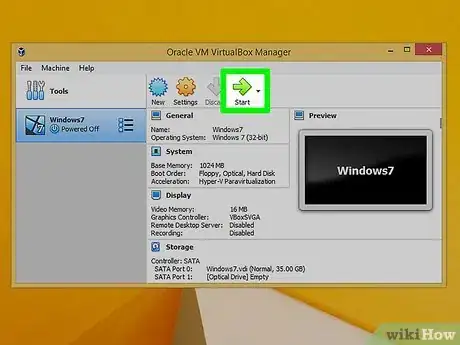
17Start the virtual machine. Once you've selected your installation media, you can start the virtual machine and begin installing Windows 7. Select your Windows 7 virtual machine and click "Start". A new window will open mimicking the display of another computer.
-
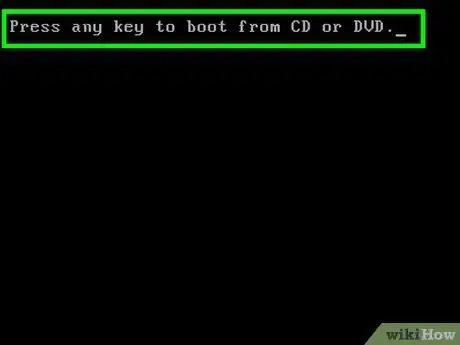
18Press a key when prompted to start the installation. You will see a message indicating when to press any key on your keyboard.
-
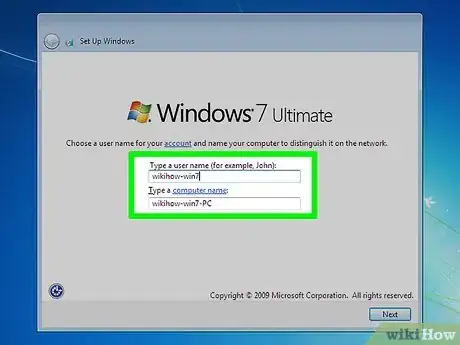
19Follow the prompts to install Windows 7. Installation will proceed from this point just as if you were installing it on a physical computer. Click here for detailed instructions on completing the Windows 7 installation.
-
20Start the virtual machine. Once you have Windows 7 installed, you can start it at any time by opening VirtualBox, selecting your Windows 7 virtual machine, and clicking Start. You can also right-click on the virtual machine in VirtualBox to create a shortcut on your desktop which allows you to start the machine with a single click.[1]
Replacing Windows 8 with Windows 7
-
1Back up any important files. Replacing Windows 8 with Windows 7 will erase all of the data on your hard drive, so make sure you have everything you need saved backed up to a secure location. Click here for detailed instructions on quickly backing up your necessary files.
-
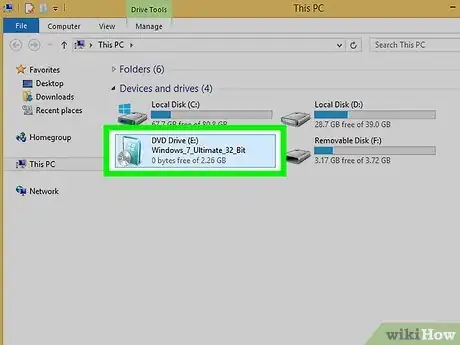
2Insert your Windows 7 installation disc. If you only have an ISO file, you will need to burn it to a DVD or create a bootable USB drive.
-
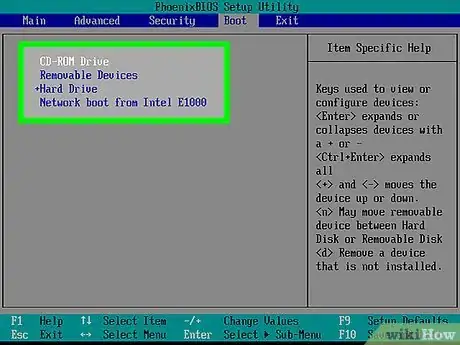
3Boot your computer from your installation drive. You can set your boot order in your computer's BIOS menu, which can be accessed as the computer boots up by pressing the correct key. Typical keys include F2, F10, F11, and Del.
- Navigate to the BOOT menu to change the order of your boot drives. Make sure that your installation drive is set to be the first boot device.
-
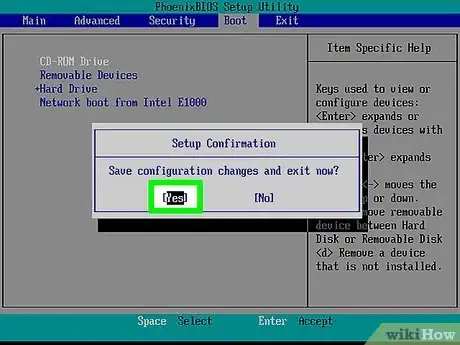
4Save your changes and reboot. You will be prompted to press a key to begin the setup process.
-
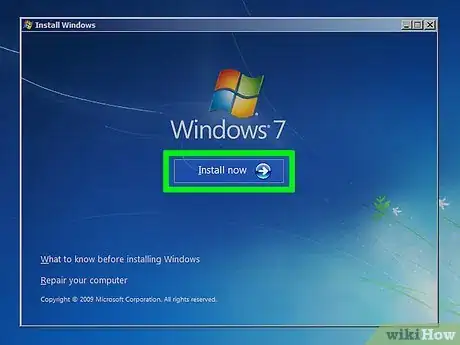
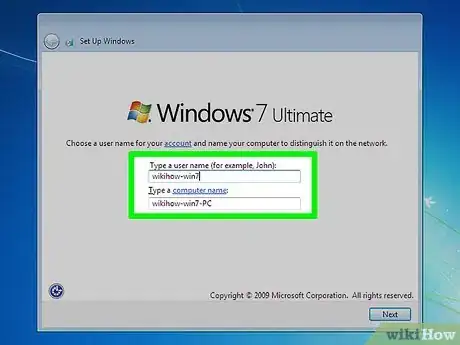
5Follow the prompts to start the installation. You will be asked to select language and input settings, as well as agree to the terms and license.
-
6Select your Windows 8 partition when asked where you want to install. Your Windows 7 partition will be marked as "System" in the "Type" column.
- Installing over your Windows 8 partition will erase all of the data on it.
-
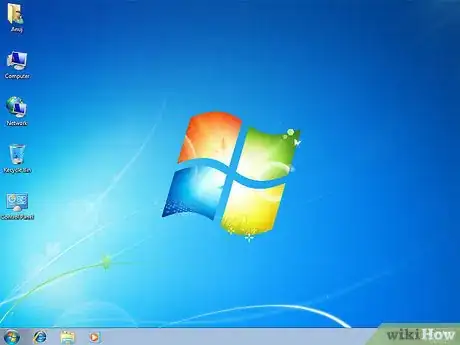
7Finish the installation procedure. You can follow the prompts to finish the installation. Click here for detailed instructions on completing the Windows 7 installation.
Community Q&A
-
QuestionCan I still return to indows 8 after installing Windows 7?
 Joshua ChuahCommunity AnswerYou sure can! Just do the same thing but with a Windows 8 DVD (or USB) instead of a Windows 7 installation media.
-Step-55-Version-2.webp)
