This article was co-authored by Luigi Oppido. Luigi Oppido is the Owner and Operator of Pleasure Point Computers in Santa Cruz, California. Luigi has over 25 years of experience in general computer repair, data recovery, virus removal, and upgrades. He is also the host of the Computer Man Show! broadcasted on KSQD covering central California for over two years.
The wikiHow Tech Team also followed the article's instructions and verified that they work.
This article has been viewed 780,921 times.
This wikiHow teaches you how to take screenshots on Windows 7 of the entire screen or a specific window using keyboard shortcuts, and how to take a screenshot of a customized area using the Snipping Tool.
Steps
Capturing the Entire Screen
-
1Press PrntScrn. Doing so saves the entire image on the screen to your computer's Clipboard, in the same resolution as your monitor setting. For example, a 1280x720 dpi monitor will result in a 1280x720 dpi image.
- If your keyboard doesn't have a PrntScrn key, press Fn+Insert.
-
2Open a document or create a new one. Do so in any app that supports the pasting of images, like Word, Outlook, or Paint.[1]Advertisement
-
3Paste the screenshot. Do so by pressing Ctrl+V or selecting Paste from the Edit drop-down in the menu bar. The screenshot will be pasted into the document. You can now save it, email it, print, or otherwise share it.[2]


Capturing a Specific Window
-
1Click on the window you want to capture.
-
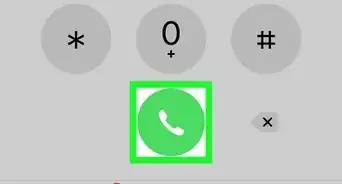
2Press Alt+PrntScrn. Doing so saves an image of the window to your computer's Clipboard.
- If your keyboard doesn't have a PrntScrn key, press Fn+Insert.
-
3Open a document or create a new one. Do so in any app that supports the pasting of images, like Word, Outlook, or Paint.
-
4Paste the screenshot. Do so by pressing Ctrl+V or selecting Paste from the Edit drop-down in the menu bar. The screenshot will be pasted into the document. You can now save it, email it, print, or otherwise, share it.


Using the Snipping Tool
-
1Open the "Start" menu. It's in the lower-left corner of the screen.
-
2Click on Search.
-
3Type snipping tool in the "Search" bar.
-
4Click on Snipping Tool. Doing so opens a dialog box
-
5Click on Mode. It's in the menu bar of the dialog box.
-
6Click on Rectangular Snip to create a rectangle-shaped image.
-
7Click and drag the pointer to outline a rectangular area of the screen. This takes a screenshot of the section of the screen you outlined and shows you the resulting image.
-
8Click on Save Snip. It's the icon that looks like a purple floppy disc. This will open the "Save As" window and you can enter a filename for the screenshot and choose where to save it.
- The default image file type for the snipping tool is JPEG. You can change this by clicking on the "File Type" drop-down menu in the dialog box.
-
9Click on Save. The selected portion of the screen will be saved as an image to your computer.


Expert Q&A
-
QuestionWhere does Print Screen save to on Windows 7?
 Luigi OppidoLuigi Oppido is the Owner and Operator of Pleasure Point Computers in Santa Cruz, California. Luigi has over 25 years of experience in general computer repair, data recovery, virus removal, and upgrades. He is also the host of the Computer Man Show! broadcasted on KSQD covering central California for over two years.
Computer & Tech SpecialistWhen you click Print Screen, it copies a screenshot of your screen, so all you need to do is paste it into a Paint file or Word document. -
QuestionWhen I press CTRL + V in Paint, it is not pasting the copied printed screen (I have Windows 7). What can I do?
 Community AnswerTry to right click on the screen and a little box will pop up, then click Paste.
 -
QuestionCan print screen be saved as a JPG image?
 Community AnswerYes. After doing a screen print, just open Paint and select Paste to copy the image. Then it can be saved several different file types, including JPG.


-Step-55-Version-2.webp)


References
About This Article

1. Press PrntScrn or Alt+PrntScrn.
2. Open or create a document.
3. Paste the screenshot.