This article was co-authored by wikiHow Staff. Our trained team of editors and researchers validate articles for accuracy and comprehensiveness. wikiHow's Content Management Team carefully monitors the work from our editorial staff to ensure that each article is backed by trusted research and meets our high quality standards.
This article has been viewed 131,456 times.
Learn more...
This wikiHow teaches how to install and use TeamViewer to connect to a distant computer, such as your home computer while you're at work or school, as long as both computers are running the TeamViewer software.
Steps
Installing TeamViewer (Windows)
-
1Open a web browser. TeamViewer will need to be installed on both the computer you are accessing remotely and the computer you're using. The same program is installed on both.
-
2Visit the TeamViewer website.Advertisement
-
3Click the Download TeamViewer button. This will download the installer for Windows.
-
4Click the downloaded installer. You'll see this at the bottom of your browser window, or you can find it in your Downloads folder.
-
5Click the Basic installation option. This will install TeamViewer for either accepting remote connections or connecting remotely.
- Windows allows you to run TeamViewer without installing it, which can be useful if you're on a computer that you don't have administrative privileges for. Select Run only (one time use) as your installation option.
-
6Click Personal / Non-commercial use. This indicates that you're using TeamViewer for free home use.
-
7Click Finish.
-
8Click Next in the TeamViewer window that appears after installation.
-
9Enter a name and create a password for your computer. This is the name the computer will appear as in TeamViewer and the password will be required when connecting remotely.
- This password should be different than your Windows login password.
-
10Create a TeamViewer account (optional). After entering the computer name and creating a password, you'll be prompted to create an account. This is not required to use TeamViewer. If you want to skip this, click I don't want to create a TeamViewer account now and click Next.
-
11Write down the TeamViewer ID and Password. This number and password will be used to connect to this computer remotely.
-
12Click Finish. You can now start using the TeamViewer program to either accept connections from remote computers or connect to and control other remote computers.


Installing TeamViewer (Mac)
-
1Open a web browser. The process for installing TeamViewer is the same for a computer that you'll be accessing remotely or a computer that you're using to access another one. All computers involved in a TeamViewer connection use the same client.
-
2Visit the TeamViewer website.
-
3Click Download TeamViewer. This will begin downloading the TeamViewer installation file for Mac computers.
-
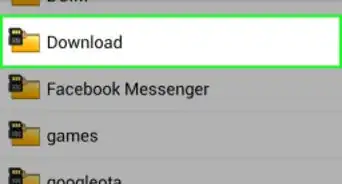
4Click the TeamViewer.dmg file in your Downloads list. You can find your Downloads list on the right end of your Dock.
-
5Double-click Install TeamViewer.
-
6Click Continue and then Continue.
-
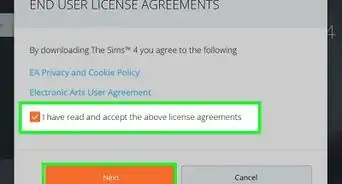
7Click Agree.
-
8Click Install. Teamviewer will install, which should just take a few moments. Enter your user password if prompted.
-
9Click Continue. If you're installing TeamViewer to connect to another computer, you can click Skip instead.
-
10Create a password. This password will need to be entered when you're connecting to this computer.
-
11Click Finish. You can now either connect to this computer from another computer with TeamViewer, or start using the TeamViewer program to connect to a remote computer.
-
12Note your ID and password. You'll see this in the TeamViewer window, and will need both to connect to this computer remotely.


Connecting to a TeamViewer Computer
-
1Install TeamViewer on the computer you're connecting from. Follow the steps for Windows or Mac to install the TeamViewer program on the computer you're currently using. The process is the same as if you were setting it up for a remote connection.
-
2Start TeamViewer on the computer you're connecting from.
-
3Enter the Partner ID for the remote computer into the Partner ID field. This will tell TeamViewer to connect to the remote computer you set up earlier.
-
4Click Connect to Partner.
-
5Type in the password. This is the password you created when setting up the remote computer. If you don't remember it, you can see it in the TeamViewer window on the remote computer.
-
6Control the computer remotely. Once you're connected, you'll be able to control the other computer from within your TeamViewer window. You'll be able to perform any actions just like you would if you were on the computer yourself.
-
7Click the File Transfer button to send files between computers. This will allow you to easily select files on your local computer to send to the remote computer, or vice versa.
-
8Click the Close button to end the session. This will stop the remote session and return you to your regular desktop.


Connecting to a TeamViewer Computer (iPhone and Android)
-
1Open the App Store or Play Store. Once you have TeamViewer configured on a remote computer, you can connect to and control it from your iPhone or Android device. The TeamViewer Remote Control app can be installed for free from the iPhone App Store or Google Play Store.
-
2Tap the Search tab or field.
-
3Type "teamviewer" into the Search field.
-
4Tap Get next to TeamViewer: Remote Control (iPhone). If you're using an iPhone, you'll need to tap the Get button before you can tap Install.
-
5Tap Install. This will begin installing TeamViewer.
-
6Tap Open once the app is installed. You can also find the TeamViewer app on your Home screen (iPhone) or in your app list (Android).
-
7Tap Next to skip through the tutorial. There are several tutorial screens before you can start using the app.
-
8Tap the TeamViewer ID field.
-
9Type the TeamViewer ID for the computer you want to connect to. This nine-digit ID is displayed on the remote computer's TeamViewer window.
-
10Tap Remote Control. The TeamViewer app will attempt to connect to the remote computer.
-
11Type the password. The password is visible on the remote computer directly beneath the TeamViewer ID.
-
12Review the instructions. You'll see a screen briefly outlining how to control your computer with the touch screen.
-
13Tap Continue. This will close the instructions screen.
-
14Tap and drag to move the cursor. Tapping and dragging the screen will move the mouse cursor around.
-
15Tap to click. This will perform a single mouse click. Tap twice rapidly to double-click.
-
16Tap and hold to right-click. This will open the right-click menu.
-
17Pinch to zoom in and out. Zooming in will help you see the screen, since your device's screen is likely much smaller than that of your computer.
-
18Tap the Keyboard button to open the controls. This will allow you to open your on-screen keyboard as well as access various shortcuts and configuration options.
-
19Tap the X button to end the session. After tapping Close to confirm, the connection with the remote computer will end.


Community Q&A
-
QuestionHow can Iinstall the Teamveiwer on a server for commercial use?
 Patrick AntalCommunity AnswerYou will need to purchase a commercial use license from Teamviewer. Install the version you wish to use on the server and activate using the license under options within Teamviewer.
 -
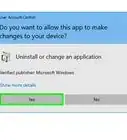
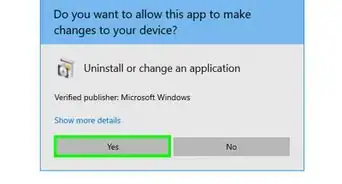
QuestionDo I accept when asked if I want the application to make changes to my PC?Patrick AntalCommunity AnswerIf you are looking to install the application, then yes. This will provide the installer with adequate admin privileges to install the software.
-
QuestionHow long is the password valid for?Patrick AntalCommunity AnswerThe quick use password provided by Teamviewer without a user account is only valid until the application has been closed. Once the application has been closed/reopened, it will generate a new quick use password.


About This Article

1. Go to https://www.teamviewer.com.
2. Download TeamViewer.
3. Run the installer file.
4. Select Basic Installation.
5. Select Personal/Non-commercial use.
6. Click Finish.
7. Click Next when installed.
8. Create a username and password.