This article was co-authored by wikiHow Staff. Our trained team of editors and researchers validate articles for accuracy and comprehensiveness. wikiHow's Content Management Team carefully monitors the work from our editorial staff to ensure that each article is backed by trusted research and meets our high quality standards.
The wikiHow Tech Team also followed the article's instructions and verified that they work.
This article has been viewed 535,264 times.
Learn more...
The 'Other' category of storage on an iPhone designates how much of the iPhone's used space is made up of important system files, settings preferences, saved memos, messages, and various other application files. While it is often impossible to completely get rid of the 'Other' category, following the suggestions in this guide can reduce the 'Other' category and free up some much needed space on an iPhone.
Steps
Deleting Safari Browsing Data
-
1Open Settings. It's a gray app that contains an image of gears (⚙️) and is typically found on your Home screen.
-
2Scroll down and tap Safari. It's next to a blue compass icon.Advertisement
-
3Scroll down and tap Clear History and Website Data. It's near the bottom of the menu.
-
4Tap Clear History and Data. Your stored website history and page data will be deleted from your device.


Deleting Chrome Browsing Data
-
1Open the Chrome app. It's a white app that contains a multicolored aperture icon.
- Chrome is Google's browser that you would have had to download from the App Store; it does not ship with your iPhone.
-
2Tap ⋮. It's in the upper-right corner of the screen.
-
3Tap Settings. It's near the bottom of the menu.
-
4Tap Privacy. It's in the "Advanced" section of the menu.
-
5Tap Clear Browsing Data. It's at the bottom of the menu.
-
6Tap the types of data you'd like to delete.
- Tap Browsing History to delete the history of sites you visited.
- Tap Cookies, Site Data to delete website information stored on your device.
- Tap Cached Images and Files to delete data stored on your device that allows Chrome to open websites more quickly.
- Tap Saved Passwords to delete passwords that Chrome has stored on your device.
- Tap Autofill Data to delete information such as addresses and phone numbers that Chrome uses to automatically fill in Web forms.
-
7Tap Clear Browsing Data. It's a red button just below the data types you selected.
-
8Tap Clear Browsing Data. The Chrome data you selected will now be deleted from your device.


Deleting Messages Data
-
1Open the Messages app. It's a green app with a white text bubble that's typically found on your home screen.
- If the app opens within a conversation, tap the "Back" arrow (<) in the upper-left corner of the screen.
-
2Tap Edit. It's in the upper-left corner of the screen.
-
3Tap the buttons next to conversations you want to delete. The buttons are on the left side of the screen and will turn blue as you select conversations.
- Conversations can use a lot of data, especially if they contain multiple messages with media like photos or videos.
-
4Tap Delete. It's in the lower-right corner. All of the selected conversations will be removed from your device.


Deleting Old and Junk Mail
-
1Open the Mail app. It's a blue app with a white, sealed envelope icon.
- If it doesn't open on the "Mailboxes" screen, tap Mailboxes in the upper-left corner of the screen.
-
2Tap Trash. It's next to a blue trash can icon.
-
3Tap Edit. It's in the upper-right corner of the screen.
-
4Tap Delete All. It's in the lower-right corner of the screen.
-
5Tap Delete All. All of the deleted emails from the Mail app, with all of their attachments, have now been deleted from your device.
-
6Tap Mailboxes. It's in the upper-left corner of the screen.
-
7Tap Junk. It's next to a blue dumpster icon that contains an "x."
-
8Tap Edit. It's in the upper-right corner of the screen.
-
9Tap Delete All. It's in the lower-right corner of the screen.
-
10Tap Delete All. All of the junk emails from the Mail app, with all of their attachments, have now been deleted from your device.
- If you use an alternative mail client, such as the Gmail app, go through the processes specific to the app to remove deleted and junk emails.


Deleting Voicemail
-
1Open the Phone app. It's a green app with a white telephone icon that's typically found on your home screen.
-
2Tap Voicemail. It's in the lower-right corner of the screen.
-
3Tap Edit. It's in the upper-right corner of the screen.
-
4Tap the buttons next to voice messages you want to delete. The buttons are on the left side of the screen and will turn blue as you select voicemail messages.
-
5Tap Delete. It's in the lower-right corner. All of the selected voice messages will be removed from your device.


Deleting and Reinstalling Apps
-
1Open Settings. It's a gray app with gears (⚙️) that's typically located on your home screen.
-
2Scroll down and tap General. It's near the top of the menu, next to a gear (⚙️) icon.
-
3Tap Storage & iCloud Usage. It's toward the bottom of the screen.
-
4Tap Manage Storage under the "Storage" section. This section is at the top of the page. Doing so will open a list of your device's apps in order from most to least space consumed.
-
5Scroll to an app and look at the number to the right of it. This number tells you how much device storage the app is using.
-
6Tap an app. Choose an app that you think is using too storage space.
-
7Tap Delete App. It's a red link below the app data.
-
8Tap Delete App. Doing so confirms that you want to delete the app and all its data.
- Repeat these steps for all apps that you think are using excessive amounts of storage.
-
9Open the App Store app. It's a blue app that contains a white "A" inside a white circle.
-
10Tap Updates. It's a rectangle icon that contains a downward-pointing arrow in the lower-right corner of the screen.
-
11Tap Purchased. It's at the top of the screen.
- If prompted, enter your Apple ID and/or password.
- If you have a Family Sharing membership, you may have to tap My Purchases at the top of the screen.
-
12Tap Not on This iPhone. It's in the upper-right. A list of all the apps that you've purchased with your Apple ID, but are not currently on your iPhone, will be displayed.
- Apps are listed in the order that you purchased them, with the most recent at the top.
-
13Tap the "download" icon. Find the apps you just deleted and tap the cloud icon with the downward-pointing arrow that's next to it them to reinstall them.
- The apps will reinstall without the extraneous data that was using the "Other" storage space on your iPhone.
- You can download multiple apps at the same time.


Performing System Restore and Backup
-
1Open Settings. It's a gray app with gears (⚙️) that's typically located on your home screen.
-
2Tap your Apple ID. It's the section at the top of the menu that contains your name and image if you've added one.
- If you are not signed in, tap Sign in to your iPhone, enter your Apple ID and password, then tap Sign In.
- If you are running an older version of iOS, you may not need to do this step.
-
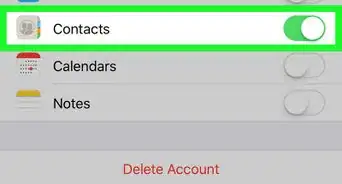
3Tap iCloud. It's in the second section of the menu.
-
4Scroll down and tap iCloud Backup. It's at the bottom of the "APPS USING ICLOUD" section.
- Slide iCloud Backup to the "On" (green) position, if it's not already.
-
5Tap Back Up Now. It's at the bottom of the screen. Wait until the backup is complete.
- You must be connected to a Wi-Fi network to back up your iPhone.
-
6Tap iCloud. It's in the upper-left corner of the screen. This will return you to the iCloud settings page.
-
7Tap Apple ID. It's in the upper-left corner of the screen. This will return you to your Apple ID settings page.
-
8Tap Settings. It's in the upper-left corner of the screen. This will return you to the main settings page.
-
9Scroll down and tap General. It's near the top of the menu, next to a gear (⚙️) icon.
-
10Scroll down and tap Reset. It's at the bottom of the menu.
-
11Tap Erase All Content and Settings. It's near the top of the menu.
-
12Enter your passcode. Enter the passcode you use to unlock your phone.
- If prompted, enter your "Restrictions" passcode.
-
13Tap Erase iPhone. Doing so will reset all settings, as well as erase the media and data on your iPhone.
-
14Wait for the iPhone to reset.
-
15Follow the on-screen prompts. The set-up assistant will guide you through the process.
-
16Tap Restore from iCloud Backup. Do so when prompted to choose how you'd like to set up your iPhone.
- Choose the backup with the latest date and time.
-
17Log in with your Apple ID. Your iPhone will begin downloading the backup from iCloud. After it's restored, your settings and apps will be reinstalled.


Community Q&A
-
QuestionHow do I delete everything out of iCloud, and off of my iPad, an iPhone?
 Community AnswerOn the iPhone and iPad, go to Settings > General > Reset > Erase all content and settings. Confirm that you want to delete everything and your device will function like it is new. To delete everything from iCloud, sign into iCloud.com. Select the information you would like to delete then click the trash can.
 -
QuestionWhat do I do if I’ve done all this but the "other" stuff is still is taking most of the data?
 MinoriteCommunity Answer"Other" is mostly cache and temporary files from apps (downloaded media in Spotify, Facebook, WhatsApp, Telegram, etc.) and iTunes logs. As cache and temperoray files are not included in the backup and were removed after the restore, in this case "Other" can be iCloud files syncing and reindexing after the restore. Just leave the phone charging overnight with a good WiFi connection.
Warnings
- Performing the system restore and backup method will erase all the data and personal settings from your iPhone. Make sure you have a recent backup of your iPhone in iTunes to avoid losing any personal data you want saved before performing the system restore and backup.⧼thumbs_response⧽
- Keep in mind that some cleanup apps are third-party apps that are not associated with or supported by Apple. Make sure that you download third-party apps from reputable websites and sources to avoid installing any corrupt or malicious applications to your iPhone or computer.⧼thumbs_response⧽


About This Article