Speed up your desktop or laptop with these expert tips
- Restart Your Computer |
- Close Unneeded Tabs |
- Turn Off Browser Extensions |
- Clear Your Browser Cache |
- Close Open Apps (Windows) |
- Close Open & Startup Apps (Mac) |
- Disable Unneeded Startup Apps (Windows) |
- Uninstall Programs (Windows) |
- Uninstall Programs (Mac) |
- Defragment Your Hard Drive |
- Empty the Recycle Bin (Windows) |
- Empty the Trash (Mac) |
- Use Disk Cleanup (Windows) |
- Use Disk Cleanup (Mac) |
- Move Your Computer |
- Reinstall Windows |
- Reinstall macOS |
- Clean Your Computer |
- Video |
- Q&A |
- Tips |
- Warnings
This article was co-authored by Gonzalo Martinez and by wikiHow staff writer, Kyle Smith. Gonzalo Martinez is the President of CleverTech, a tech repair business in San Jose, California founded in 2014. CleverTech LLC specializes in repairing Apple products. CleverTech pursues environmental responsibility by recycling aluminum, display assemblies, and the micro components on motherboards to reuse for future repairs. On average, they save 2 lbs - 3 lbs more electronic waste daily than the average computer repair store.
There are 9 references cited in this article, which can be found at the bottom of the page.
The wikiHow Tech Team also followed the article's instructions and verified that they work.
This article has been viewed 2,365,375 times.
Maybe it’s been a few months (or years) since you got your computer. It’s starting to not feel as quick. There are a few things you can try to make it run faster! This wikiHow guide shows you 16 ways to clean up a slow performing Windows or Mac computer. We’ll go over removing old files and programs, changing settings, physically cleaning your device, and more!
Things You Should Know
- Cool down your computer. Overheating can cause a device to run slower. Move it to a well-ventilated area and clean out the dust.
- Close tabs, extensions, programs, and processes to free up more RAM and speed up your computer.
- Clean up the disk to delete unnecessary files slowing down your computer.
Steps


Close Open Apps (Windows)
-
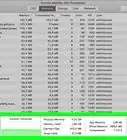
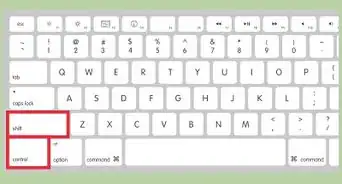
1Open the Task Manager on Windows 10 or Windows 11. To do this, right-click the Start menu and select Task Manager. You can also open it using the keyboard shortcut Ctrl + Shift + Esc.
-
2Click the Processes tab. If you're using Windows 11, you'll automatically see the Processes tab when you launch Task Manager. On Windows 10, click the Processes tab at the top of the window.
-
3Close a program if necessary. If you see any high memory usage apps which don't need to be running right now, right-click the app's name, then select End Task. Repeat until you've closed every app or program that you want to close.


Close Open & Startup Apps (Mac)
-
1
-
2Type in activity monitor. Doing so searches your Mac for the Activity Monitor program, which allows you to review and quite high-memory programs.EXPERT TIPGonzalo Martinez is the President of CleverTech, a tech repair business in San Jose, California founded in 2014. CleverTech LLC specializes in repairing Apple products. CleverTech pursues environmental responsibility by recycling aluminum, display assemblies, and the micro components on motherboards to reuse for future repairs. On average, they save 2 lbs - 3 lbs more electronic waste daily than the average computer repair store.Computer & Phone Repair Specialist
 Gonzalo Martinez
Computer & Phone Repair SpecialistUse “Activity Monitor” to track your running applications. Gonzalo Martinez, an Apple repair specialist, says: "Activity Monitor is a built-in application on your Mac that shows all the running applications. If something is running in the background that you aren’t aware of, or if your web browsers are taking up processing speed, you can force quit the applications.”
-
3Double-click Activity Monitor. This option is in the Spotlight results. Doing so opens Activity Monitor.
-
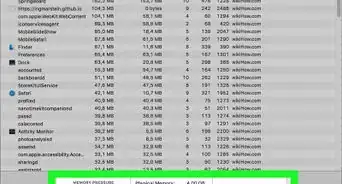
4Click the CPU tab. It's at the top of the Activity Monitor window.
-
5Select a program to quit. Click a high-memory program to do so.
- Make sure you don't select a program which you're currently using (e.g., your browser).
-
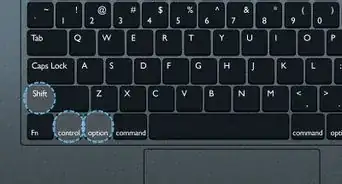
6Click X. It's in the upper-left side of the window.
-
7Click Quit or Force Quit when prompted. Clicking Quit will allow the program to attempt to create a recovery save if you have work open, while clicking Force Quit will immediately close the program in question.
-
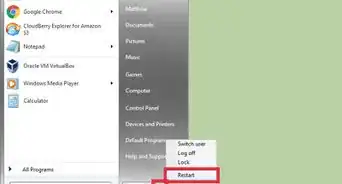
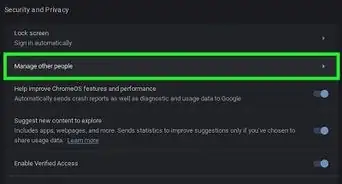
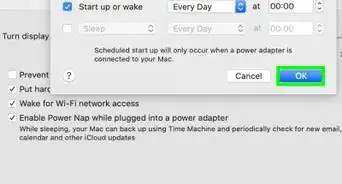
8Disable startup apps. If apps are set to start up automatically, you may notice poor performance. The steps to disable startup apps are a little different depending on your version of macOS:
-
Ventura:
- Open the Apple menu and select System Settings.
- Click General.
- Click Login Items.
- Select an app that you don't want to launch automatically and click the - symbol.[2]
-
Monterey and earlier:
- Open the Apple menu and select System Preferences.
- Users & Groups.
- Select your name.
- Click Login Items.
- Uncheck any item's box on this page to disable the item at startup. You may have to click the lock icon in the bottom-left corner of the page and enter your password before you can edit this menu.
-
Ventura:


Uninstall Programs (Windows)
-
1Uninstall unnecessary programs. If you have any applications or programs which you don't want to keep, uninstalling them from your PC will clear up some space and help your computer run faster overall.
-
2Open Settings. You can do this by opening the Start menu and clicking the gear icon.[3]
-
3Go to Apps.
-
4Select Apps & features.
-
5Click the program you want to uninstall.
-
6Click Uninstall.
- This is in the More menu button (three vertical dots) in Windows 11.


Uninstall Programs (Mac)
-
1Uninstall unnecessary programs. If you have any applications or programs which you don't want to keep, uninstalling them from your Mac will clear up some space and help your computer run faster overall.
-
2Open a new Finder window.[4]
-
3Click Applications. This is listed in the sidebar of the Finder window.
-
4Move the program to the Trash. Alternatively, you can select the app and use File > Move to Trash in the menu bar.
-
5Enter the admin account info (if prompted). You may be asked for your Mac’s admin account username and password to move the program to the trash.
-
6Empty the trash. This will completely delete the app from your computer.
- To empty the trash, go to Finder > Empty Trash in the menu bar.


Defragment Your Hard Drive
-
1Understand what defragmentation does. Defragmenting a hard drive is only necessary on heavily used Windows computers. As the hard drive ages, pieces of data become scattered throughout it, thus increasing the amount of time it takes for that data to be retrieved. Defragmenting the hard drive places all of the "fragments" back in the same general part of the hard drive.
- Note: This method only applies to Windows computers.
- If your computer uses a solid-state drive (SSD), you should never defragment it.
- If your computer's hard drive is almost full, defragmenting it may not have much of an effect.
-
2
-
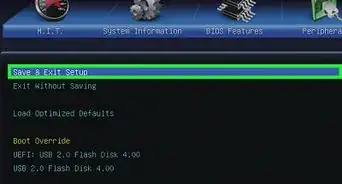
3Type in defragment and optimize drives. This will search for the Disk Defrag app.
-
4Click Defragment and Optimize Drives. It's at the top of the Start window.
-
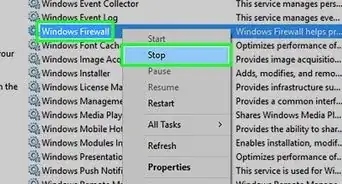
5Select your hard drive. Click the hard drive that you want to optimize. On most PCs, the main hard drive's name is OS (C:).
-
6Click Optimize. You'll find it on the right side of the window. Disk Defrag will begin running.
-
7Allow Disk Defrag to run. It may take several hours for your computer's disk to finish defragmenting, so just make sure that the computer is plugged in and free of external interruptions.


Use Disk Cleanup (Windows)
-
1Open Disk Cleanup on your PC. The Windows Disk Cleanup tool can delete unneeded files that are taking up space on your computer. To open Disk Cleanup:
- Press Windows key + S to activate the search bar.
- Type cleanup.
- Click Disk Cleanup in the search results.
-
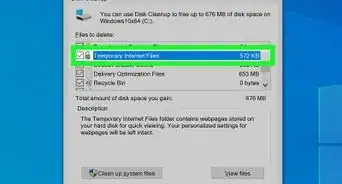
2Click Clean up system files. This option is in the bottom-left corner of the Disk Cleanup window. Doing so allows Disk Cleanup to find even more files to delete.
-
3Check every box on the page. Every item on this page can be deleted in order to free up space on your computer.
- You will have to scroll down to see all available boxes in the main window.
-
4Click OK. It's at the bottom of the window.
-
5Click Delete Files when prompted. Disk Cleanup will begin deleting your computer's unnecessary files. This can take a while, so be patient.


Use Disk Cleanup (Mac)
-
1Open Disk Cleanup on your Mac. The Disk Cleanup tool on your Mac is a great way to manage your storage and free up space. To open the tool:
-
macOS Ventura:
- Click the Apple menu.
- Click System Settings.
- Click General.
- Click Storage.[6]
-
macOS Monterey and earlier:
- Click the Apple menu.
- Click About This Mac.
- Click Storage.
-
macOS Ventura:
-
2Click Manage (Monterey and earlier only). It's in the upper-right side of the window. Doing so opens a new window with storage options.
-
3Click Optimize. Doing so will prompt your Mac to get rid of any temporary or unnecessary files, as well as move your watched movies and TV shows into iCloud.[7]


Community Q&A
-
QuestionHow can I improve my download speed?
 TheScout GirlCommunity AnswerYou can get a better Internet plan. Depending on where you live, they will vary on sizes and prices. You should check your internet speed first.
 -
QuestionWhat can I do when my Windows 10 upgrade stays on 0%
 Community AnswerUnplug your internet from the PC, restart and try again. Windows 10 upgrade tool seems to have problems with connection while upgrading.
 -
QuestionWill defragging a computer delete files?
 Community AnswerNo, it will not. It will rearrange the data of which the files are comprised to different parts of the hard drive to make it faster.
Warnings
- It's inadvisable to have more than one antivirus program on your computer at a time. Since Windows comes with the Windows Defender program pre-installed, you shouldn't have to install an antivirus program on a PC.⧼thumbs_response⧽
- Never defragment your computer if you have a Solid State Drive. This could potentially destroy your files and permanently slow down the drive.⧼thumbs_response⧽


References
- ↑ https://support.google.com/chromebook/answer/2589434?hl=en
- ↑ https://support.apple.com/guide/mac-help/open-items-automatically-when-you-log-in-mh15189/mac
- ↑ https://support.microsoft.com/en-us/windows/uninstall-or-remove-apps-and-programs-in-windows-4b55f974-2cc6-2d2b-d092-5905080eaf98#ID0EBD=Windows_11
- ↑ https://support.apple.com/en-us/HT202235
- ↑ https://support.apple.com/guide/mac-help/delete-files-and-folders-on-mac-mchlp1093/mac
- ↑ https://support.apple.com/en-us/HT206996
- ↑ https://support.apple.com/guide/system-information/optimize-storage-space-sysp4ee93ca4/11.0/mac/12.0
- ↑ https://support.microsoft.com/en-us/windows/give-your-pc-a-fresh-start-0ef73740-b927-549b-b7c9-e6f2b48d275e
- ↑ https://support.apple.com/en-us/HT204904
About This Article
1. Open Windows Disk Cleanup.
2. Click Clean up system files.
3. Select all categories.
4. Click OK.
5. Click Delete Files.
6. Uninstall unnecessary programs.
7. Remove startup programs.
8. Empty the Recycle Bin.