This article was co-authored by wikiHow staff writer, Nicole Levine, MFA. Nicole Levine is a Technology Writer and Editor for wikiHow. She has more than 20 years of experience creating technical documentation and leading support teams at major web hosting and software companies. Nicole also holds an MFA in Creative Writing from Portland State University and teaches composition, fiction-writing, and zine-making at various institutions.
The wikiHow Tech Team also followed the article's instructions and verified that they work.
This article has been viewed 641,029 times.
Learn more...
This wikiHow teaches you how to defragment a hard drive in any version of Windows.
Steps
Windows 10
-
1
-
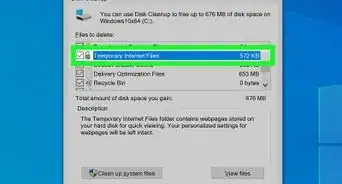
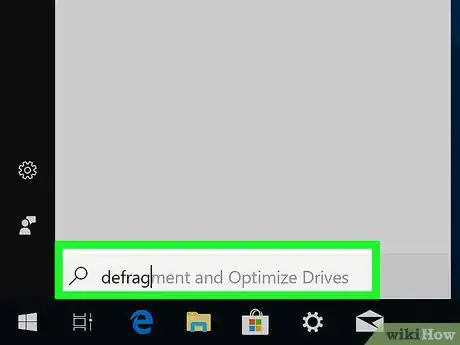
2Click Defragment and Optimize Drives. A list of drives connected to your computer will appear.Advertisement
-
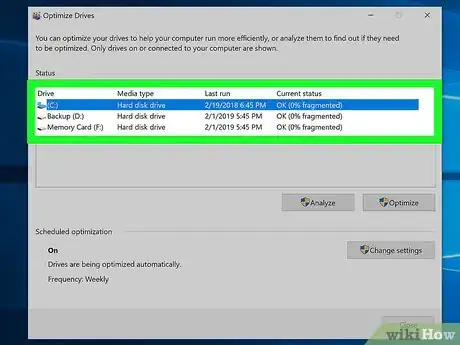
3Select the drive you want to defragment. If you only have one hard drive, it'll already be selected.
-
4Check the automatic defragmenting schedule. Windows 10 is set up to defragment your drive automatically on a certain schedule. You'll see the date the drive was last defragmented under "Last run" near the top of the window.
- If defragmenting is set to run automatically, you'll see the word "On" under "Scheduled optimization" at the bottom of the window. You'll also see the frequency (e.g., "Weekly") listed below.
- If this feature is turned off but you'd like to turn it on, click Change settings and check the "Run on a schedule (recommended)" box. Choose a frequency from the menu, then click OK.
-
5Click Optimize if you still want to defragment the hard drive. You'll see the progress under the "Current status" column. Once defragmenting is complete, today's date and time will replace the previous "Last run" date.
- The amount of time it takes to defragment the drive depends on the size of your drive and the amount of fragmentation. While you can continue working during the process, your PC may behave slowly until optimization is complete.
Windows 8
-
1Hover the mouse over the bottom-right corner of the screen. This opens the Charms bar.[1]
-
2
-
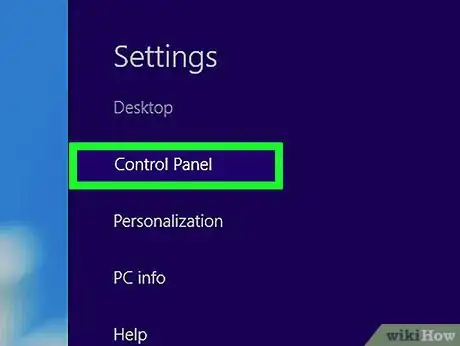
3Click Control Panel. It's at the top of the menu.
-
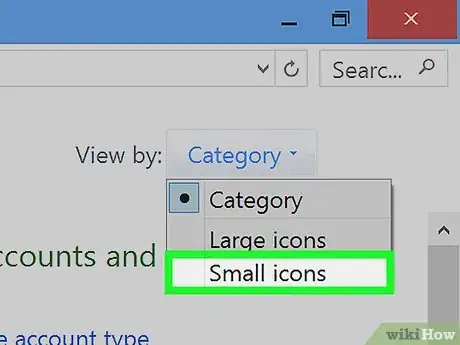
4Select Small icons from the "View by" menu. It's at the top-right corner of the window.
-
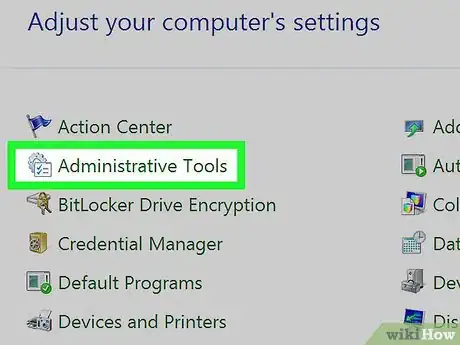
5Double-click Administrative Tools. This opens a list of tools.
-
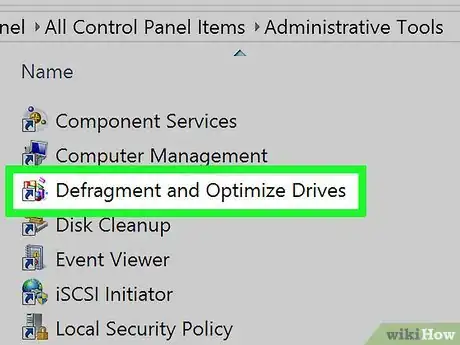
6Double-click Defragment and Optimize Drives. This opens the "Optimize Drives" window.
-
7Select the drive you want to defragment. If you only have one hard drive, it'll already be selected.
-
8Check the automatic defragmenting schedule. Windows 8 is set up to defragment your drive automatically on a certain schedule. You'll see the date the drive was last defragmented under "Last run" near the top of the window.
- If defragmenting is set to run automatically, you'll see the word "On" under "Scheduled optimization" at the bottom of the window. You'll also see the frequency (e.g., "Weekly") listed below.
- If this feature is turned off but you'd like to turn it on, click Change settings and check the "Run on a schedule (recommended)" box. Choose a frequency from the menu, then click OK.
-
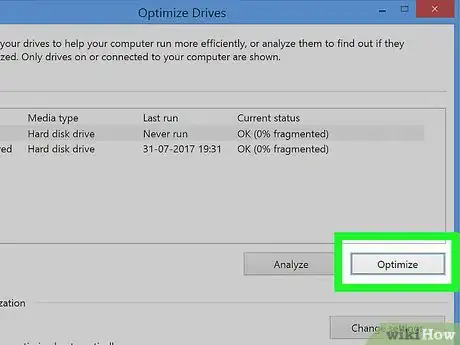
9Click Optimize if you still want to defragment the hard drive. You'll see the progress under the "Current status" column. Once defragmenting is complete, today's date and time will replace the previous "Last run" date.
- The amount of time it takes to defragment the drive depends on the size of your drive and the amount of fragmentation. While you can continue working during the process, your PC may behave slowly until optimization is complete.
Windows 7
-
1Click the Start menu. It's usually at the bottom-left corner of the screen.
-
2Click Control Panel. A window containing several icons will appear.
-
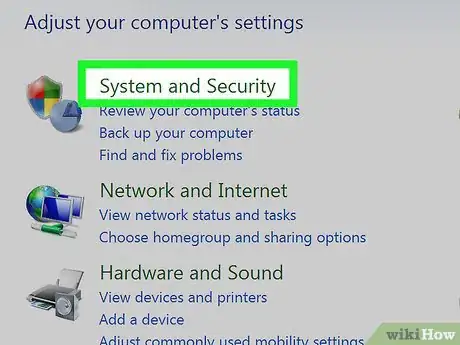
3Click System and Security. Additional tools will expand.
-
4Click Defragment your hard drive. It's under "Administrative Tools." This opens the "Disk Defragmenter" window.
-
5Select a drive to defragment. If you only have one hard drive, it will already be selected.
-
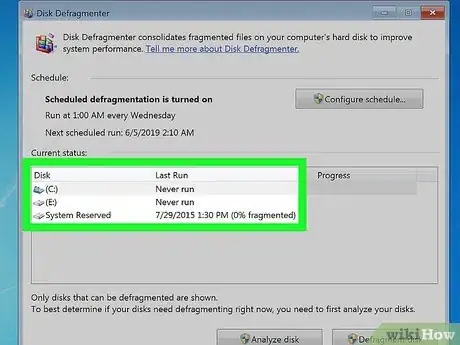
6Check the automatic defragmenting schedule. Windows 7 is set up to defragment your drive automatically on a certain schedule.[2] You can update this options as you see fit.
- The date of the last defragmentation appears in the "Last Run" column next to the drive's name.
- If defragmenting is set to run automatically, you'll see "Scheduled defragmentation is turned on" under "Schedule." You'll also see the date of the next scheduled defrag next to "Next scheduled run."
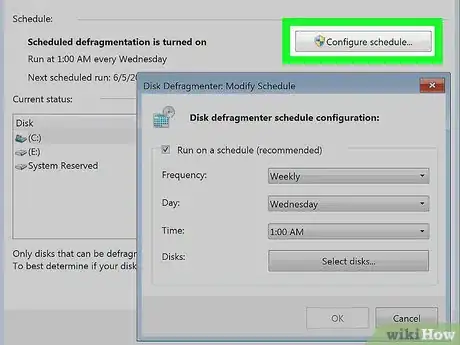
- To change your automatic defragmentation schedule, click the Configure schedule button, then make your selections.
-
7Click Analyze to see if it's necessary to defragment. If the drive is not fragmented, there's no reason to run the tool. If the drive is fragmented, you'll see a message telling you to defragment.
-
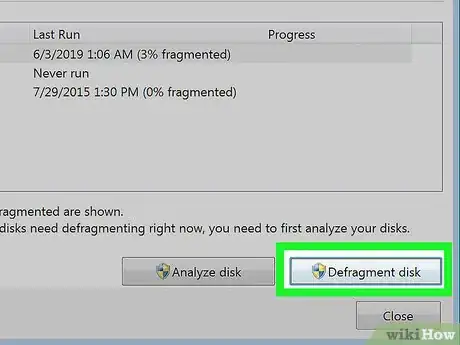
8Click Defragment disk. It's one of the buttons near the bottom-right corner of the window. The defragmentation process will begin.
- The amount of time it takes to defragment depends on the size of your drive and the amount of fragmentation. While you can continue working during the process, your PC may behave slowly until optimization is complete.
- If you need to do work once the defragmentation has begun and you cannot tolerate the poor performance, you can click Pause or Stop on the tool. The advantage of Pause is that the tool will continue where it left off when it resumes—if you use Stop, you'll have to start from scratch.
Windows Vista
-
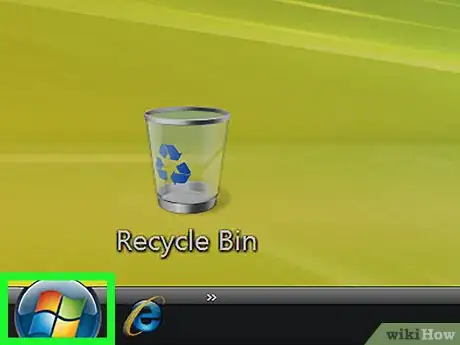
1Click the Start menu. It's usually at the bottom-left corner of the screen.
-
2Click Control Panel.
-
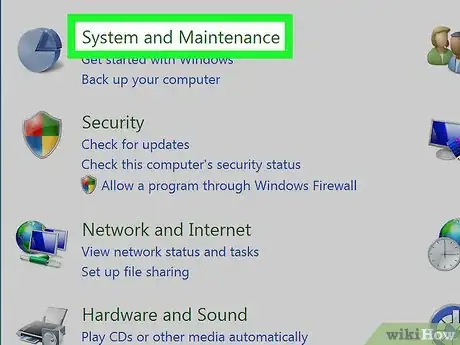
3Click System and Maintenance. A list of tools will appear.
-
4Click Defragment Your Hard Drive. It's under "Administrative Tools." This opens the "Disk Defragmenter" window.
- You may have to click Continue to open the tool.[3]
-
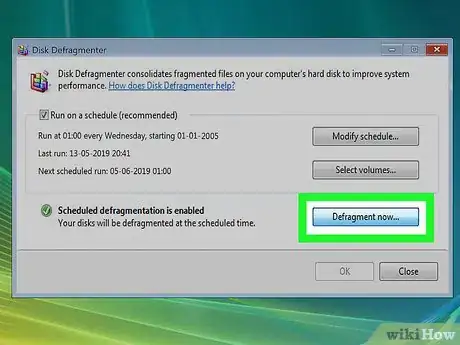
5Check the schedule. If Windows is set to defragment your drive(s) automatically, you'll see a check mark next to "Run on a schedule (recommended)." You'll also when the drive is scheduled to defragment and the last date the process occurred.
- If this option is not turned on, check the box to turn it on now.
- To schedule defragmentation for a different time, click Modify schedule, then make your selections.[4]
-
6Click Defragment now. It's the third button. A list of your drives will appear.
-
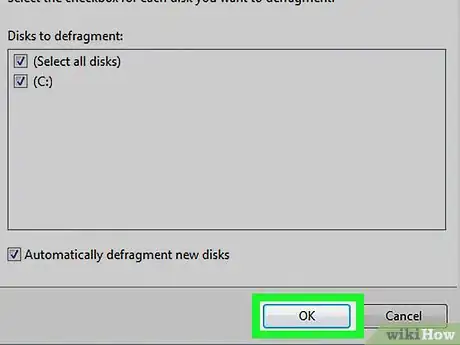
7Select the drive you want to defragment. If you have more than one drive, you can select them all if you wish—just check the "Select all disks" option at the top.
-
8Click OK. Windows will now scan and defragment the selected drive(s). The progress will appear at the bottom-left corner of the window.
- The amount of time it takes to defragment depends on the size of your drive and the amount of fragmentation. While you can continue working during the process, your PC may behave slowly until optimization is complete.
- If you need to do work once the defragmentation has begun and you cannot tolerate the poor performance, you can click Cancel defragmentation.
Windows XP
-
1Click the Start menu. It's usually at the bottom-left corner of the screen.
-
2Click Programs. A list of programs and folders will appear.
-
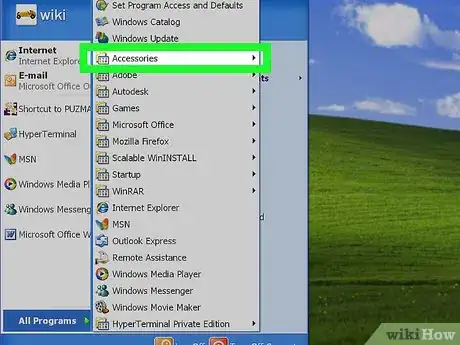
3Click Accessories.
-
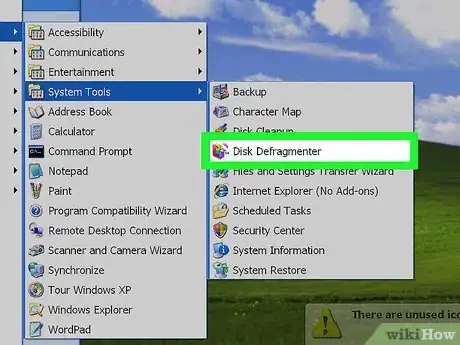
4Click System Tools.
-
5Click Disk Defragmenter. This launches the "Disk Defragmenter" window.
-
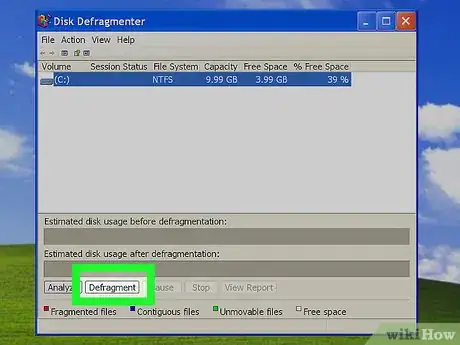
6Select the drive you want to defragment and click Analyze. Windows will now check the drive to see if it's necessary to defragment. When the analysis is complete, you'll see a pop-up message telling you whether the drive should be defragmented.
-
7Click Defragment if it's recommended to do so. If you see a message that says the drive doesn't need to be defragmented, you can close the tool. If the pop-up says "You should defragment this volume," this button will start the process.[5]
- To see a report that shows you more about the fragmentation, click View Report. After checking out the details, click Defragment to begin.
- The amount of time it takes to defragment depends on the size of your drive and the amount of fragmentation. While you can continue working during the process, your PC may behave slowly until optimization is complete.
- If you need to do work once the defragmentation has begun and you cannot tolerate the poor performance, you can click Pause to stop it briefly, or Cancel to stop it indefinitely. If you select Pause, you can restart the process from where it left off.
Community Q&A
-
QuestionShould my computer be turned on in order to defragment?
 Community AnswerThe computer needs to be turned on, because it is a solely power dependent operation. Whenever you boot up your computer, the system software automatically runs the process until you turn it off manually.
Warnings
- This process impacts other users sharing your disk volumes.⧼thumbs_response⧽
- Do not defragment a solid state drive (SSD). They do not need to be defragmented, and defragmenting them will only wear them out faster. Instead, use a TRIM command which has its own purpose.⧼thumbs_response⧽
References
- ↑ http://www.tomsguide.com/faq/id-2322423/defrag-windows-laptop.html
- ↑ https://www.dummies.com/computers/pcs/how-to-defragment-a-hard-drive-on-a-windows-7-pc/
- ↑ https://www.dummies.com/computers/operating-systems/windows-xp-vista/how-to-defragment-a-hard-drive-in-windows-vista/
- ↑ https://www.youtube.com/watch?v=7z5of9Qbzsk
- ↑ https://www.youtube.com/watch?v=5KEK5qBKNsU
About This Article
1. Type "defrag" into the search bar.
2. Click Defragment and Optimize Drives.
3. Select a drive.
4. Click Optimize.




















-Step-18.webp)
