X
This article was co-authored by wikiHow Staff. Our trained team of editors and researchers validate articles for accuracy and comprehensiveness. wikiHow's Content Management Team carefully monitors the work from our editorial staff to ensure that each article is backed by trusted research and meets our high quality standards.
This article has been viewed 203,738 times.
Learn more...
You can set your Mac's desktop background to any image saved to a common image format. This only takes a second from Finder, Safari, or Photos. Use System Preferences instead if you want more control over the display.
Steps
Method 1
Method 1 of 4:
Quick and Easy Desktop Background
-
1Right click the image file. This is the fastest way to set the background. Just locate the image in Finder and right-click the folder.
- On a one-button mouse, hold down Control and click to "right click."
-
2Set Desktop Picture. Select this option at the bottom of the right-click drop-down menu. Your desktop should change automatically, though it may take a second for a high-resolution image.Advertisement
-
3Set a picture from Safari. If you see an image you like while browsing in Safari, right-click it and choose Set Desktop Picture.[1]
-
4View more options. If you want to browse all images on your computer, including default desktop backgrounds, continue on to the System Preferences section. If you want to tweak the appearance of your wallpaper, skip down to the display options section below.


Advertisement
Method 2
Method 2 of 4:
Using System Preferences
-
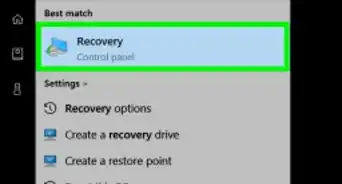
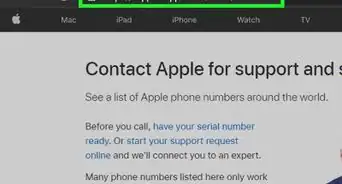
1Open System Preferences. Click the apple icon in the top menu bar and select System Preferences. You can also access System Preferences from the Applications folder.
-
2Select Desktop & Screen Saver. This is located in the first row.
- If this takes you to Screen Saver options, click the Desktop tab before you continue.
-
3Choose a folder from the left pane. The folders under the word "Apple" contain images that came with your Mac. Click a folder, and the images inside it will appear in the right pane. You may also see other categories besides Apple, including the "Photos" or "iPhoto" category that contains the photos in that application.
- If you don't see your photos, keep reading to find out how to add them.
-
4Select an image. Once you see an image you like, click it in the right pane. Your desktop should change immediately.
- If you don't like the positioning or size of your image, read about display options below.
-
5Add a folder to the list. Click the small + icon just below the left pane. In the pop up window, select a folder that contains images. This will add that folder to the left pane.
- It's not always easy to find your iPhoto or Photos folder. Use the method below if you're having trouble.
-
6Troubleshoot missing photos. If the picture you're looking for does not appear on the list, save it to a different image format in the same folder. You may need to separate photos with different file formats into separate folders.
- To change formats, open the image in Preview or another image viewing program. Use File → Save As and select JPEG, PICT, TIFF, or PNG.


Advertisement
Method 3
Method 3 of 4:
Choosing a Background from Your Photo Library
-
1Open your photo application. This method describes the process for Photos and iPhoto.[2] Other photo applications may not have this option.
- This process has been confirmed for iPhoto 9.5 and later. Older versions of iPhoto may have a different user interface.
-
2Select the photo. This photo must be saved to your computer, not stored in an iCloud library or on a camera. You can drag it to your desktop to save it.
- On some versions of the application, you may select multiple photos, or an entire album. This will cause your desktop to cycle through all selected images.
-
3Make it your desktop using the Share button. Click the Share button in the top right corner. (This looks like a box with a vertical arrow.) Select "Set Desktop Picture."
- Continue on to display options if you'd like to tweak how the image fits your screen.
-
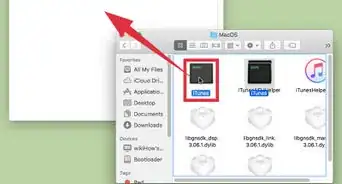
4Access the original file. Some users prefer to move all their desktop pictures to one folder, and manage them from System Preferences. You can "drag and drop" the photo to your desktop to make a copy, but this may lower the quality. Try this instead:


Advertisement
Method 4
Method 4 of 4:
Display Options
-
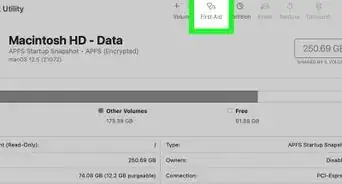
1Open the Desktop preferences screen. Open System Preferences and select Desktop & Screensaver, followed by the Desktop tab.
-
2Alter how the image fits the screen. The drop-down menu above the image pane sets the position of the image on the screen. Here's how each option works:
- Fill screen: Enlarges photo until screen is covered. This will cut off part of the photo if its size ratio is different from your screen.
- Fit to screen: Enlarges photo to fill the height of the screen. Narrow photos will have black borders on either side. Wide photos will have the sides cut off.
- Stretch to fill screen: Distorts photo to fill entire screen with no cut offs.
- Center: Places photo in center of screen surrounded by a solid color.
- Tile: Repeats image in grid to fill screen. In OS 10.7 or later, you can only choose images with resolution lower than your screen.[5] Shrink large images if you want to tile them.
- If you choose an option that doesn't fill the screen, a button will appear to the right of the drop-down menu. Click this to change the color of the border.
-
3Turn your desktop into a slideshow. Under the image pane, check "Change picture" to cycle between all images in the selected folder. Change how often the picture changes with the drop-down menu.
- By default, this will cycle in the order the images are placed in the folder. Check "Random order" to change this.
-
4Change the menu bar appearance. Check "Translucent menu bar" if you want the background visible "behind" the top menu bar. Uncheck it if you prefer an opaque bar.
- This option is not available for all computers.


Advertisement
Community Q&A
-
QuestionI seem to have slid my wallpaper back to an earlier choice. How do I get my current choice back?
 Community AnswerGo to the "Apple" logo on the top of your screen. From there, go to "System Preferences." From there, go to "Desktop and Screen Saver," and choose any desktop wallpaper you want.
 -
QuestionEvery time I restart my computer, the background returns to the default setting. How can I make my changes stick?
 Community AnswerTry turning off automatic login in System Preferences (through Users & Groups or Account, depending on your OS X version). You may need to click the lock and enter an admin password first. If this doesn't fix the problem, post on the apple support forums and someone will guide you through some more advanced solutions.
Advertisement


References
- ↑ http://osxdaily.com/2010/04/18/how-to-change-the-desktop-background-picture-in-mac-os/
- ↑ http://www.imore.com/how-set-your-desktop-picture-photos-os-x
- ↑ http://www.macworld.com/article/2974149/software-photography/how-to-find-photos-image-files-in-the-finder.html
- ↑ https://discussions.apple.com/docs/DOC-4491
- ↑ http://osxdaily.com/2011/10/26/how-to-tile-desktop-background-wallpaper-in-mac-os-x-lion/
About This Article

wikiHow Staff
wikiHow Staff Writer
This article was co-authored by wikiHow Staff. Our trained team of editors and researchers validate articles for accuracy and comprehensiveness. wikiHow's Content Management Team carefully monitors the work from our editorial staff to ensure that each article is backed by trusted research and meets our high quality standards. This article has been viewed 203,738 times.
How helpful is this?
Co-authors: 9
Updated: November 24, 2020
Views: 203,738
Categories: Mac
Advertisement