This article was co-authored by Mitch Harris. Mitch Harris is a Consumer Technology Expert based in the San Francisco Bay Area. Mitch runs his own IT Consulting company called Mitch the Geek, helping individuals and businesses with home office technology, data security, remote support, and cybersecurity compliance. Mitch earned a BS in Psychology, English, and Physics and graduated Cum Laude from Northern Arizona University.
The wikiHow Tech Team also followed the article's instructions and verified that they work.
This article has been viewed 505,243 times.
The profile picture on your Macintosh (Mac) computer is also known as your user picture. It displays when you first log in to your Mac account, and when you use applications such as iChat and Address Book. Although your profile picture is typically chosen when you initially set up your Mac computer, you can change your profile picture at any time through your System Preferences menu.
Steps
Accessing the Profile Picture for a User
-
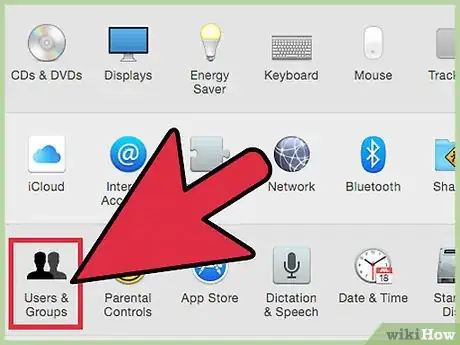
1Open the Apple Menu. Click “System Preferences”, then click “Users & Groups”.[1]
-
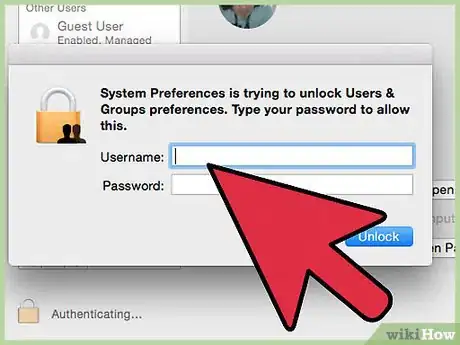
2Log in as an administrator. You will have to click the padlock icon to unlock this first, and enter in an administrator name and password.Advertisement
-
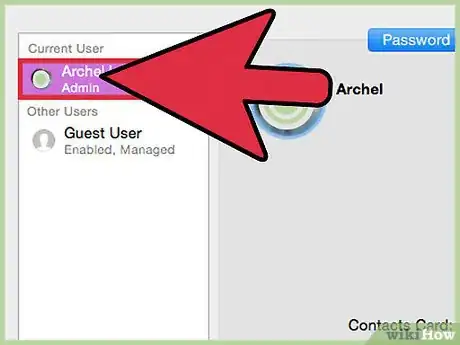
3Select the user account to change. Click the picture. This will open a menu to allow you to choose your image source.[2]
- Alternatively you can now simply drag and drop the picture onto the user account.
Selecting an Image Source
-
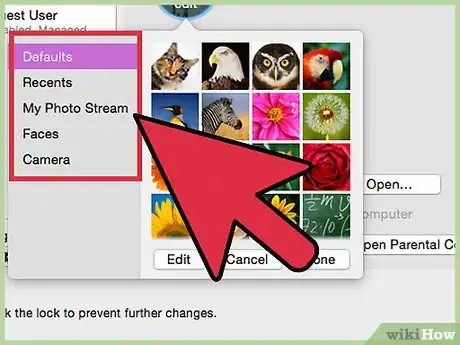
1Select a Category for the image. Options include “Defaults” (pictures that were included with OS X), “Recents” (recently used user pictures), and “Linked” (pictures from your contacts). You can also select “Faces” to have OS X automatically detect and extract faces from your saved images. Select “iCloud Photos” to use a picture you’ve uploaded to iCloud. If you want to use a photo you take right then in front of your computer, see below.
- You’ll need to turn on the iCloud Photo Library before you can use it as a source of profile pictures. Open the Apple Menu, click “System Preferences”, then “iCloud”, then “Preferences” (next to “Photos”). Select “iCloud Photo Library”.
-
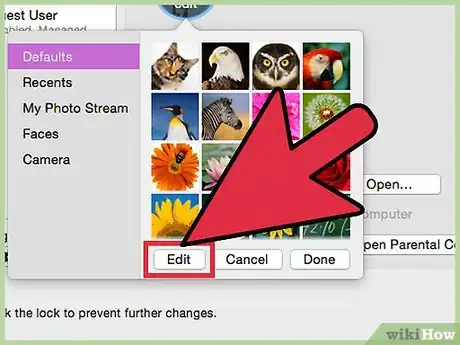
2Click “Edit” on the button beneath the selection of images. This will allow you to zoom in on parts of the image and crop the final profile image.
-
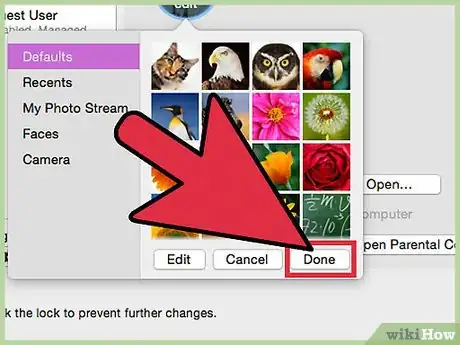
3Click the photo you want to use, then click “Done”. The profile picture will change for the user you selected.[3]
Using a Picture Directly From the Webcam
-
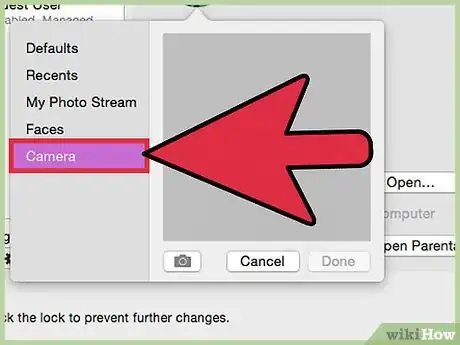
1Click “Camera”. It is on the menu that appears after you click the user picture, along with the other options for image sources.
-
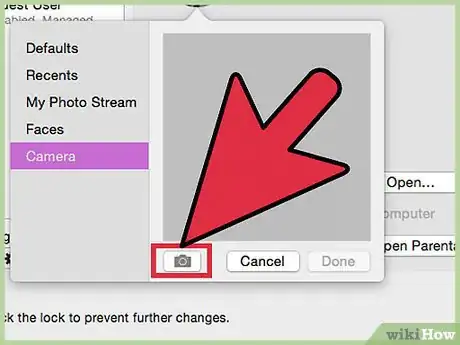
2Click the camera button that appears. Your computer’s installed camera will take a photo after a three-second delay.
-
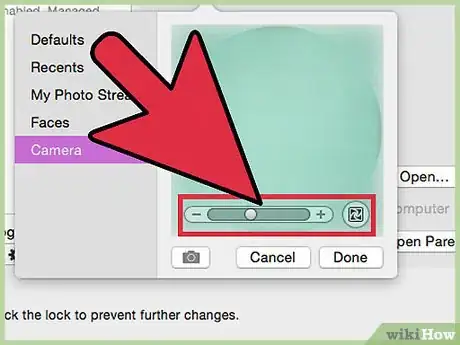
3Click “Edit” on the button beneath your image. Crop the image as desired.
-
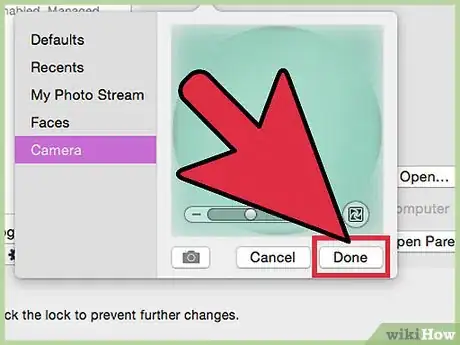
4Click “Done”. The profile picture will change for the user you selected.
Community Q&A
-
QuestionWhen I click the photos, it says 'no photos found', but I do have photos. What do I do?
 Ganesh KarkiCommunity AnswerSimply drag and drop the picture onto the user account profile picture directly.
 -
QuestionHow do I upload a downloaded (from browser) photo to my login picture on Mac?
 Community AnswerDrag the photo from your desktop into Photos. Then, when changing your photo, you can select the downloaded image.
 -
QuestionWhen I tried to drag the photo from my desktop it didn't work. What can I do?
 Community AnswerYou need to go to 'System Preferences'. Then, you need to go to 'Users and Groups'. Once you're there, click on your profile and the image. A small text would pop up in the image saying 'edit', then you can click and change your profile picture.
