This article was co-authored by wikiHow Staff. Our trained team of editors and researchers validate articles for accuracy and comprehensiveness. wikiHow's Content Management Team carefully monitors the work from our editorial staff to ensure that each article is backed by trusted research and meets our high quality standards.
This article has been viewed 83,405 times.
Learn more...
Proxy web sites are commonly used to access blocked web sites or to browse the Internet anonymously for various security reasons. Unfortunately, these websites can attract potential security threats, such as viruses, that can travel through an unprotected network. You can easily counter proxies by upgrading your security features and blocking any related websites.
Steps
Using Windows 10
-
1Open File Explorer. On the taskbar at the bottom of the screen, click the icon that looks like a folder. This folder is known as the “File Explorer”. File Explorer is a folder that shows your most frequently visited folders and most recent files. After clicking File Explorer, a new window will open on your screen. In the left sidebar, there is a list of destinations available on your computer.
-
2Click This PC. This PC is designed to easily access user related folders (such as My Documents), currently connected devices, and your computer's storage device, most commonly a hard drive or a solid-state drive.Advertisement
-
3Click on "Local Disk (C:)". Located under Devices and drives, this drive allows access to your computer's data and system folders.
-
4Click the Windows folder.
- Scroll down to the bottom.
- Double-click the folder named “Windows”.
-
5Open System32. System32 is a folder that contains important data to keep Windows and all programs running.
-
6Open the drivers folder. The drivers folder delves deeper into your computer's hard drive, allowing access to data to various programs.
-
7Open the etc folder. The etc folder keeps your system's configuration files in one neat spot. Double-click this folder to open it.
-
8Edit the hosts file. In order to create your blacklist, you will need to edit the hosts file with the URLs of the sites you want blocked.
- Right click “hosts”.
- In the menu that opens, click “Open With…” (or “Open with another program”).
- A new menu called “How do you want to open this file?” will open.
- Select “Notepad”.
-
9Scroll down to the bottom of the text file. At the bottom of the file, you’ll have space to type in.
- If there isn't any space to type by default, click at the end your document and hit your Enter button two or three times to create space.
-
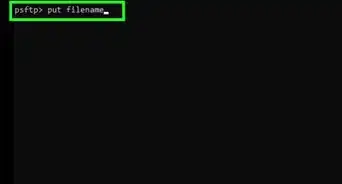
10Type “127.0.0.1” then press the Tab key. 127.0.0.1 refers to your computer's local IP address. Any website that tries to connect to your computer will access partially through this localhost.
- Alternatively, you can type a single space instead of pressing Tab.
-
11Add the URL of the website you would like to block. For example, if you want to block Yahoo!, type www.yahoo.com.
- Entering variants of the websites will help ensure that they're blocked, like yahoo.com or m.yahoo.com
-
12Save your changes. Saving your file will allow the new block to take effect. To save your file:
- Click “File”.
- In the dropdown menu, click “Save”.
-
13Test to make sure the website is blocked. You'll want to make sure the URLs you entered are actually blocked.
- Open a browser of your choice.
- In the URL box, type the website that you've blocked in your hosts file. Type them exactly as you've entered them in the original file.
-
14You're finished! If your website is successfully blocked, you'll see an Unable to Connect page.
- If you're still able to access the website, either copy from the browser and paste it into your hosts file.
- Be sure to save the hosts file after making any changes.
- If there is web server software running on your computer, you may connect to your local web server rather than seeing a "refused to connect" page.


Using Mac
-
1Open Finder. Finder allows you to access your user files and will open to the Documents folder by default.
-
2Open your Utilities folder. Click Applications in the left sidebar and scroll down to access the Utilities folder, which contains important system based applications, such as Keychain Access and Disk Utility.
-
3Double-click on Terminal. Terminal is an application that runs using the command line, similar to DOS.
-
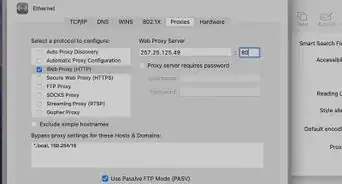
4Access the hosts file.
- In the blank window that appears, type sudo nano /etc/hosts
- Press Enter.
-
5Enter your administrator password. You'll be prompted to enter your administrator password, which is what you use to access your computer. Type it in and then press Enter.
- Open the hosts file. After pressing enter, a new window will open for you to edit. The hosts file is used to dictate how different web sites connect to your computer and save data.
-
6Scroll to the end of the text file. There will already be text within your host file. Do not delete or change this text. Underneath the text, there should be space for you to type.
- If there isn't already any space, click your mouse at the end of the last line of text and press Enter to create a new line to write on.
-
7Type “127.0.0.1” and press the spacebar. 127.0.0.1 is your computer's local IP address. This is what web sites use to access your computer's files and save data.
-
8Type the website you wish to block. For example, if you wish to block Bing, type in www.bing.com.
- Typing in variations of websites will help ensure that they're blocked, like bing.com or m.bing.com
-
9Press Control-O to open the save box. Since the hosts file opens in a special window, you'll be unable to save normally.
- If, when you save, your file name ends with “-original”, delete that ending.
-
10Press Enter close the dialogue box. You can also click Save to exit.
-
11Exit the editor. Click the red circle in the top left corner of the window to close out of the text editor and return to the Terminal's interface.
-
12Type sudo dscacheutil -flushcache. While the Terminal window is still open, type the new command into the new command line.
-
13Press Enter. This will commit the changes to your computer and also formally close the special text editor.
-
14Finished! Test the websites you've blocked. If successful, your computer will be unable to connect to the website.


Using the Control Panel
-
1Open Control Panel.
- Open the Start Menu at the bottom of your screen.
- Click on the Control Panel shortcut.
- In Windows 10, type Control Panel in the Start Menu's Search bar.
-
2Click on Internet Options. Once the Control Panel folder has opened, double click on Internet Options. A new dialog box will open on the screen.
- In Windows 10, you can type “Internet Options” in the search bar in the upper right corner of the Control Panel window.
-
3Click on the Contents tab. Within the new dialog box, click on the tab labeled “Contents”.
-
4Enable the Content Advisor. The Content Advisor will help users regulate acceptable content depending on ratings, content, and exclusion.
- Scroll through the categories under “Select a category to view ratings”.
- There's a slider that allows you to set the acceptable level each category is blocked. A slider set to the far left will allow all content related to a category while a slider set to the far right will not allow any related content.
-
5Create a password. If this is your first time enabling the Content Advisor, you will be prompted to create a password to access or change this tab in the future.
- Re-enter the password to confirm.
- Click Apply.
- If you've already used Content Advisor, re-enter the password you created the first time.
- Enter and re-enter the password you wish to enable the content advisor.
-
6Select the Approved Sites tab. In this tab, you can create a list of websites you wish to access despite their content.
- Click Settings.
- Enter security password.
- Click on the Approved Sites tab.
-
7Close the dialog box. Once you've configured your settings as you wish, click OK to save changes and close out of the dialog box. Once you are done with adding the websites to block, click OK to close the dialog box.
-
8Close Internet Options. Click OK once again to exit out of the Internet Options window.
-
9Finished! Once you're done, you can browse different websites to make sure the categories you've regulated are blocked appropriately.


Chrome
-
1Install Block Site. Extensions help Chrome do additional tasks that it might not be able to do otherwise. Block Site is an extension that, well, blocks websites.
- Click on + Add to Chrome in the upper right corner of the pop up module.
- A dialogue box will appear saying “Add Block Site?”.
- Click “Add extension”.
- Extension will appear in the download bar at the bottom of the screen.
- Once extension has been downloaded, there will be a dialog box saying Block Site has been added to Chrome.
-
2Right click to block websites. You can manually block individual websites.
- Right click anywhere on the web site.
- In the dropdown menu, hover over “Block site”.
- Click “Add current site to blacklist” in the secondary menu.
-
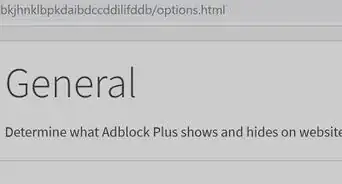
3Create a custom blacklist.
- Right click anywhere on your browser window.
- In the dropdown menu, hover over “Block site”.
- Click “Options” in the secondary menu.
- Chrome will open a new tab with settings for the Block Site extension.
- In the left sidebar, click “Block words”.
- Toggle “Custom list” to on.
- In the text box, type in the word you wish to block.
- Click the “Add word” button next to the text box.
-
4Done! While in Chrome, try to access website using the URL or keywords you've blocked.


Warnings
- Always setup your security software according to administration standards and ensure the software has been up correctly.⧼thumbs_response⧽
- While blocking proxy sites is half the battle of many network intrusions, practicing good network security habits is essential to counteract security breaches or alerts. Constant vigilance and a knowledgeable administrator are keys to a solid network.⧼thumbs_response⧽
- Proxies are not the only way to circumvent network filters, but they are the most common.⧼thumbs_response⧽
-Step-12.webp)


About This Article


-Step-12.webp)