wikiHow is a “wiki,” similar to Wikipedia, which means that many of our articles are co-written by multiple authors. To create this article, 33 people, some anonymous, worked to edit and improve it over time.
This article has been viewed 379,005 times.
Learn more...
The internet can be a scary and dangerous place, especially for children. As a parent, there are a variety of tools at your disposal that you can use to control and monitor your child’s internet usage. Using these tools can significantly lower the chances of the child encountering dangerous people or objectionable content. Follow this guide to easily start monitoring your family online.
Steps
Using a Web Monitoring Program
-
1Purchase a web monitoring program. A web content monitoring program will allow you to block groups of sites as well as specific addresses. These programs typically allow you to set up different levels of protection for different users, allowing for more control over who sees what in the family. Popular programs include:
- Net Nanny
- Norton Family
- K9 Web Protection
- Qustodio
-
2Install the program on each computer. Most monitoring programs require an initial purchase or a subscription to use. You will need a license for each computer that you want to protect. When you purchase a web filtering product online, you will be given links to download the program onto your computer.
- These programs generally need to be installed on each computer that you want to protect.
Advertisement -
3Set the content that you want blocked. Most programs offer a list of categories that you can check and uncheck to customize what you allow through. You can also designate specific sites that you don’t want to be accessible, or that you always want to be accessible.
- You will need to set these filters on each computer that you install the software on.
- Filters are updated constantly by the companies that run these programs. Many use automated systems that browse new pages and block automatically, even if the site isn’t in the database yet.
-
4Set the hours that you want content to be available. Some programs will allow you to set specific times that content can be accessed. For example, you could disable all access to social networks during homework hours so that children can’t be wasting time on Facebook instead of studying.
-
5Monitor online behavior. Most programs will provide logs and alerts that show when inappropriate content is trying to be accessed. Some programs even allow you to see your child’s Facebook profile and all of their pictures and messages.


Using OpenDNS to Protect Your Entire Network
-
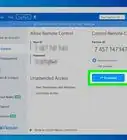
1Sign up for OpenDNS. OpenDNS is free for use at home, and a more powerful version is available to businesses for a fee. OpenDNS is installed into your network’s router, and affects all network traffic. This means that it blocks websites on any device connected to the router, including computers, tablets, game consoles, and mobile phones.
- OpenDNS will block sites on every device, so it may not be as useful for parents who want to access blocked sites when the children aren't around.
-
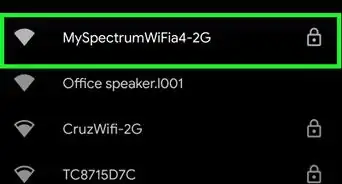
2Open your router’s configuration page. Most routers can be accessed by entering 192.168.1.1 or 192.168.0.1 into a web browser’s address bar on a device that is connected to the network. You may then be asked to enter your username and password.
- Your router’s login address and default username/password combination will vary by manufacturer. If you cannot access your router, try checking the default settings at RouterPasswords.com.
- If you still cannot access your router due to a forgotten username or password, you can press the reset button on the router to reset it to the factory settings. This will erase all of your network settings, including wireless settings.
-
3Find your DNS settings. This is typically located in the Internet section of the router. Look for DNS accompanied by two or three fields where you can enter IP addresses. For most default settings there will be two options, though the exact wording may change: “Get Automatically from ISP” and “Use These DNS Servers”. Select “Use These DNS Servers” so that you can input the OpenDNS server information.
-
4Enter your DNS information. In the Primary and Secondary DNS fields, enter the following addresses:
- 208.67.222.222
- 208.67.220.220
-
5Click Apply Changes or Save. Once the settings have been updated, you will want to flush the DNS on each computer connected to the network. This will ensure that your new settings will take effect immediately.
-
6Enable dynamic IP updates. Chances are your home internet connection has been assigned a dynamic IP by your internet service provider. This means your home IP address will occasionally change. OpenDNS needs to be configured to update its settings when your IP address changes, otherwise the filtering will not work.
- Log in to your OpenDNS Dashboard using the username and password you received when you signed up.
- Select your network in the Home or Settings tab. Click Advanced Settings and scroll to the Dynamic IP Update section. Check the boxed labeled Enable and then click Apply to save your settings.
- Download an OpenDNS Dynamic IP Updater program. This program should be installed on a computer that your children will not have access to so that it cannot be disabled. Ideally this computer will be always on, or on before other computers connect.
-
7Set your filters. Once you have OpenDNS configured, you’re ready to start setting your filters. These filters will block sites that meet certain criteria, such as pornography, academic fraud, social media, and many more. You can either filter out categories, set overall tiers of protection, block specific websites, or only allow specific websites.
- Log in to your OpenDNS Dashboard. Select the network that you want to adjust the filtering for. Click on the Web Content Filtering link.
- Choose your filter level. You can choose between three tiers of filtering: Low, Moderate, and High. OpenDNS will provide examples of what gets filtered at each level.
- Set a custom filter. If you’d like to define which filters you would like to activate, click the Custom option and then check each box that you want to enable. For example, checking
- Add domains to your black- or whitelist. In the “manage individual domains” section, you can enter in domains that you want to either be always blocked or always allowed, regardless of the filters set. For example, you could have the Social Networking filter enabled, but adding “twitter.com” to the Always Allowed list will allow Twitter to be accessed.
-
8Monitor which sites are accessed. Once you’ve enabled your filters, you can monitor the web usage on your network to see if people are trying to access sites that they shouldn’t. To do this, you will first need to ensure that stat logging is enabled. Log in to the Dashboard and click the Settings tab. Check the box labeled “Enable stats and logs” and then click apply.
- Click the Stats tab to view the logs for your network. You can use the left menu to see what websites are being accessed and when. This will give you an idea if your children are attempting to access sites that they shouldn’t.


Using Windows Family Safety
-
1Install the Family Safety Filter on each computer. The Family Safety Filter needs to be installed on every computer in your house that your child will have access to. The Family Safety Filter is automatically installed for Windows 8, but may need to be downloaded for Windows 7. Earlier versions of Windows (XP, Vista, etc.) and other operating systems do not support it.
-
2Enable Family Safety on Windows 7. Open the Family Safety program and sign in with your Microsoft Account. In order to use the Family Safety program, you will need to have a Microsoft Account. When you sign in for the first time, you will be creating the primary parent account. This is the administrator account for Family Safety, and will be the account that can change the settings from the Family Safety website.[1]
- If you install Family Safety on multiple computers, log in with the Microsoft Account that you used initially.
- Check the box next to each account that you want to monitor. Family Safety works best if each family member has their own account, and if all accounts are password protected. This is important, because if someone switches to an account that isn’t covered by Family Safety, they will be able to access blocked content.
- Turn any guest accounts off, otherwise children can access blocked content by signing into the guest account. To turn off a guest account, search for “user accounts” in the Windows Search and select it from the results. Click Manage Other Accounts, and then click Guest. Click “Turn off guest account”.
- Verify your settings. Once you’ve indicated which accounts you want to monitor, you will be shown a summary of all the accounts you selected, as well as a link to the Family Safety website.
-
3Enable Family Safety on Windows 8. Family Safety is automatically turned on for any Child Accounts you create in Windows 8, as long as your administrator account is logged in with a Microsoft Account. You can also enable Family Safety on standard accounts.[2]
- To enable Family Safety on an existing account, open Settings and click Change PC Settings. Open Accounts and then click Other Accounts. Select the account that you want to enable Family Safety on, and click Edit. Change the “Account type” to Child.
- Make sure that all accounts are password protected, so that a child cannot log into another account to access blocked material.
-
4Log into the Family Safety website. Once all of your accounts have Family Safety enabled, you can adjust settings for each user through the Family Safety website. Log in with the primary parent’s Microsoft Account.
-
5Select a user to modify. Once you’ve logged in you will be presented with a list of all of the users you have Family Safety enabled for. Select a user and you will see options to filter websites, report activity, set time limits, allow access requests, and set game and app restrictions.
- Web filtering – In this section you can set the level of filtering for the user. Different levels allow different kinds of sites through, with the strongest filter at the top. You can choose to only allow specific sites, block all but children’s sites, allow all general sites, allow social networking, or don’t block anything.
- Web filtering lists – This section lets you designate specific sites that you want to always allow or always block.
- Activity reporting – You can set the level of activity reporting for this account, This will allow you to choose how much web browsing you want logged.
- Requests – You can allow users to send requests to access blocked sites. You will then receive these requests, and can allow or disallow at your choosing.
- Time limits – This sets specific times that the user can use the PC. After the time period is up, the user will be logged out of the computer.
- Game and App restrictions – These sections will allow you to specify games and apps installed on your computer that you don’t want the user to be able to access. This is useful if you have mature games installed that you don’t want your children playing.


Editing the Hosts File
-
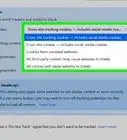
1Edit the hosts file in Windows. The hosts file allows you to block websites from being accessed on the computer you are using. It works for all accounts on the computer. Editing a host file will block a website, but does not offer any additional features such as tracking or time limits. Tech-savvy users may be able to change the host file and circumvent blocks.
- Navigate to C:\Windows\System32\drivers\etc and double-click it. Use Notepad to open the file when prompted to choose a program.
- Place your cursor at the bottom of the document. Put a blank line between your starting point and the end of the existing text.
- Enter 127.0.0.1 <website> and press Enter. Replace <website> with the website that you want to block (facebook.com, youtube.com, etc.).
- Enter another line with the same information except add the “www.” before the website. In essence you should have two entries per website that you want to block: 127.0.0.1 facebook.com AND 127.0.0.1 www.facebook.com.
- Repeat this for each website that you want to block.
- Save the file. Do not change the name, file type, or location of the file. Simply save the changes you’ve made. You may have to restart your browser for the changes to take effect.
- In case you are not able to edit host file you can also run notepad as administrator by right clicking on it and then open host file from the suitable location mentioned above.


-
1Edit the hosts file on a Mac. The hosts file allows you to block websites from being accessed on the computer you are using. It works for all accounts on the computer.[3]
- Launch the Terminal, which can be found in the Utilities folder.
- Create a backup of the hosts file. You can create a backup of the hosts file by entering the following command and pressing Enter:
sudo /bin/cp /etc/hosts /etc/hosts-original. You may have to enter your administrator password. - Edit the hosts file. To edit the hosts file, you need to open it in nano with the following command:
sudo nano /etc/hosts/. This will open the nano window and you will see the hosts file text. - Start a new line at the bottom of the file. Enter 127.0.0.1 <website> and press Enter. Replace <website> with the website that you want to block (facebook.com, youtube.com, etc.).
- Enter another line with the same information except add the “www.” before the website. In essence you should have two entries per website that you want to block: 127.0.0.1 facebook.com AND 127.0.0.1 www.facebook.com.
- Repeat this for each website that you want to block.
- Save your changes by pressing Ctrl + O. Once the changes are saved, press Ctrl + X to exit nano.
- Flush your DNS. Use the DNS flush command
sudo dscacheutil –flush cacheto reset your DNS and load the new settings. Your browser should now block the sites you listed in the hosts file.
-
2Repeat these steps on each computer you want to protect. The drawback of the hosts file method is that the hosts file needs to be changed on every computer that you want to protect. If your network has a lot of computers on it, this may prove unfeasible.
-Step-2.jpg)
-Step-3.jpg)
-Step-6.jpg)
-Step-7.jpg)
-Step-9.jpg)
-Step-10.jpg)
-Step-11.jpg)
-Step-12.jpg)
-Step-7.webp)


References
About This Article
1. Purchase web monitoring software.
2. Install the software on each computer.
3. Select the content you want to block.
4. Set the hours you want content to be available.
5. Monitor the activity logs.