This article was co-authored by wikiHow staff writer, Nicole Levine, MFA. Nicole Levine is a Technology Writer and Editor for wikiHow. She has more than 20 years of experience creating technical documentation and leading support teams at major web hosting and software companies. Nicole also holds an MFA in Creative Writing from Portland State University and teaches composition, fiction-writing, and zine-making at various institutions.
This article has been viewed 193,959 times.
Learn more...
Your hard drive is the long-term storage device within your computer. Hard drives hold all your files as well as the applications you use, like the operating system, which is what you use to access and run all the other programs. Learn how to use your USB flash drive as extra storage, as well as how to install another operating system (such as Ubuntu, as used in this example) onto it to use as an alternative to Windows.
Steps
Storing Files on a Flash Drive from Windows
-
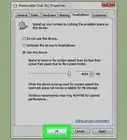
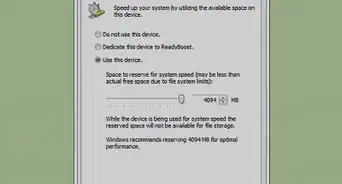
1Plug the flash drive into a USB port. If you have not plugged in this type of flash drive into your computer before, you may have to wait for its drivers to be installed. It may also need to be formatted. Windows will guide you through format process, but understand that formatting this flash drive delete any files that are already saved on the device.
-
2Open the Start menu and click “Computer.” You will see the USB drive in the list of available drives as a “Portable Device.” Make note of the drive letter that it is assigned by Windows (it may say drive “E:” or drive “F:” and then double-click to open it.Advertisement
-
3Save files to the flash drive. As long as the flash drive is plugged into your computer, you can save files to it as you would your hard drive.
- To move files from another folder, open another folder to click-and-drag files to the flash drive. This will create a copy of the file on the flash drive.
- You can save new files to the flash drive using the “Save” dialog of most Windows programs. When saving files to the drive, select the drive letter you previously noted.
- To organize files on your flash drive, use the Windows interface to create new folders and move files around just as you do with your hard drive.


Storing Files on a Flash Drive from Mac
-
1Plug in your flash drive to a USB port. If you have not yet plugged in this type of flash drive, you may have to wait a few moments for its drivers to be installed. After it is finished, a USB icon will appear on your home screen.
- You may also have to format the drive to work with your computer. If you see a message that says your USB flash drive needs to be formatted, understand that this will erase any files you've stored on the drive.
- If you're using a Mac desktop computer, it's better to plug the flash drive into a USB port on the back of the computer rather than the keyboard.
-
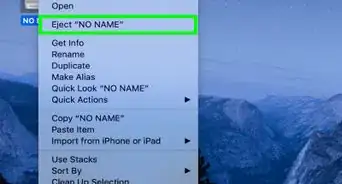
2Double-click the icon that appeared on your desktop. Click and drag files to the window that opens to copy them to the flash drive. You can also save new files from programs using their save dialog, by clicking the USB icon and then clicking “Save.”
-
3Open or delete files from the flash drive. As long as the flash drive is plugged into your computer, you can open, save, delete, and organize files as you would your hard drive.
- As long as the flash drive is plugged into your computer, you'll be able to save files to it as you would your hard drive. When saving files within an application, select your flash drive from the left side of the screen.[1]


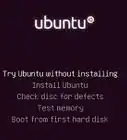
Running Ubuntu from a Flash Drive on a PC
-
1Boot into the BIOS.[2] You'll need to act quickly because you only have a few seconds to enter the BIOS once your computer boots. Turn on (or restart) your computer and watch for a message that says something like “Press F2 to enter setup” or “Setup=F1.” The exact message and key to press are different across different sorts of computers. Press the key as instructed to enter the BIOS.
-
2Set the BIOS to boot from a USB drive. BIOS menus vary, but look for the option that mentions “Boot” and select it with keyboard commands.
-
3Set the boot priority first to CD, then Removable Device. This will allow you to boot to install your operating system from a CD, and load it onto the flash drive.
-
4Disconnect your hard drive before installing the operating system (OS) on your flash drive. Disconnecting the hard drive leaves the operating system unaffected and prevents boot errors from grub (Ubuntu's operating system loader) if the USB drive is not present.
-
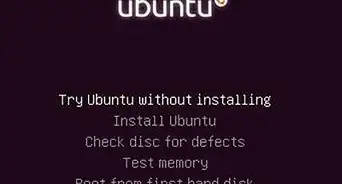
5Put the Ubuntu CD in the CD-ROM drive. Make sure the flash drive is plugged in, then reboot the computer.
-
6Follow the prompts from the installer to install Ubuntu. Select the USB flash drive as the location where you want to install the new OS.
-
7Reboot the computer and re-enter the BIOS. Depending on the computer, it may reboot automatically. Re-enter the BIOS and set the boot order to this order: 1) Removable Device, 2) CD, and 3) Hard Drive (HDD). If you see an option to enable “boot from USB,” as will be present on most Intel-enabled PCs, change it to “on” or “yes.”
-
8Reconnect the hard drive. Remove the power cord and reattach hard-drive cable(s).
-
9Turn on the computer. To boot into Ubuntu, make sure the USB drive is plugged in. If you want to use the OS on your hard drive (in other words, not the version of Ubuntu you just installed on the USB drive), remove the USB drive before rebooting. When the USB drive is disconnected, it will first try to boot from CD. If there is no bootable CD in the CD-ROM drive, it will then boot from the hard drive as normal.


Community Q&A
-
QuestionIf I turn off my computer, does it still save any changes I made on Ubuntu, e.g. saving text documents, setting up WiFi, etc.?
 Community AnswerYes, just like the hard drive, even if you use another computer. But if you don't use Ubuntu, you have to check whether your operating system supports saving a network.
 -
QuestionMy computer does not have hard drive but can it use only a flash drive?
 Owethu SimkaCommunity AnswerNo, it needs a hard drive, then you can use it as a flash drive if your flash drive is full.


References
About This Article