This article was co-authored by wikiHow staff writer, Nicole Levine, MFA. Nicole Levine is a Technology Writer and Editor for wikiHow. She has more than 20 years of experience creating technical documentation and leading support teams at major web hosting and software companies. Nicole also holds an MFA in Creative Writing from Portland State University and teaches composition, fiction-writing, and zine-making at various institutions.
This article has been viewed 601,767 times.
Learn more...
This wikiHow teaches you how to replace your Windows 10 PC's existing primary hard drive with a new one. You'll also learn how to choose the right drive for your system, and how to keep your computer safe during the transition.
Steps
-
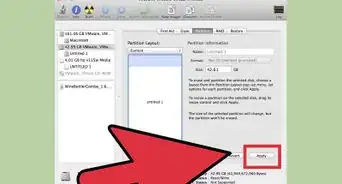
1Back up the data on the existing hard drive. If the drive you want to replace still works and you want to keep any of its data, you'll need to perform a backup before removing it. If you don't have an external USB drive to back up to, check out this wikiHow to learn how to back up your files online using OneDrive.
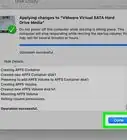
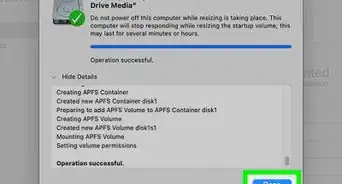
- If you are replacing an existing drive with an SSD drive, the new drive may come with its own cloning software.[1] You can use this software to clone your current hard drive's contents (including the operating system) to the new drive. If software is not included in the package, check the drive manufacturer's website to see if they offer cloning software for download. Other popular reliable cloning options are Symantec Ghost, Clonezilla (one of the few free options), Acronis, and Macrium.
- See How to Back Up a Windows Computer to learn how to back up your data to another drive.
- If you've purchased any software with license keys, make sure you back them up and/or have copies of the keys so you can reinstall them easily.
-
2Obtain a full, bootable copy of the operating system. If you're replacing your primary hard drive and not using a cloning tool, you'll need to reinstall your operating system on the new drive after installing it. You can buy the software on DVD, download it to flash drive, or create your own recovery media.[2]
- If you're using Windows 10, see How to Create a Recovery Drive on Windows to learn how to create your own Windows 10 installation media on a blank USB drive.
Advertisement -
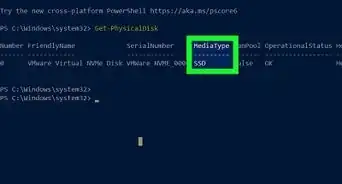
3Decide between an HDD (Hard Disk Drive) or an SSD (Solid State Drive). SSDs are significantly faster than HDDs and have a much longer life capacity due to having fewer moving parts. Because of these benefits, SSD drives are more expensive and come in smaller sizes. If money and storage are an issue, stick to the HDD. However, once you use a computer with an SSD drive, you'll find it very hard to go back.
-
4Get the right drive for your computer. Laptop computers usually take 2.5 inch (6.4 cm) hard drives, while desktops support the 3.5 inch (8.9 cm) size. Adapters are available for 2.5 inch (6.4 cm) drives so they'll fit in desktop computers. Most SSD drives are 2.5 inch (6.4 cm) only, so many modern manufacturers now include laptop-sized cages in their newer models. If you're putting a smaller drive in a desktop that doesn't have a 2.5 inch (6.4 cm) cage, you'll need an adapter. HDD drives are widely available in both sizes.
- Both SSD and HDD generally connect to the motherboard with SATA connectors. Older HDD drives may use IDE, but that's increasingly rare. SATA usually comes in 3 different versions (SATA, SATA II and SATA III), so you'll need to find out what your motherboard supports.
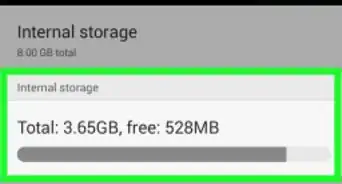
- Make sure you get a drive that's large enough to handle all of your data.
-
5Shut your computer down and unplug it. Even if you're using a laptop, you'll want the computer to be turned off and not connected to a power outlet.
-
6Ground yourself before opening the computer. Improper handling of electronic components can cause damage to the system. You can accomplish this by wearing an anti-static wrist strap while standing on an anti-static mat.
- If you're not familiar with proper grounding techniques, see How to Ground Yourself to Avoid Destroying a Computer with Electrostatic Discharge.
-
7Open the computer case. The steps to do this vary depending on whether you're replacing the drive in a desktop or laptop computer. If you're using a desktop computer, you'll typically need to twist off the screws on the back of the tower and then slide the side panels away from the unit.
- Some laptops have special doors on the case that allow you to easily insert and remove hard drives. Other models require you to remove the battery and unscrew various components to access the hard drive. Check with your manufacturer to find the correct method for your computer.
- Some desktop cases do not use screws. If your case is a screw-less case, you will need to find the latch or button that releases the doors or panels. Remove the doors or panels as necessary
-
8Locate the existing hard drive. Most desktop computers will have the hard drive screwed within a cage inside the computer case. Identify the data and the power connectors and disconnect them.
-
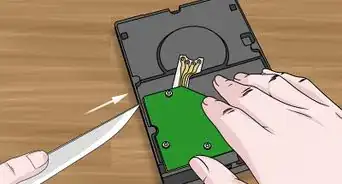
9Remove any screws and disconnect the drive. Most likely, the drive will be held in place by screws on both sides of the hard drive. Remove the screws. Please use your hand to support the hard drive if the case or cage does not support the drive. Once the screws are removed, you can slide the hard drive out of the cage or case.
-
10Set the jumpers on an IDE drive. If you're using a SATA drive you can skip this step. Once you have removed the original hard drive, look at the position of the jumpers on the drive itself. If you cannot see them, most drives will have a diagram on the hard drive's label illustrating the location of the jumpers. The jumper setting will either set the drive as Master, Slave or Cable Select. You should match the settings of the replacement drive to that of the original.
-
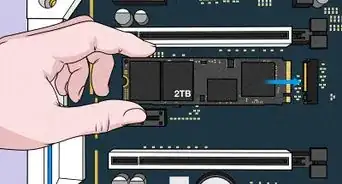
11Insert the new drive into position. This should be the same position as the old drive. Carefully screw the drive in and reconnect the data and power cables.
- Place the old drive somewhere safe in case you need it in the future.
-
12Boot the PC up with the recovery media inserted. You can skip this step if you cloned the drive using cloning software. If the recovery media is on a DVD, you may have to turn the PC on first so you can eject the DVD tray. If it's a USB drive, just insert the drive before turning the PC on. As long as your PC is set to boot from a USB drive or DVD drive, it should automatically boot up into the Windows installer.
- If the PC won't boot from the recovery media, you'll have to make some changes in the BIOS. The key to enter the BIOS varies, but you'll usually need to restart the PC and immediately press either F12, F10, or Del to enter the boot menu. The actual key should appear below the manufacturer's logo. If you don't tap it fast enough you'll have to reboot and start again.
- Once you're in the BIOS, find the section called Boot Menu or Boot Order, then set the first boot device as USB Drive or DVD drive as needed. Exit and save your changes, then reboot the PC.
-
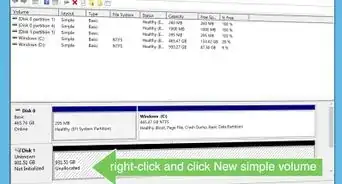
13Follow the on-screen instructions to reinstall Windows. Once Windows is reinstalled and reconnected to the internet, the PC will automatically re-register the operating system (although you may have to confirm a few things here and there). Once you're back up and running on the new drive, you can restore your data from the backup you created.


Community Q&A
-
QuestionCan I remove my hard drive and run it in an external case?
 Community AnswerYou can, but the desktop that you remove the hard drive from will no longer work. The now external drive will run as a storage device, like a flash drive.
 -
QuestionHow do I install a SATA disk?
 Community AnswerInstall it in your PC's chassis, connect the proper power cable from the PSU and connect it to the motherboard with a SATA cable, and you're done.
 -
QuestionCan a hard disk be repaired?
 Community AnswerNot usually, although there are ways to at least partially recover the data. Hard disks are pretty inexpensive and aren't worth trying to repair, especially if the disk surface has been damaged.


References
About This Article

1. Back up your current drive.
2. Make recovery media.
3. Purchase the right hard drive.
4. Shut the computer down and remove the case.
5. Remove the hard drive.
6. Insert the new drive and put the case back on.
7. Boot the computer back up with the recovery media inserted.
8. Reinstall Windows and restore from backup.