This article was co-authored by Adam Kealing. Adam Kealing is a Professional Photographer based in Austin, Texas. He specializes in general wedding, destination wedding, and engagement photoshoots. Adam has over 11 years of photography experience. His work has been featured in Green Wedding Shoes, Style Me Pretty, Once Wed, and Snippet Ink. His work has won numerous awards with Fearless Photographers and Masters of Wedding Photography.
There are 8 references cited in this article, which can be found at the bottom of the page.
This article has been viewed 177,514 times.
Taking photographs is a great way to preserve memories. When you take a lot of photos, storing them can be overwhelming because there are so many options available. Traditional print photos need extra care to prevent degradation. And, since the technology is always changing, old files and storage techniques for digital images eventually becomes obsolete. However, it's possible to store all your photos so that they remain accessible and in good shape by just follow some easy guidelines.
Steps
Preserving Hard Copies of Photographs
-
1Handle your photos with clean, dry hands to prevent damage. To maximize the life of your photographs, make sure your hands are clean, dry, and free of lotions. You don't want anything transferring from your hands to your pictures as you handle them.[1]
- If you are working with old prints, it's a good idea to wear powder-free gloves as you handle the photographs to ensure that no oils from your fingers rub off on them. You can get them at most drugstores or medical supply stores.
-
2Choose acid-free magnetic photo albums to organize your photos. If you want a way to keep your photos handy for sharing with guests or family, a photo album is a great way to keep them accessible and protected. However, make sure to choose an album with acid-free pages because albums with cheaper-quality pages will deteriorate your photos over time.[2]
- The cover material of the album won’t affect the pictures, but it’s a good idea to get a sturdy leather or hard-bound album if you think you will handle it a lot over the years.
- To attach pictures in the album, either choose an album with sleeves that you just drop the photos in or attach the pictures to the pages using sticky photo corners. Do not glue the photos themselves to the album pages because the glue can ruin your photos over time.
Advertisement -
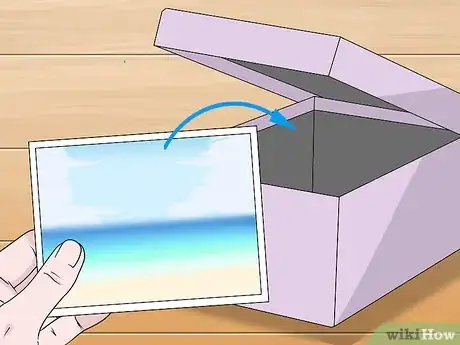
3Store photos over long periods of time in acid-free boxes. Regular cardboard boxes sometimes contain chemicals that can break down your photographs. Make sure you choose boxes that are marked acid-free or safe for photographs.[3]
- Choose boxes that are big enough that you do not have to bend the photos, but small enough that the photos don’t shift around too much inside the box.
- For added protection, put dividers or sheets of acid-free paper in between photos to ensure they do not stick together.
- You can buy specialty photo supplies like acid-free boxes and paper from craft stores or framing shops. Or, you can find them online.
-
4Keep your photos away from excess heat and humidity. Photographs contain gelatin that will melt and become sticky under warm and humid conditions. The best places to store photographs in your home are under your bed or in your closet. If the gelatin gets too warm or humid, it melts and the photos will stick together or deteriorate. Therefore, don’t keep them in the garage, attic, or basement.[4]
- If you have very valuable family heirloom photos, consider housing them in a climate-controlled storage facility. This way, you can have peace of mind knowing that temperature, light, and humidity are regulated.
- Too little humidity can cause the photographs to become brittle and fall apart. To avoid humidity-related problems with your photographs, aim to store them in a location that stays in a 20-60% relative humidity range.
-
5Display your favorite photos in frames with acid-free mats. Frames are great protection from dust as long as you use acid-free mats in your frames. As temperature and moisture in the room changes, photos in frames without mats can stick to the glass and get ruined. A mat is not only an aesthetically-pleasing option, but it also keeps the photo from direct contact with the glass.[5]
- Also, try to keep your framed photographs away from prolonged exposure to direct sunlight to avoid fading.
Uploading Digital Photographs to the Cloud
-
1Choose cloud storage for easy access to photographs. Cloud storage is convenient and easy to use, but storing your photos remotely comes with a few risks. First, if you cannot access the internet, you will not be able to access your cloud-based photos. Second, cloud storage is the most vulnerable to attacks from outsiders, so be careful that you do not store anything in your cloud that you would not want anyone else to see.[6]
-
2Research the various cloud storage platforms to find a good fit. There are several options for cloud storage. iCloud, DropBox, and Google Photos are some of the most well-known, but not the only options. What you choose will depend largely on your preference, whether or not you want to pay for it, and what devices you currently use.[7]
- You do not always have to use the service that comes linked to your device. For example, if you have an Apple product, using iCloud is the easiest because it’s integrated into your OS. However, Google Photos and DropBox can be downloaded from the Apple App Store and easily installed on your Apple Products. On the other side, you can link your iCloud account with non-Apple devices, but it’s more difficult and requires the help of someone experienced with the technology.
- Most cloud storage accounts offer free and paid options. The free options usually offer a limited amount of cloud space, while the paid options vary in price depending on how much storage space you purchase.
-
3Sync your devices directly to a cloud storage account for automatic uploads. When you connect your devices to your cloud storage, everything saves automatically. This way, you won’t lose anything and you can access your files from any device linked to that account.[8] This will vary depending on what type of device you have and what type of cloud storage you choose. Generally, if you're on your computer, you will be prompted to sync periodically. You just have to click the button to accept![9]
- If you're using a digital camera, connect the camera to the computer using a USB cord. The computer will give you prompts on how to upload and sync your photos.
- The downside of this is that every picture you take will be uploaded to the cloud, instead of ones that you choose. This can result in more work later when you want to organize your photos and those quick snapshots of grocery lists or a cute dog you saw became mixed in with your mementos. To avoid a big project later, make time to delete unnecessary photos regularly.
-
4Upload your photos to a cloud storage account manually. You can select the photos you want to upload individually or move entire albums that you have created on your devices. This way, only the photos that you want saved in cloud storage will be moved there.
- The downside to manual uploads is that if anything happens to your device before you have a chance to upload the files, you may lose the images forever. To avoid this problem, aim to set aside dedicated times just for uploading photos.
Saving Digital Photographs Locally
-
1Store digital photos on your device’s internal hard drive for easy access. The easiest and quickest way to save photographs is to save them directly onto the hard drive of your computer or phone. This method is best used as a temporary solution, however, because internal hard drives are more susceptible to viruses and failure than external solutions.[10]
- If your pictures are on your phone, you can likely sync them automatically. If you're using a digital camera, connect the camera to the computer using a USB cord.
-
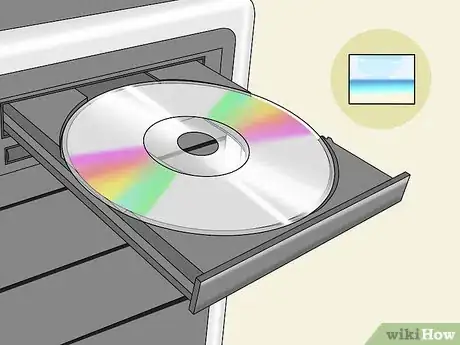
2Transport and save your digital photographs using external storage. CD-ROMs, DVDs, and external hard drives are great for storing and backing up photographs that you want to easily transport from one place to another.[11] Also, it’s easy to upload photos to multiple computers or hardware from discs or external drives.[12]
- Don’t use thumb drives or SD cards for storing pictures long-term. They decay over time and should not be relied on as storage solutions.
- Optical discs and hard drives allow you to access your pictures easily while you are away from your home computer without worrying about internet connectivity or slow upload/download times. This is great for transporting digital pictures to other countries or rural regions where you are unsure how connected you will be.
-
3Convert and move images as new technology becomes available. Technology becomes obsolete with time and you don’t want to be stuck with a disc, drive, or image file that cannot be read by any hardware or software. As new technology comes out, proactively convert to the latest file types and storage technology to ensure that you are always able to access your images.[13]
- When new file types or storage methods become available, tech companies usually release a way to convert and move files in bulk, rather than forcing their customers to work on one file at a time. When you see a new technology has been released, research how to efficiently and safely convert files or seek advice from a tech-savvy friend.
- You can also hire a professional to do this for you.
Expert Q&A
Did you know you can get expert answers for this article?
Unlock expert answers by supporting wikiHow
-
QuestionWhat is the best way to keep digital photos safe?
 Adam KealingAdam Kealing is a Professional Photographer based in Austin, Texas. He specializes in general wedding, destination wedding, and engagement photoshoots. Adam has over 11 years of photography experience. His work has been featured in Green Wedding Shoes, Style Me Pretty, Once Wed, and Snippet Ink. His work has won numerous awards with Fearless Photographers and Masters of Wedding Photography.
Professional Photographer
-
QuestionHow do I store photos from a computer to a memory stick?
 Community AnswerWhen you plug the thumb drive into the USB port, oftentimes your computer will automatically open the drive's files. If not, open up your files and navigate the sidebar until you find "This PC" or "Computer" (or something similar). Your memory stick should be listed alongside your computer's hard drive and disk drive, often as "(E:)." From your computer, select the photos you wish to transfer, and drag them into (E:) (or whatever you find your memory stick is labelled as).
 -
QuestionDo I need to put anything between pictures?
 Community AnswerYou could if you wanted. A thin, non-stick material should work. Try parchment paper used for baking.
References
- ↑ https://www.loc.gov/preservation/care/photo.html
- ↑ https://www.archives.gov/preservation/family-archives/storing
- ↑ https://www.archives.gov/preservation/family-archives/storing
- ↑ https://www.sparefoot.com/self-storage/blog/5315-storing-photos/
- ↑ https://www.loc.gov/preservation/care/photo.html
- ↑ https://blog.malwarebytes.com/101/2016/04/should-you-store-your-data-in-the-cloud/
- ↑ https://www.myamberlife.com/learn/top-ways-to-store-your-digital-files/
- ↑ Adam Kealing. Professional Photographer. Expert Interview. 7 April 2020.
- ↑ https://www.myamberlife.com/learn/top-ways-to-store-your-digital-files/
- ↑ https://www.myamberlife.com/learn/top-ways-to-store-your-digital-files/
- ↑ Adam Kealing. Professional Photographer. Expert Interview. 7 April 2020.
- ↑ https://www.theguardian.com/technology/askjack/2018/apr/12/how-can-i-store-my-digital-photos-for-ever-external-hard-drive
- ↑ https://www.nytimes.com/2018/07/19/technology/personaltech/convert-photo-files-bulk.html
- ↑ Adam Kealing. Professional Photographer. Expert Interview. 7 April 2020.


-Step-53.webp)


-Step-53.webp)


