X
This article was co-authored by wikiHow Staff. Our trained team of editors and researchers validate articles for accuracy and comprehensiveness. wikiHow's Content Management Team carefully monitors the work from our editorial staff to ensure that each article is backed by trusted research and meets our high quality standards.
This article has been viewed 107,525 times.
Learn more...
This wikiHow teaches you how to access your photos across devices using Apple's cloud-based solution.
Steps
Method 1
Method 1 of 4:
Using iPhone or iPad
-
1Open Settings. It's a gray app that contains gears (⚙️) and is typically located on your home screen.
-
2Tap your Apple ID. It's the top section in the Settings menu that contains your name and image if you've added one.
- If you are not signed in, tap Sign in to (Your Device), enter your Apple ID and password, then tap Sign In.
- If you are running an older version of iOS, you may not need to do this step.
Advertisement -
3Tap iCloud. It's in the second section of the menu.
-
4Tap Photos. It's near the top of the "APPS USING ICLOUD" section.
-
5Slide "iCloud Photo Library" to the "On" position. It will turn green. Photos you take on your device, as well as existing photos in your Camera Roll, will now be saved to iCloud.
- If you'd like to save storage space on your device, tap Optimize iPhone Storage to store smaller versions of photos on your device.
-
6Slide "Upload to My Photo Stream" to the "On" position. Any new photos you take with your device will now sync to all that devices on which you've signed in with your Apple ID when they're connected to Wi-Fi.
-
7Press the Home button. This is the main button below the screen of the iPhone. This will return you to your main home screen.
-
8Open the Photos app. It's a white app with a multicolored flower icon.
-
9Tap Albums. It's in the bottom-right corner of the screen.
-
10Tap All Photos. It's at the top of the screen. All of your iCloud photos are now accessible in your Photos app.


Advertisement
Method 2
Method 2 of 4:
Using iCloud on the Web
-
1Go to iCloud. Use a Web browser on your desktop computer.
-
2Enter your Apple ID and password. Do so in the labeled fields.
-
3Click on Photos. It's the icon with the multi-colored flower in the top row of apps.
-
4Click on All Photos. It's in the upper-left corner of the screen, under the "Albums" section. You've now accessed all your photos using iCloud.


Advertisement
Method 3
Method 3 of 4:
Using a Mac
-
1Open the Photos app. It's a white app that contains a multicolored flower icon.
- Your desktop must be signed into iCloud with iCloud Photo Library enabled.
-
2Click on Albums. It's at the top of the screen.
-
3Click on All Photos. The photos displayed in this album include all the photos in your iCloud Photo Library.


Advertisement
Method 4
Method 4 of 4:
Using Windows
-
1Click the Start menu.
-
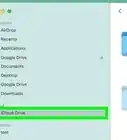
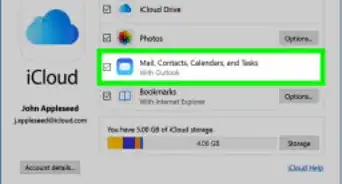
2Click on the iCloud folder.
- You must have iCloud for Windows installed and you must be signed in with your Apple ID. Be sure it's configured correctly to sync with your iCloud Photo Library.
-
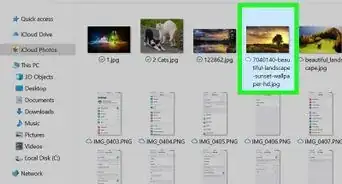
3Click on iCloud Photos.
-
4Click Downloads.
- Any new photos or videos added to your iCloud Photo Stream will appear here.


Advertisement
Warnings
- Depending on your devices' settings, any changes you make to photos in iCloud may automatically update across all devices signed into iCloud.⧼thumbs_response⧽
Advertisement


About This Article

wikiHow Staff
wikiHow Staff Writer
This article was co-authored by wikiHow Staff. Our trained team of editors and researchers validate articles for accuracy and comprehensiveness. wikiHow's Content Management Team carefully monitors the work from our editorial staff to ensure that each article is backed by trusted research and meets our high quality standards. This article has been viewed 107,525 times.
How helpful is this?
Co-authors: 4
Updated: July 28, 2022
Views: 107,525
Categories: ICloud
Advertisement