This article was co-authored by Luigi Oppido. Luigi Oppido is the Owner and Operator of Pleasure Point Computers in Santa Cruz, California. Luigi has over 25 years of experience in general computer repair, data recovery, virus removal, and upgrades. He is also the host of the Computer Man Show! broadcasted on KSQD covering central California for over two years.
This article has been viewed 1,048,604 times.
Installing a router is the first step to creating a solid home network, but how do you choose the right one? And once you've purchased your router, how do you go about setting it up? Follow this guide to get the right router configured for a secure wireless (Wi-Fi) network.
Steps
Installation
-
1Acquire a wireless router. There are a variety of factors that will determine which router is best for you. These include distance, interference, transfer speed, and security.
- One of the most important factors to consider when purchasing a router is the distance between the router and the devices that you are wirelessly connecting. More expensive routers generally have more antennae, which can lead to a more stable connection at further distances.
- Another factor to consider is the amount of signal interference. If you have multiple devices that operate on the 2.4 GHz band, such as microwaves and cordless phones, these can interfere with the Wi-Fi signal. Newer routers can operate on the 5 GHz band, which is much less crowded and thus less prone to interference. The drawback is that 5 GHz signals do not travel as far as 2.4 GHz signals.
- Transfer speed is a feature to consider. Newer routers claim to be able to transfer data up to 450 Mbps. While this may be helpful when moving data between two computers over a network, it will not increase your general Internet speed, as this is set by your ISP. There are three main router speeds available: 802.11g (54 Mbps) 802.11n (300 Mbps), and 802.11ac (450 Mbps). It is important to note that these speeds are virtually impossible to attain in any environment other than a clean room free of signal interference.
- Finally, make sure that the router you are purchasing has the latest form of wireless encryption, WPA2. This is pretty much standard in all new routers, but is something to consider if purchasing an older, second-hand router. Older encryption algorithms are much less secure; a WEP key can be cracked in just a few minutes.
-
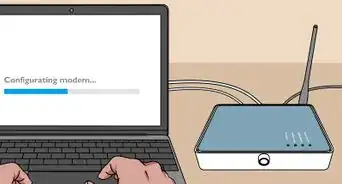
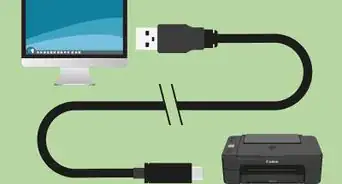
2Connect the router to your modem. Once you've purchased your router, you will need to connect it to your modem. The router will have a port in the back labeled WAN/WLAN/Internet. Connect this port to the modem using a standard Ethernet cable.
- Make sure that the router is properly powered and turned on.
Advertisement -
3Connect a computer via Ethernet cable. This step is not always necessary, but can be very useful if you want to set up the wireless router before connecting any wireless devices to it. Connecting a computer through a physical cable will allow you to tinker with the wireless settings without losing your connection to the router.
- For optimum efficiency while setting up the router, plug it in next to your computer while you adjust the settings. After you are finished configuring the router, you can move it to where it will normally stay.
-Connection-Step-1-Version-5.jpg)
-Connection-Step-2-Version-3.jpg)
-Connection-Step-3-Version-4.jpg)
Configuration
-
1Install the router software. Not every router comes with software to install, but if yours did, then install it on a computer that is connected to the router via an Ethernet cable. Using the bundled software makes setting up a router much more convenient than going in to the configuration menus.
- Using the software, designate the name of your wireless network, and the type of security that you want to use. Choose WPA2 for the most secure network. Choose a password and continue.
- Most router software will automatically detect your internet settings. This is the information that the router needs to translate your internet connection and transfer it to all of your wirelessly connected devices.
-
2Open the router's configuration page. If your router did not come with any installation software, you will need to connect to the router's configuration page through your web browser. Open your browser of choice and enter the web address for the router. This is typically 192.168.1.1 or 192.168.0.1. Consult the documentation that came with the router to find the exact address.
- You will be asked for a username and password to continue into the router configuration. These are also provided in the documentation that came with your router. Typical defaults are username: admin and Password: password or admin.
-
3Enter your Internet connection information. This includes the IP address and DNS information from your internet service provider. Most routers will fill this section in automatically. If it does not, contact your ISP for the information that you need to enter.
-
4Set your wireless settings. Most routers will have a Wireless Settings section towards the top of the router's menu. From this section you can enable or disable the wireless signal, change the network name, and set the encryption.
- To set the name of the network, select the SSID field. This is the name that will be displayed on any device that detects your network. If you are living in an area with a lot of public traffic, avoid putting any identifiable information in the SSID, as anyone with a wireless device can see it.
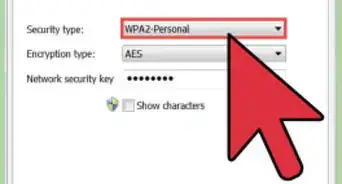
- Make sure to set the encryption to the latest version allowed by your router. In most cases, this will be WPA2. WPA2 operates with a single password. You can enter whatever you'd like, but a strong password is recommended. Stronger passwords contain upper and lowercase letters, numbers, and symbols.
-
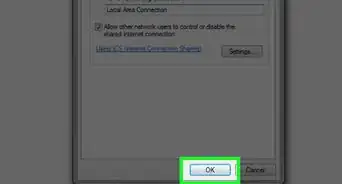
5Apply your settings. Make sure you click the Apply or Save Changes button in your router's configuration when you are done changing the settings. The router will process for a moment, and your new settings will take effect.
-
6Place your router. In order to get the best possible signal, try to place your router in a central location. Keep in mind that any obstacles such as walls and doors will degrade the signal. If you have multiple floors, you may want to consider multiple routers to ensure that you have the coverage you need.
- Remember that it must be physically connected to your modem, so this may limit your options when placing the router.
-Connection-Step-4-Version-4.jpg)
-Connection-Step-5-Version-4.jpg)
-Connection-Step-6-Version-5.jpg)
-Connection-Step-7-Version-5.jpg)
-Connection-Step-8-Version-5.jpg)
-Connection-Step-9-Version-2.jpg)
Connection
-
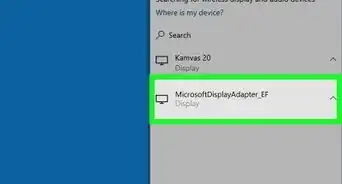
1Connect a device to the network. Once the router is broadcasting a wireless signal, you can test the connection by scanning for wireless networks using a Wi-Fi device such as another computer, a smartphone, a tablet, etc.
- Scan for new networks. In Windows, click the network icon in the system tray in the lower-right corner of the desktop. Select Connect to a Network and look for your SSID. On a Mac, click the AirPort icon in the menu bar, which looks like 3 curved lines. Select your SSID from the list of available networks.
-
2Enter the password. If you enabled WPA2 encryption, you will need to enter your password to connect to the network. If you are using a private computer, you can disable the hidden characters on some systems to let you see the password you are typing easier.
-
3Test your connection. Once you are connected to the network, wait a moment for your IP address to be assigned. Open a web browser and try to connect to a website you don't normally visit (this will ensure that you aren't loading the website from memory).
-Connection-Step-10-Version-4.jpg)
-Connection-Step-11-Version-5.jpg)
-Connection-Step-12-Version-5.jpg)
Expert Q&A
Did you know you can get expert answers for this article?
Unlock expert answers by supporting wikiHow
-
QuestionWhy would I need to update my router's firmware?
 Luigi OppidoLuigi Oppido is the Owner and Operator of Pleasure Point Computers in Santa Cruz, California. Luigi has over 25 years of experience in general computer repair, data recovery, virus removal, and upgrades. He is also the host of the Computer Man Show! broadcasted on KSQD covering central California for over two years.
Computer & Tech SpecialistFirmware is essential for the operating system's security. It patches holes in the network. Updating the firmware ensures that your network is protected against the newest bugs and viruses out there.
Support wikiHow by unlocking this expert answer.
-
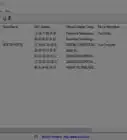
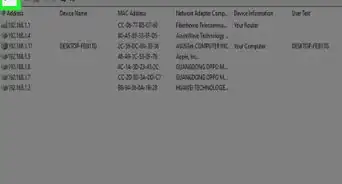
QuestionHow can I see who is using my WiFi network?Luigi OppidoLuigi Oppido is the Owner and Operator of Pleasure Point Computers in Santa Cruz, California. Luigi has over 25 years of experience in general computer repair, data recovery, virus removal, and upgrades. He is also the host of the Computer Man Show! broadcasted on KSQD covering central California for over two years.
Computer & Tech SpecialistSo the first thing you do is log in to your router. You do that by accessing your router's homepage, which is going to be an IP address or routerlogin.net, or whatever. Sign in with your username and password. Then, select "connected devices" to see a list of everyone who has been or is currently connected to your network.Support wikiHow by unlocking this expert answer.
-
QuestionHow can I get unwanted guests off of my WiFi network?Luigi OppidoLuigi Oppido is the Owner and Operator of Pleasure Point Computers in Santa Cruz, California. Luigi has over 25 years of experience in general computer repair, data recovery, virus removal, and upgrades. He is also the host of the Computer Man Show! broadcasted on KSQD covering central California for over two years.
Computer & Tech SpecialistThe easiest way to do this is to just change your password. The moment you do that, they'll be booted from your network. The downside here is that you'll have to sign in again on all of your devices.Support wikiHow by unlocking this expert answer.


-Step-8-Version-2.webp)


-Step-30.webp)

About This Article

1. Connect your wireless router to your modem.
2. Connect the router to a computer with an Ethernet cable.
3. Configure the wireless router using the computer.
4. Connect other devices to the router via Wi-Fi.