This article was co-authored by wikiHow Staff. Our trained team of editors and researchers validate articles for accuracy and comprehensiveness. wikiHow's Content Management Team carefully monitors the work from our editorial staff to ensure that each article is backed by trusted research and meets our high quality standards.
There are 12 references cited in this article, which can be found at the bottom of the page.
This article has been viewed 47,579 times.
Learn more...
An Intermatic timer is a timer that you can install in your home and connect to anything with a power source, such as lights, to program them to turn on and off at certain times of day. The two types of Intermatic timers are analog and digital. They are both easy to set, as long as you make sure to follow the steps and set the correct times.
Steps
Setting Up an Analog Intermatic Timer
-
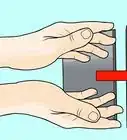
1Open up the door on the timer’s enclosure. You don’t need any tools to open the enclosure. Use your hands to pry open the door on the grey box that encloses the timer.[1]
- This applies to Intermatic Mechanical Time Switch models with an all-metal construction.
-
2Rotate the clock so that the large arrow points to the current time. Turn the yellow clock dial clockwise with your hand until the large arrow facing down points at the current time. It’s important to set this time as accurately as possible so that the timer works at the exact times you want it to.[2]
- The dial only turns clockwise, so if you pass the correct time just keep turning it until you get there again.
- Each line between numbers on the clock represents an interval of 20 minutes.
- Don’t ever unscrew the arrow for the current time or you will throw off the timer.
Advertisement -
3Loosen the “on” and “off” arrows with your fingers or pliers. Turn the knobs on the arrows to the left to loosen them. Use a set of pliers to get them started if they are too tight to loosen with your fingers.[3]
- These are the arrows you will set at the times you want the timer to turn something on and off.
-
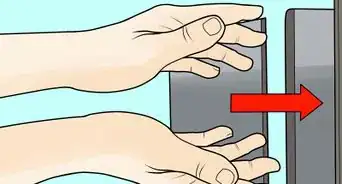
4Slide the “on” and “off” arrows to the times you want them set at. Slide the arrow that says “on” to the time you want the timer to turn something on at. Slide the “off” arrow to the time you want it to turn off at.[4]
- If you want your timer to turn your lights on at dawn and dusk, then do a quick Internet search for the dawn and dusk times in your area and set the arrows to those.
-
5Tighten the knobs on the “on” and “off” arrows with your fingers. Screw the arrows in place as tight as you can with your fingers. Use pliers to tighten them all the way if they still slide after you tighten the knobs with your fingers.[5]


Programming a Digital Intermatic Timer
-
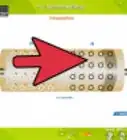
1Press and hold the “on/off” button and press the reset button with a paperclip. Flip open the door that covers the buttons then hold the “on/off” button as you press the reset button in with a paperclip for 3 seconds. Keep holding the “on/off” button for another 3 seconds.[6]
- This will clear the timer’s memory and let you program it from the beginning.
-
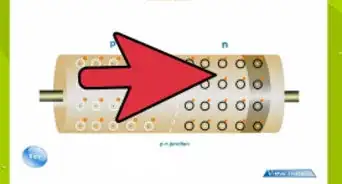
2Press the “mode” button until the screen shows “setup”, then press “on/off”. This will enter the setup menu. From here you will begin to set the current hour.[7]
- You should see the hour flashing on the digital display at this point.
-
3Set the current hour and minutes. Use the plus and minus keys to set the current hour, then hit the “on/off” button. Set the current minutes with the plus and minus keys, followed by the “on/off” button.[8]
- Make sure to pay attention to whether the time you are setting is AM or PM.
-
4Set the current year, month, and date. Use the plus key to set the current year, then press “on/off” to move on. Do the same for the month and date.[9]
- You can hold down the plus or minus keys to change the numbers a bit faster.
- When you are done with this, you will see a day of the week displayed. If the day is wrong, then you may have set the date wrong and you will have to repeat the steps. If the day is right, hit “on/off” to move on.
-
5Select manual or auto daylight savings and your zone. Leave the daylight savings setting on auto if you use daylight savings in your area. Change it to manual if you do not use daylight savings. Refer to the map in the instructions to see which zone you fall into and set the correct one.[10]
- Always use the “on/off” button to move on to the next section of the programming.
-
6Adjust the dawn and dusk times as needed. The next hour you will see is the timer’s estimated dawn time for your area. Adjust it if it is off, then move on to the dusk time and do the same.[11]
- These are the times that the timer will follow to turn on and off.
- This is the end of the basic setup and you will be taken back to the beginning of the setup screen when you are done.
-
7Press the “mode” button until it displays “PGM”, then hit “on/off”. This will take you into the program menu so you can set the timer’s on and off events. The timer is automatically set to turn on at dusk and off at dawn every day of the week. Change these settings if you want, or leave them the same if this works for you.[12]
- When you are happy with the settings, simply press “mode” once more to put the timer back in “AUTO” mode and close the cover over the buttons.


References
- ↑ https://www.youtube.com/watch?v=lqNZc5cW_KE&feature=youtu.be&t=18
- ↑ https://www.youtube.com/watch?v=lqNZc5cW_KE&feature=youtu.be&t=25
- ↑ https://www.youtube.com/watch?v=lqNZc5cW_KE&feature=youtu.be&t=50
- ↑ https://www.youtube.com/watch?v=lqNZc5cW_KE&feature=youtu.be&t=60
- ↑ https://www.youtube.com/watch?v=lqNZc5cW_KE&feature=youtu.be&t=85
- ↑ https://www.youtube.com/watch?v=KW-5luasxgE&feature=youtu.be&t=35
- ↑ https://www.youtube.com/watch?v=KW-5luasxgE&feature=youtu.be&t=58
- ↑ https://www.youtube.com/watch?v=KW-5luasxgE&feature=youtu.be&t=65
- ↑ https://www.youtube.com/watch?v=KW-5luasxgE&feature=youtu.be&t=90
About This Article