This article was co-authored by Daniel Stoescu and by wikiHow staff writer, Hunter Rising. Daniel Stoescu is a Master Electrician and the Owner and Operator of Home Tech Solutions, LLC in Hampton, Virginia. With over a decade of experience, Daniel specializes in wiring residential, commercial, and light industrial structures. The Home Tech Solutions team has over four decades of combined experience and offers comprehensive solutions for residential electrical needs.
There are 14 references cited in this article, which can be found at the bottom of the page.
This article has been viewed 13,060 times.
When you plug something in, does your outlet box wiggle around in the wall? Or do plugs feel loose and fall out of the outlet? Loose outlets can create a fire hazard, so it’s important to fix them as soon as possible. Even if you haven’t done any electrical repairs before, you can fix either type of loose outlet on your own within an hour. Keep reading for everything you need to know to fix your outlet so it’s secure and safe to use again.
Steps
Repairing a Loose Outlet Box in the Wall
-
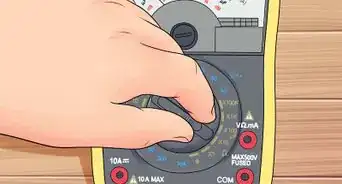
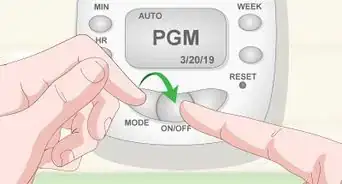
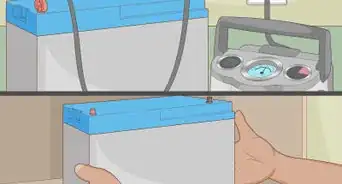
1Shut off power to the outlet. Find the main circuit box in your home, which is usually on a wall in a hallway, basement, or garage. Find the circuit that controls the room with the outlet and flip the switch to the “OFF” position to cut the power completely so you don’t risk getting shocked while you’re working on your repairs.[1]
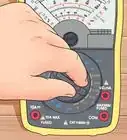
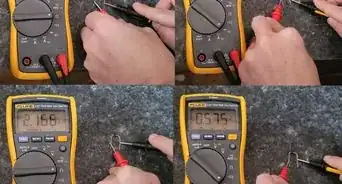
- Plug a voltage tester into the outlet to test if the outlet is still live.
- If you aren’t sure which circuit your outlet connects to, you can turn off the main breaker at the top of the box, but it will shut off all of the power in your home.
-
2Unscrew the cover plate from the wall. Use a screwdriver to turn the screw in the middle of the cover plate counter-clockwise. Once the cover plate is loose from the wall, pull it off to expose the outlet and wires in the electrical box behind it.[2]
- Keep the screw in a cup so you don’t lose it during your repairs.
Advertisement -
3Try tightening the outlet screws if they feel loose. Sometimes, the outlet will loosen over time as the screws get looser. Use your screwdriver to turn the screws at the top and the bottom of the outlet clockwise. Try to gently wiggle the outlet from side to side to check if it’s secured in place.[3]
- If the screws are already tight, then the electrical box inside the wall might be loose instead.
-
4Put electrical spacers on the screws if the outlets are recessed. Get a pack of electrical spacers, which look like small C-shaped clips with snaps on the top and bottom. Line up the snaps on 2 spacers and squeeze them together until they click. Loosen the screws on the outlet and position the spacers on the screw’s shaft right behind the head. Tighten the screws back into the wall so your outlet doesn’t move around.[4]
- If the outlets are still recessed into the wall after you tighten the screws, click on another spacer and screw the outlet back in. It may take a few tries to figure out how many spacers you need to use.
-
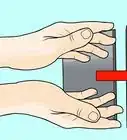
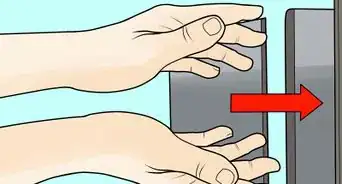
5Attach an electrical box extender if spacers don’t work. An electrical box extender is a rectangular plastic piece that fits into the outlet hole, and it lets you screw in the receptacle tightly. Unscrew the outlet completely from the wall and gently pull it out from the wall, but leave it connected to the wires. Slide the outlet through the hole in the middle of the electrical box extender. Then, push the extender flush with the wall before screwing your outlet into it.[5]
- Some electrical box extenders come with longer screws to secure your outlet even better.
- Extenders are perfect if you need if you’re extending an outlet after installing a backsplash or any other addition to your wall.
-
6Install a wall plate spacer if the electrical box is loose inside the wall. If you can still wiggle the outlet around, then the box came loose inside the wall. Loosen your outlet from the wall, leaving the wires connected, and simply slide a wall plate spacer behind it. Screw the outlet back into the electrical box so the screws go through the holes in the top and bottom of the wall plate spacer.[6]
- The wall plate spacer clamps the outlet against the drywall so the box doesn’t move around anymore.
-
7Reattach the cover plate and turn the power back on. Once you’re finished with your repairs, use your screwdriver to reattach the cover plate to hide the wires inside the electrical box. Go back to your circuit breaker and flip it to the “ON” position so you can start using your outlet again.[7]


Replacing an Outlet with Loose Plugs
-
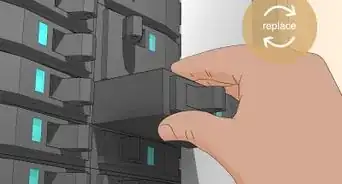
1Turn off the power to the outlet at the circuit breaker. Locate the circuit breaker in your home, which is usually on a wall in a hallway, basement, or garage. Find the switch that controls the room with the outlet and turn it to the “OFF” position to cut the power.[8]
- Use a voltage tester to check that the outlet doesn’t have any power running through it. If the outlet is still live, then it’s controlled by a different switch.
-
2Remove the cover plate from the outlet. Take a screwdriver and turn the screw in the middle of the cover plate counter-clockwise. Once the cover plate is loose, carefully pull it away from your wall and set it aside.[9]
-
3Unscrew the old outlet from the wall. Your outlet will have a screw at the top and the bottom holding it in the electrical box. Turn the screws counter-clockwise to remove them, and put them in a small bowl or cup so you don’t lose them.[10]
-
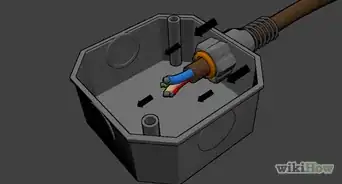
4Disconnect the wires from the screws on the old outlet. Carefully pull the outlet out of the electrical box to expose the wires and screws they’re connected to. Loosen the screws with your screwdriver so you can easily unhook the ends of the wires from the old outlet. Once you disconnect all of the wires from the outlet, you can toss out the old outlet.[11]
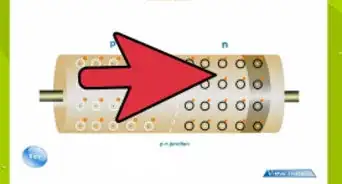
- Properly identify the wires. Some outlets have 1 black live wire and 1 white neutral wire attached to them. Others may have 2 live wires and 2 neutral wires to carry power to another outlet. Your outlet may also have a green or bare wire for a grounding screw.
- If there are multiple wires attached to the outlet, take a picture of how they’re connected. Alternatively, you can wrap a piece of masking tape around each one and label which screw it was connected to.
-
5Attach the wires to screws on the new receptacle. Get a new outlet receptacle from a local hardware store. Wrap the exposed ends of white neutral wires clockwise around the silver screws and black live wires to the brass screws. If there’s a green or bare ground wire in the box, wrap it around the green grounding screw. Then, tighten the screws with your screwdriver.[12]
- Be careful not to connect the wires to the wrong screws since it could cause a short circuit or shock.
- If the ends of the wires are frayed, trim them with a pair of wire strippers and strip the coating off the wires to wrap around the screws.
-
6Screw the new outlet and the cover plate back onto the wall. Gently push the wires back into the electrical box. Hold the outlet tight against the electrical box, and screw the top and the bottom back in with your screwdriver. Then, put the cover plate over the outlet and secure it to the wall.[13]
- If the outlet doesn’t fit in the box, gently move the wires around to move them out of the way until the outlet fits in.
-
7Turn the power back on to test if your outlet feels loose. Go back to the circuit breaker and flip the switch back into the “ON” position. Go back to your outlet and try plugging something in to see if the outlet holds your plug without falling out. If it’s working and plug doesn’t move around, then you’re all done with your repairs.[14]
- If your outlet doesn’t work, then you may have an issue with your wiring. Turn off the power again and recheck that the wires are attached properly.


Warnings
- Never work on an outlet while it’s still connected to power since you could get shocked.⧼thumbs_response⧽
- Loose outlets could cause sparking and create a fire hazard, so fix them as soon as you notice them.⧼thumbs_response⧽
Things You’ll Need
Repairing a Loose Outlet Box in the Wall
Replacing an Outlet with Loose Plugs


References
- ↑ https://youtu.be/6jNZeouo7Rg?t=114
- ↑ https://youtu.be/drsaKC6_gYw?t=31
- ↑ https://youtu.be/6mptPU8veoU?t=37
- ↑ https://youtu.be/-YzDcAoh4WY?t=64
- ↑ https://rexel-cdn.com/products/arlington-be3-extender.pdf?i=C5525CD3-1C16-46A4-B71E-FECACED624C1
- ↑ https://todayshomeowner.com/video/this-incredible-spacer-fixes-flimsy-wall-plates/
- ↑ https://youtu.be/-YzDcAoh4WY?t=177
- ↑ https://youtu.be/6jNZeouo7Rg?t=116
- ↑ https://youtu.be/B16l7RurJuQ?t=25
About This Article