This article was co-authored by Ricardo Mitchell. Ricardo Mitchell is the CEO of CN Coterie, a fully licensed and insured Lead EPA (Environmental Protection Agency) Certified construction company located in Manhattan, New York. CN Coterie specializes in full home renovation, electrical, plumbing, carpentry, cabinetry, furniture restoration, OATH/ECB (Office of Administrative Trials and Hearings/Environmental Control Board) violations removal, and DOB (Department of Buildings) violations removal. Ricardo has over 10 years of electrical and construction experience and his partners have over 30 years of relevant experience.
There are 23 references cited in this article, which can be found at the bottom of the page.
This article has been viewed 76,552 times.
Has your electrical socket cracked its casing or mysteriously stopped functioning? As long as it's a standard home outlet, the repair is pretty achievable even if you're not a DIY expert. Of course, any work on electrical systems can be dangerous. Work slowly and steadily, and contact an electrician if you see anything unusual such as burn marks or a wiring setup that this guide doesn't cover.
Steps
Preparing for a Safe Installation
-
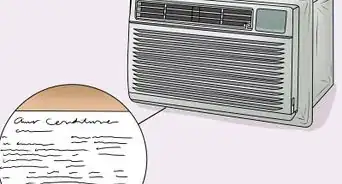
1Check regulations for kitchens and bathrooms. Due to the high chance of water spill, these installations require extra safety precautions. These guidelines are also recommended for unfinished spaces, outdoor areas and sheds, laundry rooms, and anywhere else near sinks, hot tubs, and other water sources.[1]
- At minimum, you'll need an outlet that includes a GFCI (ground fault circuit interrupter), also called a RCD (residual-current device). This will shut off the power if it gets wet.
- Installing brand new sockets in these locations is best done by qualified electricians. Replacing a damaged socket here may be doable by yourself.[2]
-
2Protect yourself from shocks. Prevent electrical shocks by taking safety precautions:[3]
- Use tools with rubber handles.
- Wear rubber-soled shoes.
- Don't touch your bare skin to any metal or other conductive surfaces, including multimeter probes.
Advertisement -
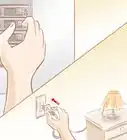
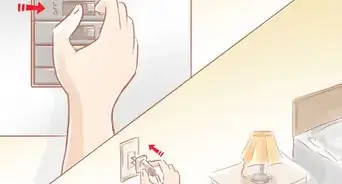
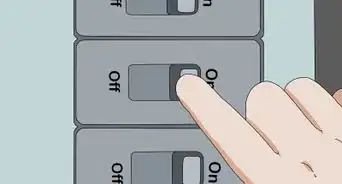
3Switch off the power. Flip the circuit breaker or remove the fuse that powers the outlet you will be working on. If you're not 100% sure which power source to cut, turn off the power to your whole home and work with a flashlight.
-
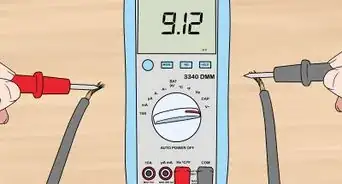
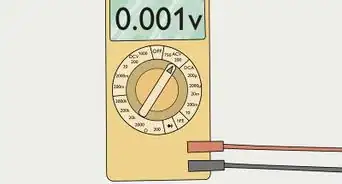
4Test the voltage. Never assume that the wires are dead without testing. Test a live circuit first to confirm the tool is working, then test the circuit you're working on. If you get a voltage reading, the outlet is still live and cannot be worked on.
- A non-contact voltage tester is easy to use, but less reliable. While you are grounded, place the tool against each hole in the outlet. If it lights up, or if its display reads anything other than zero, the outlet is live.[4]
- A multimeter is more reliable and gives a more accurate result. To test voltage with a multimeter, set the tool to its AC voltage setting in the 100V range (230V or higher for most European countries). Test by placing the red probe to the live socket (the small vertical hole in a US socket), then keep it there while you put the black probe first into the neutral socket (the taller vertical hole), then the ground (rounder hole).[5] [6]
- Warning: In the UK and some former UK colonies, some houses are wired in a ring circuit. These DIY tests are not sufficient in these cases. Never work on a circuit in these areas until an electrician has identified the type.[7] This article does not cover safety information for ring circuits.
-
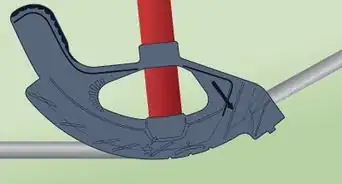
5Remove the old socket. Once you are certain the power is off, unscrew the faceplate of the old socket and pull it out from the wall box. To detach the wires from the socket, unscrew the terminals just enough that you can slip the wire loop off of them.[8]


Wiring the New Socket
-
1Identify the live, neutral, and ground terminals of the socket. A standard modern outlet for household use should have three terminals for connecting the appropriate wires.
-
UK sockets:[10]
"L" indicates live
"N" indicates neutral
"E" or three parallel lines indicates earth (ground)
-
-
2Adjust your plan if there are more terminals. If you see more terminals than described above, you are probably in one of these situations:
- When replacing an existing socket in the UK, you'll often have to fit two wires of each type to matching terminals. Installing a new socket only requires one set of wires.[11]
- A US two-socket outlet generally has a metal tab connecting the two live terminals, and another for the two neutrals. If there is only one wire of a given type in your wall, you can attach it to either terminal to power both sockets.
- A GFCI (RSD) outlet has two sets of terminals. Use the line terminals for these instructions. The load terminals (usually marked with yellow tape) are used to connect other devices to GFCI protection.[12]
-
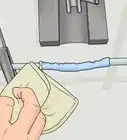
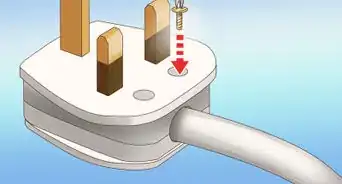
3Strip the ends of your wires. If the wires are frayed or nicked, cut the damage off, then strip off roughly ¾" (2cm) of insulation. You can do this using a wire stripper or a utility knife. Take care to avoid nicking the metal of the wire, which can cause electrical faults later.[13] Err on the side of under-stripping so you can correct later.
- Some outlets have a built-in guide: place the wire in the short groove on the back and mark the end of the groove as your strip point.[14] Note that this guide may be for the "push-in" connector instead of the recommended wrapping method.
- If the three wires are enclosed in one PVC jacket, find the end of the bare copper ground wire. Grab this with needle-nose pliers and tug down to split open the seam of the jacket to access the other wires.[15]
-
4Bend the wire ends into the shape of an umbrella handle. The best way to secure your wires is to wrap them around the screw terminals. To prep for this, bend the stripped end into a U shape, so it will fit snugly around the whole screw.[16]
- Wire strippers have holes in them for this purpose. Slip the end of the wire in and twist. If you don't have a wire stripper, use needle-nose pliers.
- Many outlets have push-in connectors, or small holes below the terminal that hold the wire in with a spring clamp. If you use this, all you need to do is push the wires into the holes. However, these clamps can lose tension and eventually weaken the connection.[17]
-
5Wrap the wires around the screws clockwise. Each wire should rest snugly around its terminal, with all three sides of the U-bend in close contact. Wrap them in the direction the screw tightens (usually clockwise) for maximum contact with the screw threads.[18] Before you do this, be about 700% sure you are using the correct wire:
-
USA:[19]
Live cable is black (if there are two live cables, the second one is red)
Neutral cable is white or grey
Ground cable is uninsulated, green, or green & yellowEU & UK:[20]
Live cable is brown (red for pre-2004 UK)
Neutral cable is blue (black for pre-2004 UK)
Earth (ground) cable is green & yellow
-
-
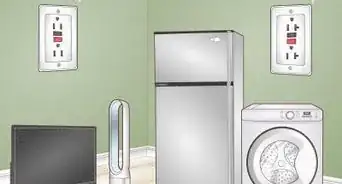
6Tuck the wire under the plastic retainer. Most outlets have small plastic ledges for you to tuck the wires under to secure them in place. If this isn't working well, double-check the wire stripping:[21]
- The wire in contact with the terminal should be completely bare. If insulation is touching the terminal, strip it off.
- The portion tucked under the retainer should be insulated. If it is bare, snip off the end of the wire.
-
7Tighten the terminal screws. Use a screwdriver to tighten each screw until it presses down against the wire. Tighten enough for a firm connection, so the wire cannot get jostled out of place, but don't tighten with maximum force.
-
8Wrap the outlet in electrical tape. For extra safety, wrap the sides of the outlet in electrical tape to reduce the chance of contact with a wire if it ever gets loose.[22] Your outlet is now ready to be inserted back into the wall.
- If you have just installed a GFCI outlet, use the test button to confirm that the safety feature is working. When the test has been activated, a multimeter should read zero voltage from the outlet.


Community Q&A
-
QuestionWhere is the green (ground) cable attached?
 LojjikCommunity AnswerThe ground wire is looped around the green screw (terminal), usually located on the bottom of the wiring device.
 -
QuestionHow do I connect a very short wire to an electrical outlet?LojjikCommunity AnswerIf the wire has been cut back too far to make wiring feasible, you will have to extend it by using a pigtail. To do this, you will need an extra piece of 12 AWG copper wire (6" should be enough) and a yellow wing wire nut. Strip back the wire half an inch on both sides. Twist together one side of the new wire with the existing wire using the wire nut (the copper ends must make contact inside of the wire nut). Connect the other end of your new wire to your wiring device as normal. For added safety, use electrical tape to secure the wiring nut and the wires together so they don't come loose.
-
QuestionHow to connect earthing to ground?
 Yannick SlockCommunity AnswerIn a modern network there should be a L,N,E network. The E should be green/yellow covered. In your technical/electrical locker all Earth wires are combined. This is usually done on a copper strip or a connection bar (usually green). From there the earth wires go to 'the earth'. This is or directly to the city's network but will mostly be a leaden loop laying below the foundations of your house. If it is an old house and there is no option to connect with the loop, what can be done is to hammer copper coated pins in the soil near the electrical locker. These pins should make a low resistance connection with the earth. This can be measured with a specific tool measurement tool.
Warnings
- It is not recommended to use the push-in connectors (small holes that can hold wires) found in some outlets. This is more likely to cause electrical failures, and is against code in some areas.[24]⧼thumbs_response⧽
- If installing new wire, always make sure to use the gauges and color codes standard for your country.⧼thumbs_response⧽
Things You'll Need
- Multimeter (recommended) or voltage tester
- Wire stripper or craft knife
- Needle-nose pliers
- Screwdriver with insulated grip
- Flashlight (if needed)
- Insulated gloves
- Rubber-soled shoes


References
- ↑ https://www.ecmweb.com/national-electrical-code/code-basics/article/20898894/nec-requirements-for-groundfault-circuit-interrupters-gfci
- ↑ https://www.diydoctor.org.uk/projects/partp.htm
- ↑ https://www.homestratosphere.com/how-to-test-an-electrical-outlet/
- ↑ https://www.fluke.com/en/learn/blog/electrical/part-1-electrical-testing-safety-preparing-for-absence-of-voltage-testing
- ↑ Ricardo Mitchell. Electrician & Construction Professional, CN Coterie. Expert Interview. 6 May 2020.
- ↑ https://www.homestratosphere.com/how-to-test-an-electrical-outlet/
- ↑ https://www.diydoctor.org.uk/projects/ringmain.htm
- ↑ https://www.theartofdoingstuff.com/how-to-replace-an-ugly-old-electrical-outlet/
- ↑ https://youtu.be/UwGoU3XVpnI?t=75
- ↑ https://www.homebuilding.co.uk/advice/how-to-swap-a-socket
- ↑ https://www.diydoctor.org.uk/projects/radialcircuit.htm
- ↑ https://www.do-it-yourself-help.com/receptacle-outlet-wiring-diagrams.html
- ↑ https://youtu.be/jtiP2LNSLN4?t=125
- ↑ https://youtu.be/UwGoU3XVpnI?t=233
- ↑ https://youtu.be/jtiP2LNSLN4?t=83
- ↑ https://youtu.be/UwGoU3XVpnI?t=274
- ↑ https://youtu.be/GaBGjsnX9Pk?t=700
- ↑ https://youtu.be/jtiP2LNSLN4?t=326
- ↑ https://www.allaboutcircuits.com/textbook/reference/chpt-2/wiring-color-codes/
- ↑ https://www.electriciancourses4u.co.uk/useful-resources/history-of-wiring-colours-cable-sheathing-bs7671/
- ↑ https://youtu.be/UwGoU3XVpnI?t=344
- ↑ https://youtu.be/jtiP2LNSLN4?t=358
- ↑ https://youtu.be/UwGoU3XVpnI?t=82
- ↑ https://www.youtube.com/watch?v=UwGoU3XVpnI
About This Article