This article was co-authored by Alicia Sokolowski. Alicia Sokolowski is a Green Cleaning Specialist and the President and co-CEO of AspenClean, a green cleaning company in Vancouver, British Columbia. With over 17 years of experience, Alicia specializes in creating a healthier, green alternative to chemical-based cleaning products and services. AspenClean develops and manufactures its own line of 100% Natural, EcoCert® certified, and EWG verified™ cleaning products. AspenClean’s glass cleaner was voted Parent’s Green Pick 2020 by readers of the Parents’ magazine. Alicia holds a CPA designation and a Bachelor’s degree in Commerce and Finance from the University of Toronto.
There are 18 references cited in this article, which can be found at the bottom of the page.
This article has been viewed 11,586 times.
We're all about that brass. It's delightful both as a shiny golden surface, and as a distinguished antique with a brown or green patina. Whichever final result you want for your brass lamp, there are plenty of DIY methods to clean off the grime and reach the appearance you're dreaming off.
Steps

How do you remove old lacquer from brass?
-
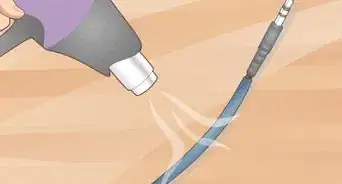
1Strip off the lacquer with a chemical solvent. In order of least to most intense, try a spray-on oven cleaner, a lacquer thinner, or a methylene chloride paint stripper.[4] (Other types of paint stripper may damage your brass.)
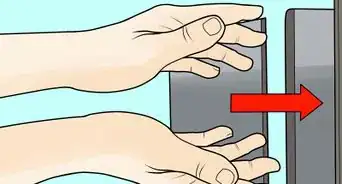
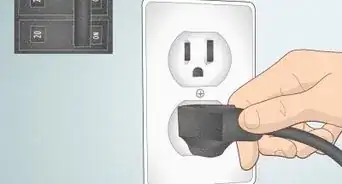
- Disassemble the lamp first to avoid damage to electrical components.
- Methylene chloride is quite caustic; use as a last resort and follow all safety information on the label. Excellent ventilation, gloves, eye protection, and clothing that covers skin are all important.[5]
-
2Take stubborn lacquer to a professional. Since there are many types of lacquer and varnish, there is no one-size-fits-all solution. If ordinary solvents don't work, or if you have a valuable piece you are afraid of damaging, take your lamp to a professional antique restoration service.


How do you remove oxidation from brass?
-
1Clean with soap or rubbing alcohol. First remove any dirt and oils from the surface using mild soap and water, or the gentle side of a scrubbing sponge dipped in isopropyl alcohol.[6]
-
2Remove tarnish with store bought or DIY polish. You can use a commercial brass polish, or make an abrasive, slightly acidic paste out of ½ cup (120mL) vinegar, 1 tsp (5 mL) table salt, and just enough flour to form a paste. Rub it onto the brass with a soft cloth and let sit for a few minutes, then rinse in cool water and dry.[7] Repeat until the corrosion is removed to the level you desire.
- You can use ketchup or lemon juice instead of vinegar for the acid, and baking soda instead of salt for the abrasion.[8] The more abrasive material you use, the more corrosion will scrub off. Just don't combine vinegar and baking soda, no matter how often DIY blogs recommend it: all that fizz just means your two useful cleaners are turning into the much less helpful carbon dioxide and water.[9]
- Brass polishes can be very harsh, especially when sold as an automotive product.[10] If you want to be cautious, spread it fairly thinly onto a rag and let dry for 24 hours before applying it.[11]
-
3Clean thoroughly and polish. Leaving acid on the brass can make it tarnish faster later. Wipe off all traces of DIY cleaners with a dry, lint-free microfiber cloth.[12] Buff with another dry cloth or another thin application of brass polish if you want a shiny finish.
- Commercial polishes containing ammonia will also speed up tarnishing. However, many polishes also leave a protective film on the surface to make up for this.[13]


How do you clean old brass without removing the patina?
-
1Use soapy water or rubbing alcohol for household lamps. Dip a cloth or a gentle scrubbing sponge in mild soap and water, or in isopropyl alcohol — avoid abrasive cloths or brushes to avoid scratching the piece. Wipe the brass clean to remove surface dirt and oil. This will not remove the patina from oxidation unless the brass is in extremely rough shape.
- If the brass piece still looks dirty afterward, this could be due to uneven oxidation. You may need to remove some of the patina with a gentle polisher, such as a jeweller's cloth.
-
2Use brushes and cotton swabs for valuable or heavily corroded items. This is overkill for most DIY projects, but if the lamp is worth more than your car, go the full museum conservator route. Brush away dirt with a dry toothbrush, then get into the crannies with an artist's oil painting brush. Remove grease and stubborn dirt with a cotton swab or Q-tip dipped in a few drops of mild detergent.[14]
- Hog bristle or other natural bristles are recommended for the brush.
- Wear cotton gloves while handling valuable metal objects.
- Any grime that you can't remove may need more specialized substances that are hard for ordinary consumers to access, such as methanol.[15]


How do you polish brass while protecting the patina?
-
1Wipe delicate pieces with cotton, cloth, or a plastic eraser. The gentlest option is a cotton swab or a lint-free cloth. A PVC pencil eraser is a bit more effective at removing grime, and is safe to use on all but the most damaged and heavily corroded brass.[16] Rub one of these tools over the brass to remove dirt and oil from the surface.
- Minimize the amount of fingerprints on the lamp as you work.
-
2Buff with a slightly abrasive tool for more polish. More abrasive tools create a better polish, but they also come with some risk of removing the patina. The following options, listed roughly in order from most to least gentle, are all still pretty mild. Start with a less conspicuous corner of the lamp to test the result, buffing in rapid but gentle circles to create a smooth, polished surface.


How do you polish brass to a mirror finish?
-
1Use a buffing wheel for fast results. Attach a stiff buff to a bench grinder or an electric drill. Apply a small amount of Tripoli rouge or another buffing compound rated for brass to the bottom of the wheel. Polish each component of the lamp by holding it against the base of the wheel and moving it around until you get an even finish.[21]
- Always wear eye protection when using a buffing wheel.
- For best results, repeat with new buffs and buffing compounds of ever finer abrasion, such as jeweller's rouge then blue rouge.[22]
-
2Sand in stages from low to high grit. If you don't have a buffing wheel, use wet sandpaper or abrasive pads instead. Start with a low grit tool (no more than 600-grit) and sand lightly in straight lines back and forth, wetting the brass often to lubricate.[23] Once the major scratch marks and tarnish are removed and the surface looks even, repeat with successively higher grits (for example, 1000, then 1500, then 2000). The longer you continue and the higher grit you end up with, the more polished the brass will be.[24]
- Sandpaper creates a more even surface, while abrasive pads remove less material but smooth out imperfections rather than removing them entirely.[25]
- If using sandpaper, make sure it is designed for wet sanding and soak it in water first—preferably overnight, but for a minimum of 15 minutes.[26] Foam-backed sandpaper is easier to use against the irregular shapes and curves of the lamp.[27]
-
3Finish with a brass polish. For an even shinier surface after sanding, rub brass polish over the lamp with a paper towel. Add more polish as needed, and wipe it away as it builds up and turns black. Switch to a lint-free cloth for the final polish, rubbing until no scratches are visible.[28]
- This is not necessary if you used a buffing wheel.


How do I protect the lamp from further corrosion?
-
1Protective wax has the least effect on appearance. Use a bleached microcrystalline wax (such as Renaissance wax) for best results. Gently wipe the wax onto the lamp with a soft cloth and buff for a few minutes. Repeat with a second coat after one hour, and optionally with a third coat after another 30 minutes.[29]
- For museum-quality restoration, mix the wax first with an equal amount of a Stoddard solvent product, such as Varsol. Let sit until the liquid evaporates before buffing. This makes it easier to get the wax into every cranny, but it isn't necessary for pieces meant for home use.[30]
- If you can't find microcrystalline wax, use beeswax or any natural wax. Synthetic waxes are more difficult to remove, making later treatment harder.[31]
-
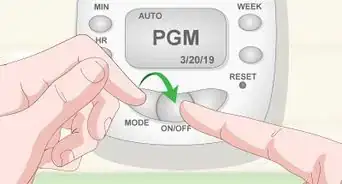
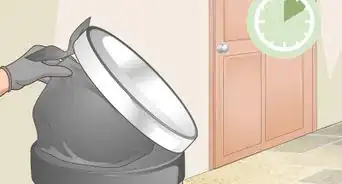
2Lacquer is more difficult to use and will change the appearance. Brush on the lacquer as thinly and evenly as possible, covering every surface exposed to air. Use a spray-on lacquer if the lamp has many nooks and crannies that are difficult to coat evenly.[32] Do not touch the lamp until the lacquer is completely dry, according to the time estimate on the product label.
- Lacquer is harder to remove than wax.[33] Test a small area first if you're not sure whether you'll like the appearance.


Warnings
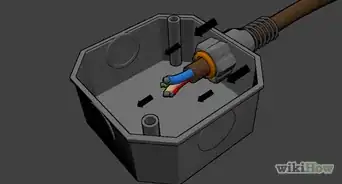
- Rewiring antique light fixtures is not recommended for amateurs unless it is a simple single wire and socket. A professional antique repair shop can test the wiring for safety and replace missing parts appropriately.[36]⧼thumbs_response⧽

References
- ↑ https://www.architecturaldigest.com/story/how-to-clean-brass
- ↑ http://www.sheilazellerinteriors.com/articles/brass-is-it-plated-or-solid
- ↑ http://www.sheilazellerinteriors.com/articles/brass-is-it-plated-or-solid
- ↑ https://www.washingtonpost.com/lifestyle/home-garden/how-to-restoring-the-finish-on-a-brass-door-lock-replacing-old-window-panes/2011/08/24/gIQAucqGsJ_story.html
- ↑ https://www.acplasticsinc.com/media/documents/MSDS_MethyleneChloride.pdf
- ↑ https://www.frenchranges.com/wp-content/uploads/2013/10/BrassCleaningRepair.pdf
- ↑ https://www.countryliving.com/home-maintenance/cleaning/g28483397/how-to-clean-brass/
- ↑ https://www.architecturaldigest.com/story/how-to-clean-brass
- ↑ https://www.scientificamerican.com/article/foamy-white-snow/
- ↑ https://www.canada.ca/en/conservation-institute/services/conservation-preservation-publications/canadian-conservation-institute-notes/care--brass-copper.html
- ↑ https://www.frenchranges.com/wp-content/uploads/2013/10/BrassCleaningRepair.pdf
- ↑ https://www.researchgate.net/publication/319313759_A_Practical_Guide_to_the_Care_and_Conservation_of_Metals
- ↑ https://www.canada.ca/en/conservation-institute/services/conservation-preservation-publications/canadian-conservation-institute-notes/care--brass-copper.html
- ↑ https://www.canada.ca/en/conservation-institute/services/conservation-preservation-publications/canadian-conservation-institute-notes/care--brass-copper.html
- ↑ https://www.canada.ca/en/conservation-institute/services/conservation-preservation-publications/canadian-conservation-institute-notes/care--brass-copper.html
- ↑ https://www.researchgate.net/publication/319313759_A_Practical_Guide_to_the_Care_and_Conservation_of_Metals
- ↑ https://www.researchgate.net/publication/319313759_A_Practical_Guide_to_the_Care_and_Conservation_of_Metals
- ↑ https://www.canada.ca/en/conservation-institute/services/conservation-preservation-publications/canadian-conservation-institute-notes/care--brass-copper.html
- ↑ https://www.frenchranges.com/wp-content/uploads/2013/10/BrassCleaningRepair.pdf
- ↑ https://www.canada.ca/en/conservation-institute/services/conservation-preservation-publications/canadian-conservation-institute-notes/care--brass-copper.html
- ↑ https://www.youtube.com/watch?v=TA4VbFvr3gc?t=50
- ↑ http://whiteglovefans.com/blog/2013/9/30/how-to-professionally-polish-brass
- ↑ https://makezine.com/2016/05/10/wet-sanding-gives-your-projects-a-scratch-free-finish/
- ↑ https://www.youtube.com/watch?v=6EaG_bIH0tc?t=144
- ↑ https://www.youtube.com/watch?v=6EaG_bIH0tc?t=178
- ↑ https://makezine.com/2016/05/10/wet-sanding-gives-your-projects-a-scratch-free-finish/
- ↑ https://www.youtube.com/watch?v=6EaG_bIH0tc?t=101
- ↑ https://youtu.be/6EaG_bIH0tc?t=281
- ↑ https://www.kremer-pigmente.com/elements/resources/products/files/62900_Renaissance_Wax_on_Metals_Application_Techniques_2016.pdf
- ↑ https://www.canada.ca/en/conservation-institute/services/conservation-preservation-publications/canadian-conservation-institute-notes/care--brass-copper.html
- ↑ https://www.canada.ca/en/conservation-institute/services/conservation-preservation-publications/canadian-conservation-institute-notes/care--brass-copper.html
- ↑ https://www.researchgate.net/publication/319313759_A_Practical_Guide_to_the_Care_and_Conservation_of_Metals
- ↑ https://www.canada.ca/en/conservation-institute/services/conservation-preservation-publications/canadian-conservation-institute-notes/care--brass-copper.html
- ↑ https://www.researchgate.net/publication/319313759_A_Practical_Guide_to_the_Care_and_Conservation_of_Metals
- ↑ https://www.canada.ca/en/conservation-institute/services/conservation-preservation-publications/canadian-conservation-institute-notes/care--brass-copper.html
- ↑ https://www.oldhouseonline.com/repairs-and-how-to/restoring-antique-lighting/
About This Article