This article was co-authored by Gonzalo Martinez and by wikiHow staff writer, Nicole Levine, MFA. Gonzalo Martinez is the President of CleverTech, a tech repair business in San Jose, California founded in 2014. CleverTech LLC specializes in repairing Apple products. CleverTech pursues environmental responsibility by recycling aluminum, display assemblies, and the micro components on motherboards to reuse for future repairs. On average, they save 2 lbs - 3 lbs more electronic waste daily than the average computer repair store.
There are 7 references cited in this article, which can be found at the bottom of the page.
The wikiHow Tech Team also followed the article's instructions and verified that they work.
This article has been viewed 326,715 times.
In order to truly delete files and data from your hard drive, you'll need to fill the space those files once occupied. Pressing the Delete key and emptying the Trash bin won't cut it—sensitive files could still be retrieved by hackers and security experts. Macs include a built-in utility to completely remove deleted files from your hard drive, while Windows users will need to install third-party software to get the job done. Learn how to use Secure Empty Trash (Mac) and Eraser (Windows) to get rid of deleted files for good.
Steps
Using Eraser in Windows
-
1Download Eraser from the developer's website. Eraser, a program recommended by security experts, installs an option in the right-click menu that allows you to securely delete (“wipe”) any file or folder with a click.[1] You can also use Eraser to fill the space that once housed your older deleted files with brand new data.
- The installer will download to your default download folder (usually called “Downloads”).
-
2Run the installer. Double-click the Eraser installer, then accept the license agreement. Choose “Complete” as your setup type, click “Next,” and finally, “Install.” When you see a box with a Finish button, click it to complete the installation.Advertisement
-
3Locate files to delete in Windows File Explorer.[2] If there are particular files on your computer that you'd like to permanently delete, press ⊞ Win+E to launch Windows File Explorer, then browse to the folder containing the files.
- To select multiple files or folders at once, hold down the Ctrl key as you click their names.
-
4Right-click the file(s), then select "Eraser > Erase". This will wipe the files from your computer completely, bypassing the recycle bin. This can take several minutes, depending computer speed and file size.
- You can also delete entire folders this way.
-
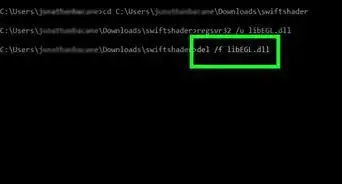
5Launch Eraser to permanently wipe data from past deleted files. To make sure sensitive data you deleted at a previous time is completely wiped from your computer, you can completely wipe all of your previously deleted files by creating and running a new task in Eraser. Press ⊞ Win+S to launch the Windows search box, then type
Eraserinto the blank. When you see “Eraser” appear in the search results, click it to launch the program.- Running Eraser on the drive can take several hours, depending on your computer and drive size. You can use the computer while the process runs, but it might be slow. You may want to run it overnight.
-
6Click “Settings” to view the erasure method options. Erasure methods are specific patterns that are filled in to replace the data left over from deleted files. Different methods run the patterns several times (each instance is called a “pass”) to ensure that the data is truly wiped forever. You'll need to select an option for both "Default file erasure method” and “Default unused space erasure method.”
-
7Choose “US Army” or “Air Force” erasure methods. “US Army” and “Air Force” provide fast but effective wiping. While other options have higher passes (some up to 35 passes), 3-pass methods like 'US Army" and "Air Force" provide some extra insurance. Click “Save Settings” when you're done.
-
8Click the down arrow next to “Erase Schedule,” then click “New Task.” Now you'll set up a task that can be run immediately.
-
9Select “Run manually,” then “Add Data” to choose which data to wipe. Because the files have already been deleted, select “Unused Disk Space” and choose your main hard drive from the list. Click “OK.”
-
10Close all programs. To ensure that Eraser runs without issue, close all open programs except for Eraser.
-
11Right-click “Erase Schedule” to access the list of tasks. Click on the task you just created (it should say “Unused Disk Space”) and select “Run Now.” A progress bar will appear, showing you the progress of the task. When the process is complete, the progress bar will reach 100%. At that point, the files you deleted earlier will be wiped from the hard drive.


Emptying Trash Securely in Mac OS X
-
1Move files and/or folders to the Trash.[3] Do this by dragging files or folders to the Trash bin icon on the dock.
-
2Open the Trash to view deleted files. Files you've deleted appear in the Trash bin. Click the Trash icon on the dock to see what's in the Trash.
-
3Click the Finder icon on the dock, then open the Finder menu. This is where you'll be able to access the option to permanently delete files you've moved to the trash.
-
4Select “Secure Empty Trash.” A dialog will appear, asking “Are you sure you want to erase the items in the Trash permanently using Secure Empty Trash?” Click “OK” to remove. This process can take anywhere from a few minutes to several hours, depending on how big your Trash bin is.
-
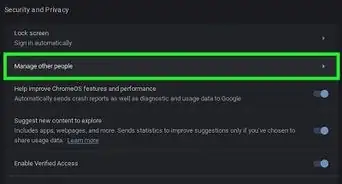
5Format your hard drive.[4] If you'd prefer to delete all of the files on the computer instead of just a select few, you can format the hard drive. This option will completely destroy all data on your computer and then reinstall Mac OS X. It can take several hours if you have a big drive.


Formatting Your Mac Hard Drive
-
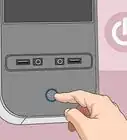
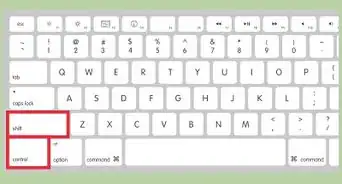
1Connect to the Internet, then restart the Mac.[5] Use this method if you would prefer to delete everything on your hard drive, including personal settings and data. As soon as you hear the startup chime, quickly press and hold ⌘ Command+R on the keyboard to launch OS X Recovery. If the computer boots back into the desktop, you'll need to restart again and make sure you press the keys as soon as you hear the chime.
-
2Click “Disk Utility,” then click “Continue.” Select the drive you want to format, then click over to the “Erase” tab.EXPERT TIPGonzalo Martinez is the President of CleverTech, a tech repair business in San Jose, California founded in 2014. CleverTech LLC specializes in repairing Apple products. CleverTech pursues environmental responsibility by recycling aluminum, display assemblies, and the micro components on motherboards to reuse for future repairs. On average, they save 2 lbs - 3 lbs more electronic waste daily than the average computer repair store.Computer & Phone Repair Specialist
 Gonzalo Martinez
Computer & Phone Repair SpecialistUse “Disk Utility” to completely erase data. Gonzalo Martinez, an Apple repair specialist, says: “When you put data in the trash, and then you empty your trash, the hard drive is only writing a zero over the data. To make sure the trash is completely empty, you can go into “Disk Utility” and erase the empty space.”
-
3Choose “Mac OS Extended (Journaled)” in the Format area. This is also where you'll give your disk a new name (you can even just call it “Mac”).
-
4Click “Security Options,” then move the slider one notch to the right. This will ensure that all data is wiped before the installation.
-
5Click “Erase.” Once the format completes (this could take hours), the computer will boot into a brand new fresh installation of Mac OS X.


Formatting Your Windows Hard Drive with DBAN
-
1Find a Windows installation disc.[6] This method should only be performed by advanced users. Formatting the hard drive erases everything on the computer, including Windows. You'll need an installation disc to reinstall the operating system after you format the drive. You can borrow one from a friend, as long as it's the same version you have installed currently.
-
2Download DBAN (Darik's Boot and Nuke). The only way to completely wipe your hard drive clean is to use a third-party “nuke” tool. Experts recommend DBAN, which is free. This will download an ISO image of DBAN to your computer.
-
3Burn DBAN to a CD or DVD. See Burn ISO Files to DVD for tips on properly burning an ISO file to disc.
-
4Insert the burned DBAN CD/DVD and restart the computer.[7] The computer will reboot into DBAN, which will walk you through formatting your hard disk.
-
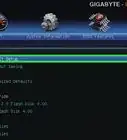
5Press Enter for “Interactive Mode.” This will allow you to specify how DBAN formats the drive.
-
6Press the spacebar to select the drive to be formatted, then press F10 to begin. This process will take several hours. The actual length depends on hard disk size and speed. Look at the “Remaining” time in the top right corner of the screen to keep track of your progress.
-
7Eject the DBAN CD or DVD when you see the word “Pass.” When you see “Pass,” the wipe is complete. Your drive has been erased and re-written.
-
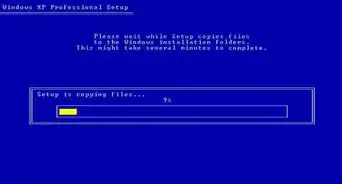
8Insert the Windows installation disc and reboot the computer. Now you'll begin the process of installing Windows on your freshly-formatted hard drive. Rebooting the computer will boot directly into the Windows installer. Click “Install” or “Next” to begin the installation, then follow the screens to select your installation options.


Community Q&A
-
QuestionWhen deleting files, is there a way to keep the information that's in the file? I am not computer literate.
 Community AnswerBy definition, "deleting" a file means getting rid of the information that is in the file. You can copy the file somewhere else, like a flash drive, or e-mail it to yourself so that you can access it again in the future. If you don't want to lose the file, it's not a good idea to delete it.
 -
QuestionHow can I permanently remove sensitive files and data from an Android phone?
 Community AnswerGo into Settings < System < Reset options < Factory reset. Your phone will be wiped. Be sure to back up first.
 -
QuestionDoes the free version of Eraser work for permanently deleting files?
 JerbinsonCommunity AnswerTechnically speaking, permanent deletions doesn't really exist, unless you destroy the hard drive, so putting so much effort into deletion is usually not helpful.

References
- ↑ https://securityinabox.org/en/guide/eraser/windows
- ↑ https://uit.stanford.edu/service/ess/pc/securedelete
- ↑ https://www.safecomputing.umich.edu/protect-yourself/encrypt-your-data
- ↑ https://support.apple.com/en-us/HT204904
- ↑ https://support.apple.com/en-us/HT204904
- ↑ http://windows.microsoft.com/en-us/windows-vista/formatting-disks-and-drives
- ↑ http://www.pcadvisor.co.uk/how-to/storage/how-format-hard-drive-in-windows-reset-windows10-3470977/
About This Article