This article was co-authored by Crystal Bear. Crystal Bear is a Professional Photographer and the Owner of Summer Bear Photography. Crystal specializes in weddings and portraits for women. She holds a BS in Interior Design and Consumer Science from San Francisco State University. Coming from a design background, Crystal brings a sense of style and artistry to her work that brings out her client’s inner confidence, showcases their beauty both inside and out, and puts them at ease. She also specializes in using the correct lighting and branding for women entrepreneurs.
This article has been viewed 109,566 times.
Merging photos together gives a cinematic, professional look to any combination of photos. Every photo editing program is different; the following will give a general step by step using Adobe Photoshop to merge your photos into 1 seamless piece of art.
Steps
-
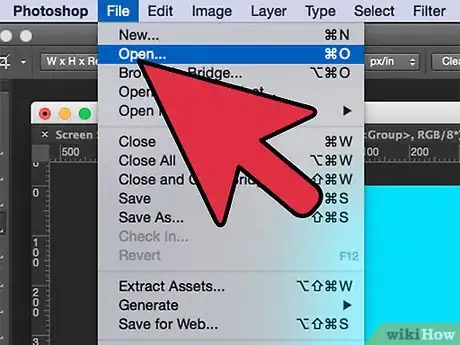
1Scan or import the photos you wish to merge into your photo editing program on your computer. For this example, import your photos into Adobe Photoshop.
-
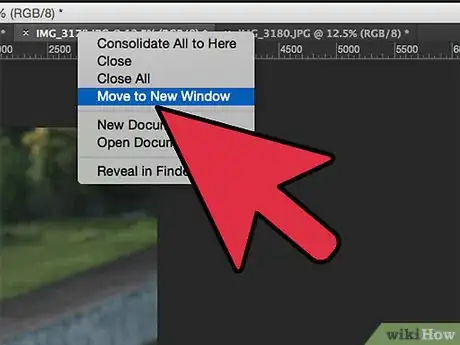
2Open the 2 photos you want to merge in their own separate document windows.Advertisement
-
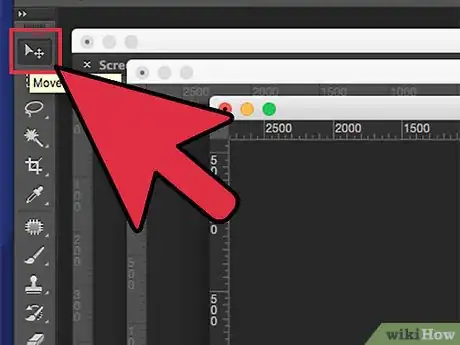
3Grab the "Move" tool in the tools palette. To use a shortcut, simply press the "V" button on your computer's keyboard.
-
4Click on the photo you want as the background photo to select that photo's document window.
-
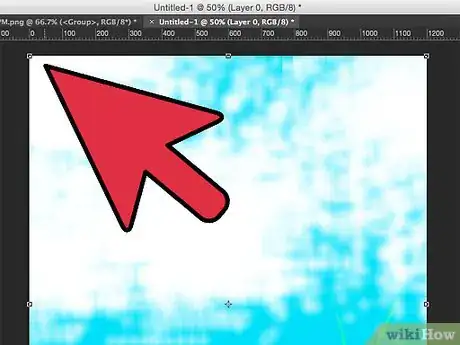
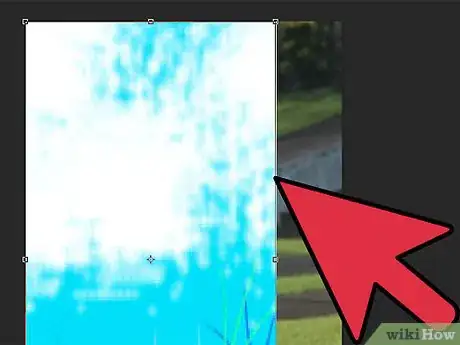
5Drag the selected background photo into the unselected document window of the second photo by holding the left click of the mouse. When you let go of the left mouse click, both images will appear in the same document window, 1 on top of the other.
-
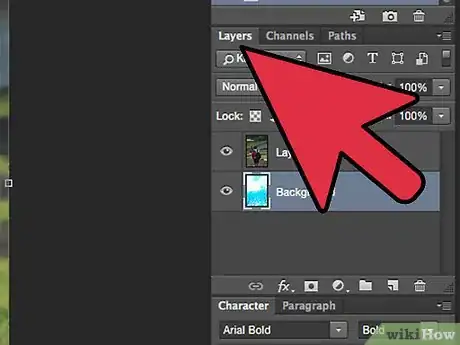
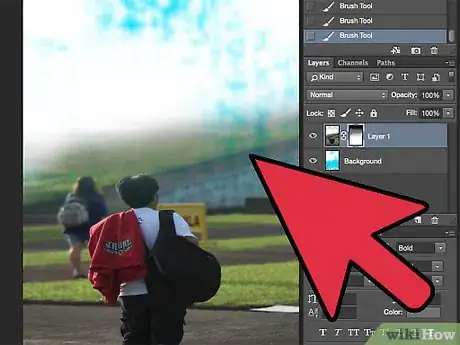
6Click on the "Layers" tab to view both images as their own separate layer. Be sure the photo you want as the background photo is titled "Background" and the photo you want for the front is labeled "Layer 1."
-
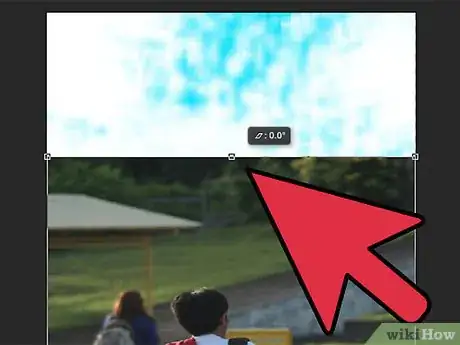
7Resize both layers as necessary so your photos will merge with the desired images showing. Do this by using the "Free Transform" command (shortcut for Windows is "Crtl + T," shortcut for Mac is "Command + T") and dragging the edges of each photo as necessary.
-
8Press "Enter" if using Windows and "Return" if using a Mac when you are finished resizing the photos to accept the changes made.
-
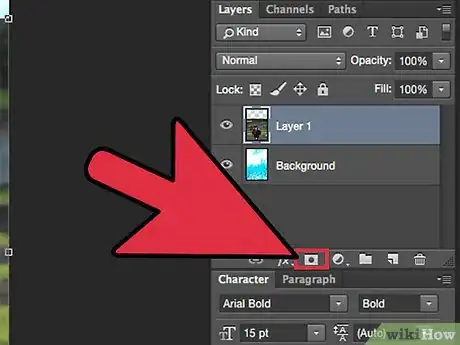
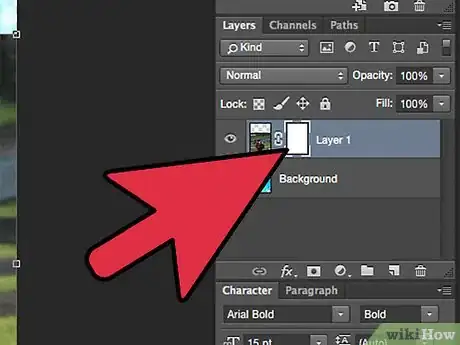
9Add a layer mask to the front photo, layer 1, in order to seamlessly blend. To do this, select the layer 1 photo in the "Layers" tab then click on the "Add a Layer Mask" icon at the bottom of the "Layers" tab. Photoshop will then show you the layer mask next to the layer 1 photo in the "Layers" screen.
-
10Select the layer mask within the "Layers" tab screen. You will know that it is selected by seeing a white highlighted border around the layer mask. The layer mask is the white thumbnail next to your layer 1 photo's thumbnail within the "Layers" screen.
-
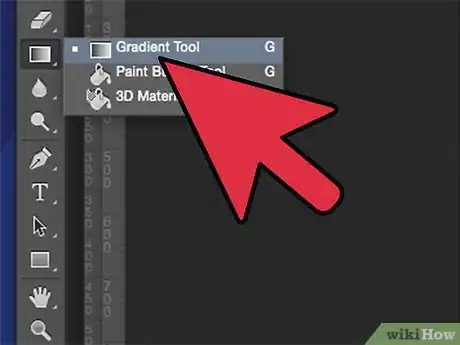
11Select the "Gradient" tool from the tools palette (shortcut for both Windows and Mac is simply pressing the letter "G").
-
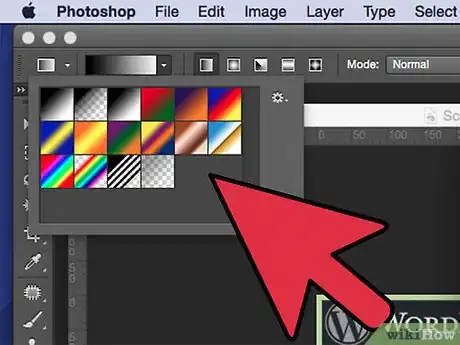
12Click on the "Options" bar at the top of the screen then click on the downward facing arrow of the gradient preview strip to access the list of gradient options called the "Gradient Picker." Select the "Black to White" gradient option by clicking on it; this option will be on the top row, third from the left. Click anywhere on the screen outside of the "Gradient Picker" box to close the gradient window.
-
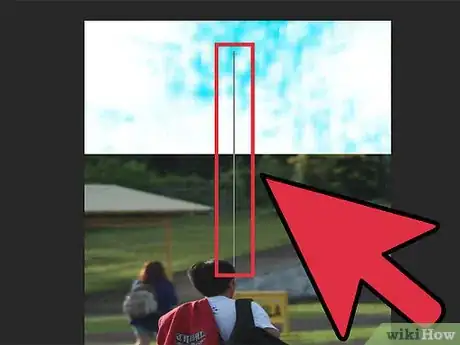
13Holding the left click, drag the gradient tool to set the gradient transition area in order to blend the photos together. Place the top "+" of the tool where you want the background, or layer 0, photo to begin blending into the layer 1 photo. Set the bottom "+" where you want the blending to stop.
-
14Release the left click once you are done setting the gradient transition parameters. Adobe Photoshop will now show you the photos blended together as 1 seamless image.
