This article was co-authored by Boris Polissky. Boris Polissky is a Professional Photographer and the Owner of SF City Hall Photo and Boris Polissky Photography based in the San Francisco Bay Area. Boris specializes in wedding, portrait, and family photography focused on bringing out real emotion and connection in his photos. He holds a Bachelor’s degree in Social Science from San Jose State University. Boris is known for capturing moments that bring out the uniqueness in all his clients.
This article has been viewed 249,354 times.
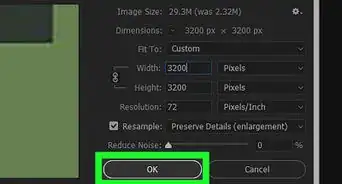
If you have an image that's too big to work with, you can easily resize it in Adobe Photoshop. When changing an image's dimensions, you can specify your own length and width measurements or adjust the size by a percentage of its current size. This wikiHow teaches you how to make an image larger or smaller in Adobe Photoshop for Windows and macOS.
Steps
Community Q&A
-
QuestionHow do I save the image after I resize it?
 Matthew WeilCommunity AnswerDouble click on the image you want to save. Something will appear that has multiple options. You press "save," then save it under whatever name you want.
 -
QuestionWill the picture not be blunt?
 Community AnswerYou can use command t if your device is mac, or control t if it's a PC computer.
 -
QuestionI have edited the picture to send to somebody. When I try to resize it, which is something that I have done thousands of times, I cannot do it. What have I done?
 Community AnswerTry saving it under a different name first and then do it. Sometimes it works. s your original file a .psd or .pdf? If you edited the file in Photoshop, you have to export the changed version again as a pdf.
wikiHow Video: How to Resize an Image in Adobe Photoshop
References
About This Article
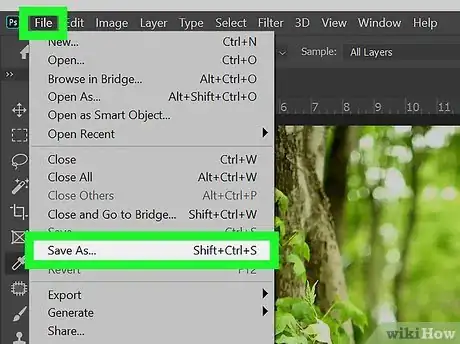
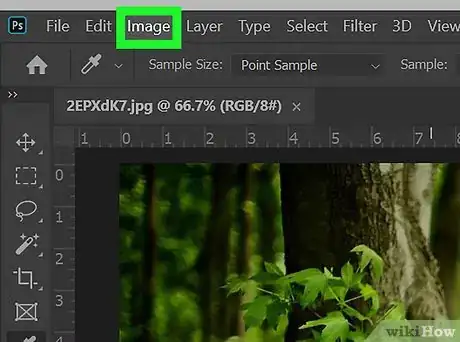
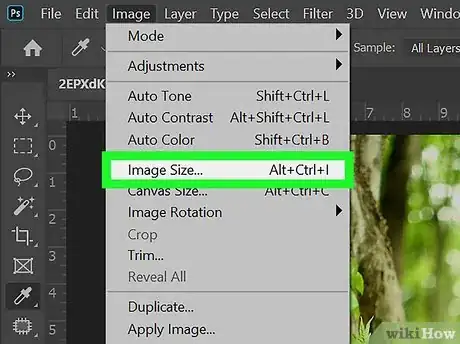
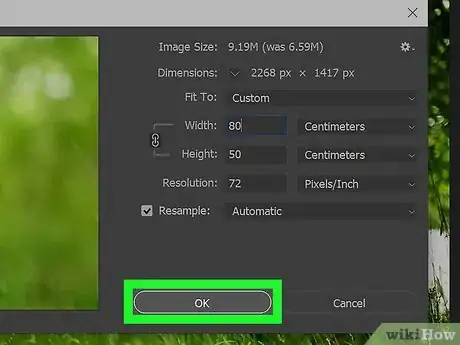
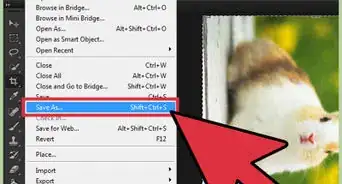
You can use Adobe Photoshop on your PC or Mac to change the size of nearly any image. First, if you haven't made a backup of the original image, click the File menu, select Save as, enter a new filename for the resized image, such as filename-resized, and then click Save. Then, click the Image menu and select Image Size. You'll see your image's current size in pixels next to "Width" and "Height." If you'd rather use a measurement unit other than pixels, such as millimeters or inches, click the triangle next to "Dimensions" and select that unit. Now, type the new width size into the "Width" box. When you enter a width, the height value changes automatically to retain the image's proportions, ensuring that the resized version doesn't stretch or warp. If you need to specify exact Height and Width sizes, click the link button to turn off automatic proportioning, and then enter your measurements.
A different way to resize the image is to grow or shrink it by a percentage of its original size. To do this, select Percent from the menus next to "Height" and "Width," and then enter a percentage value. For example, if you want the height to be twice as large as it is now, you'd enter "200 percent." Once you're satisfied with the size settings, click OK to view your newly-resized image. Remember to click the File menu and select Save so you don't lose your work.

