This article was co-authored by wikiHow staff writer, Rain Kengly. Rain Kengly is a wikiHow Technology Writer. As a storytelling enthusiast with a penchant for technology, they hope to create long-lasting connections with readers from all around the globe. Rain graduated from San Francisco State University with a BA in Cinema.
wikiHow marks an article as reader-approved once it receives enough positive feedback. In this case, 100% of readers who voted found the article helpful, earning it our reader-approved status.
This article has been viewed 1,037,833 times.
Learn more...
If you're new to Adobe Photoshop, all of the editing tools might feel overwhelming to learn. Adobe Photoshop has a reputation for being hard to learn with the amount of offered features and complexity. However, its interface is clean, logical, and easy to learn, even for beginners. You'll be able to quickly grasp how to use tools such as the Lasso tool, Paint Bucket tool, Crop tool, and more. This wikiHow tutorial will teach you how to use the many tools and functions available in Adobe Photoshop.
Things You Should Know
- Photoshop tools can be split into: Selection, Basic, Painting, Retouch, and Advanced Tools.
- When using Selection Tools, you can easily add, subtract, or select specific sections of your project for editing.
- You can use Retouch Tools such as Clone Stamp and Spot Healing Brush to edit your personal or professional photos.
Steps
Using Selection Tools
-
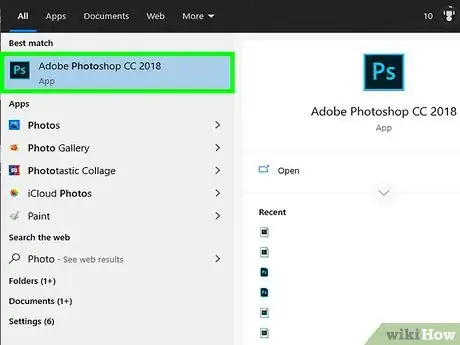
1Launch Photoshop.[1] It has a blue icon that says "Ps" in the middle. Click the Photoshop icon on your computer to launch Photoshop. You do need to purchase a subscription to download and use Photoshop. You can purchase a subscription from https://www.adobe.com/products/photoshop.html. If you don't have a subscription, you can click Free Trial and sign up for a free 7-day trial.
- Familiarizing yourself with the tools will help you learn Photoshop and use Photoshop more quickly.
-
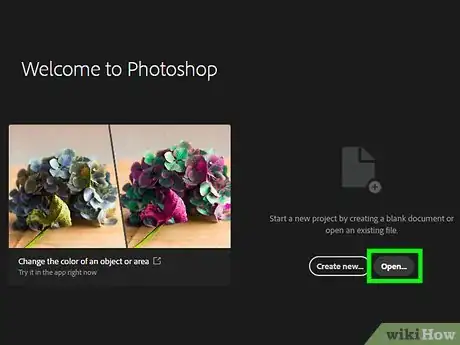
2Open a document. You can open any .".jpeg/.jpg", ".gif", ".png", or other image files, or you can open a Photoshop (.psd) document. Click here to open a sample picture. You can click Open on the title screen and select an image file to open or use the following steps to open an image file anytime in Photoshop:
- Click File.
- Click Open.
- Select an image file or Photoshop document.
- Click Open.
Advertisement -
3Use the Marquee tool. You can do this by clicking on the icon that resembles a rectangle with a dotted line, or by pressing "M" on your keyboard. You must select a section of a photo in order to edit it in Photoshop. The Marquee tool allows you to select a rectangular region of a photo. Click and drag to select a section of an image with the Marquee tool. A selected region of an image will have a moving dotted line that resembles ants marching around the selected region.
- Click and hold the Marquee icon in the toolbar to the left to display a small popup menu where you can select the variations of the Marquee tool. The variations include the Elliptical tool, and the vertical and horizontal select tools. The Elliptical tool allows you to select circles and ovals. The vertical and horizontal select tools can be used to select both horizontal and vertical rows of pixels.
- To deselect a selection, press "Command + D" on Mac or "Control + D" on a PC.
-
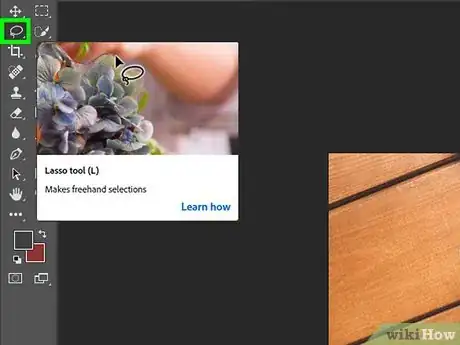
4Use the Lasso Tool. You can use the Lasso tool to draw a freeform selection around a shape or area of your image. Click the icon that resembles a lasso, or press the "L" key on the keyboard to select the lasso tool. Click and hold the mouse button, then draw a selection around the small white sailboat that's left of center in the window. When you get to the bottom, release the mouse button—the selection will auto-complete.
- Click and hold the lasso tool in the toolbar to see its variants. Its variants include the Polygonal Lasso tool, and the Magnetic Lasso tool.
- Press "Shift + L" to select the Polygonal Lasso tool. Click once anywhere on the image. Notice as you move your mouse, the starting point remains pinned, and a dashed line extends towards the cursor. Click again, and that next point becomes pinned. These pinned points are called anchor points. You can make an entire selection by clicking to create anchor points. It can be as simple as a triangle, or as complex shape. When you reach your last click point, double-click instead of single click, and the polygon will automatically close. You can also click the starting anchor point
- Press the Escape key at any time to cancel the selection in progress.
- Press "Shift + L" again to select the Magnetic Lasso tool. The Magnetic Lasso tool is similar to the Polygonal Tool except it tries to guess the shape you are trying to select and automatically snaps anchor points to the edges of the shape. Click and hold the mouse button with the cursor pointing at the waterline of the bow (front) of the boat and drag around the boat slowly. Notice as you drag, the selection snaps to the boat as you move!
-
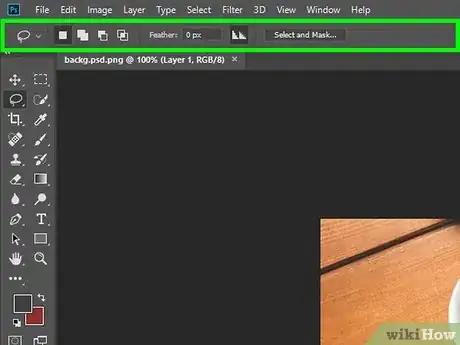
5Use the Lasso Tool modifiers. At the top-left corner of the Photoshop window, you'll see some tool modifiers. These include Feather, Anti-alias, Width, Contrast, and Frequency. You can use these tools to do the following:
- Feather. This creates a soft, faded edge around your selection. Enter a number next to "Feather" to select how many pixels wide you want the soft edge to be. Enter "0" to turn Feather off.
- Anti-alias: Click the checkbox next to "Anti-alias" to create a smooth transition around your selection.
- Width: This sets how many pixels away from an edge the Magnetic Lasso tool will place each anchor point.
- Contrast: This sets the amount of color contrast the Magnetic Lasso tool will use to consider what is an edge and what is not.
- Frequency: This sets how often the Magnetic Lasso tool will place an anchor point while tracing an outline for a selection.
- You can use the Lasso Tool to remove the background of a picture.
-
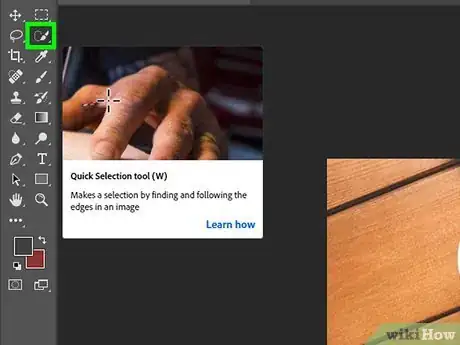
6Use the Quick Selection tool. Click the icon that resembles a paintbrush painting a selection in the toolbar to the left of press "W" to select the Quick Selection. Click and hold on the tan house in the middle of the picture. While holding the mouse, drag to the left or the right, "scrubbing" the house with the cursor. Notice how the selection grows as you do this. Make sure you select the roof, balcony, and all the rest of the house is selected.
- If the Quick Selection tool selects too much of the image, click the icon that resembles Quick Selection tool with a minus (-) sign in the upper-left corner or press and hold the "Option" or "Alt" key. This puts it in subtraction mode. Click and drag slightly on the area of the selection you want to remove from the selection.
- Press "[" or "]" to adjust the size of the brush for the Quick Selection tool. This adjusts the sensitivity of the tool.
- Click and hold the Quick Selection tool in the toolbar to view and select the Magic Wand tool. The Magic Wand tool is similar to the Quick Selection tool, except it selects colors. Use the field next to "Tolerance" in the upper-left corner to adjust how sensitive the Magic Wand tool is to selecting color ranges.
-
7Add or remove a part of a selection. The shapes in the upper-left corner of Photoshop can be used to add or subtract from a selection. These options are available for all the selection tools (except the Quick Selection tool, which has it's own options). Use the following steps to add or subtract from a selection:
- Click the icon that resembles a square. This is the default option. Use this option to replace your current selection with a new selection using any of the selection tools.
- Click the icon that resembles two squares joined together. This option allows you to use a selection tool to add to your current selection.
- Click the icon that resembles a square cut out of another square. This option allows you to use any of the selection tools to subtract an area from your current selection.
- Click the icon that resembles two squares overlapping. This option makes a selection where a new selection overlaps with an existing selection.
Using Basic Editing Tools
-
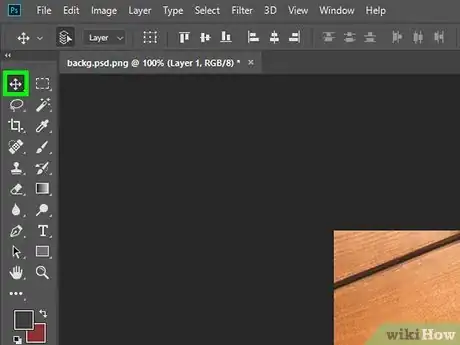
1Use the Move tool. The Move Tool has an icon that resembles horizontal and vertical arrows crossing (on older versions of Photoshop, it has an icon that resembles a mouse cursor and a cross-arrow). Click the icon in the toolbar to the left or press "V" on the keyboard. Click and hold in the middle of a selection and move the cursor. Notice how the selection moves with your cursor. Drag the selection so that it surrounds the tan house on the hill, as shown:
- Alternatively, you can copy and paste a selection using the options in the Edit menu in menu bar at the top.
- You can also use the Filters menu in the menu bar at the top to apply Filters to a selection.
-
2Use the Crop Tool. To select the Crop tool, click the icon that resembles two right-angles forming a square. Click and drag to draw a rectangle around the areas of the image you want to keep. Then click and drag drag the handles in the corners of the crop area to adjust the crop area. The dim area outside the crop area will be removed from the image when the image is cropped. Press "Enter" to crop the image.
- Click and hold the Crop tool to view its variants. The Crop Tool variants include the Perspective Crop tool, and the Slice tool.
- Perspective Crop lets you adjust the relative perspective of the image as you crop. If you an image that's at an odd angle, for example, you can place the corners of the cropping area on the corners of the sign and crop the image. This will produce a straightened version of the sign.
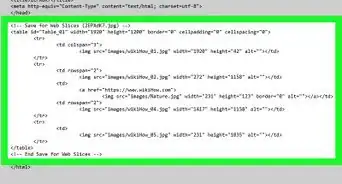
- The Slice tool has an icon that resembles an Exacto knife. This is used to cut up an image into multiple smaller images. This is useful if you have an image you want to use for a web page, and you have parts of an image you want to use for buttons. Use the slice tool to draw squares around the areas of an image you want to cut into smaller images. Click and drag the edges of the square divisions to adjust them. You can also use the Slice Select tool to move the square divisions. Click File and Save for Web and Save to save each of the divisions as a separate image.
-
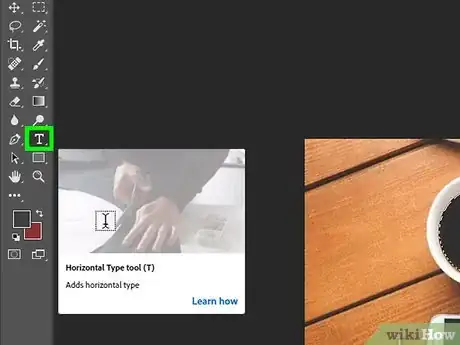
3Use the Text Tool. Click the icon that resembles a "T" in the toolbar or press "T" on your keyboard to select the text tool. Click where you want to add text in your image and type something. Highlight the text and use the following menu options at the top of Photoshop to adjust the look of your text:
- Font family: It's the first menu at the top of the page that has the name of a font in it. This lets you select a font of your text. You can select from the list, or type in the font name.
- Font style: It's to the right of the Font Family menu at the top. This allows you to select a font style (e.g., Bold, Italic, Light, Medium, etc.). If the menu is grayed, that means there are no variations on the current font family.
- Font size: This is next to an icon that resembles a small "T" and a large "T" at the top. This adjusts the size of the font. You have the option of entering a specific font size or choosing a size from a small list.
- Antialiasing: This will determine the strength of the edge blending around the letters. "None" turns off antialiasing and text will look very blocky and pixilated. Here's a comparison of the different antialiasing settings:
- Justification. Click the icons with lines that resembles text arranged to side or middle to select how you want the text to be justified. Text can be justified to the left, right, center, or evenly spaced.
- Color. To change the color of the font, click the colored square at the top of the page. Use the panel to the left in the window to select a color. Use the small strip to the side of the color panel to select the color shade. Then click Ok to set the color.
- Warp. This bends, or "warps" the text on the horizontal or vertical axis. To use it, simply select the text layer, click on the Warp button, and select a style from the drop-down menu. Use the slider bars to adjust the text warping. Click Ok when you are finished.[Image:Warp settings.jpg|center]]
- Panels. The Panels button opens up two more palettes: Character and Paragraph. These panels have more text options you can use to adjust your text. You can adjust the vertical and horizontal character size, as well as the space between letters, and lines of text.
-
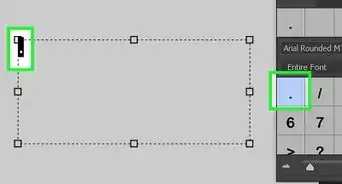
4Create a sized text field. To do this, select the Text tool and click and drag from the top left corner of where you want your text box to appear, to the bottom right corner of the box. You'll see a rectangle on the screen, with handles on the corners and sides.
- Type some a couple sentences into the box. Don't worry if the text is too big or too small. When you're done entering text, press the Enter key. If your text is too small, use the Font Size control (at the top) to make it larger. Conversely, if your text is too large, use the Font Size control to make the text smaller.
- You can also adjust the size of the text field: hover over one of the handles for a couple seconds, and your cursor will change to a double arrow. Click and drag to resize the text box: the text will flow within the boundaries of the box.
-
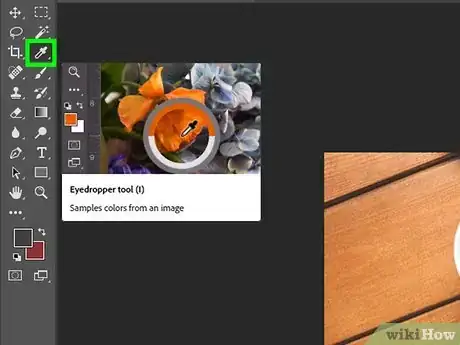
5Use the Eye-dropper tool. Click the icon that resembles an eye-dropper in the toolbar or press "i" to select the eye-dropper tool. Then click a color in your image. This sets the color you clicked as the Foreground color.
-
6Use the eraser tool. Click the icon that resembles an eraser in the tool bar to select the Eraser tool or press "E". Click and drag over an area of the image you want to erase.
Using Painting Tools
-
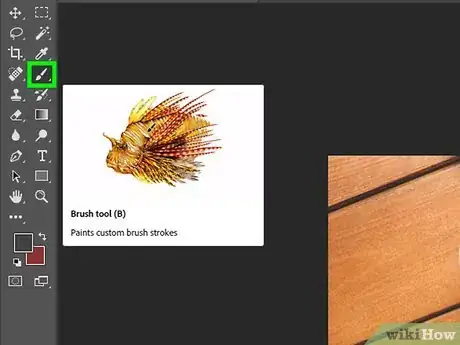
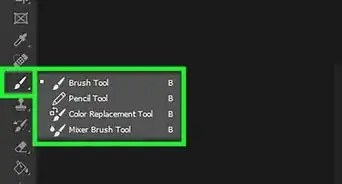
1Use the Brush Tool. Click the icon that resembles a paintbrush in the toolbar to the right or press "B" to select the Brush tool. Click and drag over your image to paint freehand over your image.
- You can use this tool to create digital art.
- Click and hold the Brush tool to view the Brush menu variants. The Brush menu is also home to the Pencil tool, the Color Replace tool, and the Mixer Brush.
- The Pencil tool draws lines of varying thicknesses, and while you can use different brushes, the Pencil tool features no antialiasing: everything is very bitmapped.
- The Color Replacement tool can be very useful for replacing one color (or range of colors) with another color.
- The Mixer Brush. This mixes together different colors, much the same way that an artist mixes colors on a palette.
- Pick a color for the brush. Click the colored square on top at the bottom of the toolbar to select the Foreground Color. A color picker dialog will appear. Use the panel to the left in the window to select a color. Use the small strip to the side of the color panel to select the color shade. Then click Ok to set the color. You can also do the same for the background color
- Pick a brush. The easiest way to pick a brush is with the brush picker at the top-left of the Photoshop window. Click the icon that resembles a circle (or selected brush) Pick any brush in the menu. Notice the Size and Hardness slider bars. Size sets the diameter of the brush, and Hardness refers to the edges: a 100% brush has a crisp edge, while a 0% brush is feathered for a soft edge.
- Set the Opacity for a brush. Opacity refers to how transparent (see-through) a color is. Type a number in the field next to "Opacity" to set the opacity. 0% is completely invisible. 100% is completely opaque.
- Set the Flow rate for the brush. Flow is similar to opacity, but it tries to similar ink or paint on a brush. Set flow to 1% for almost no paint. Set it to 100% to glob it on.
-
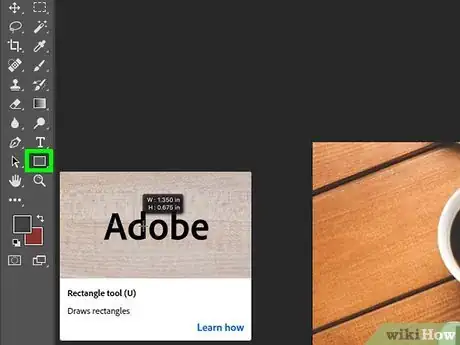
2Use the Shape Tool. Click and hold the icon that resembles a shape to display the different shape tools. By default, it is a rectangle. Then click the shape you want to use. Click and drag in the image to create your shape. Hold "Shift" as you drag to keep the shape proportional as you drag.
- The Shape menu (shown open) lets you choose Shape, Path, or Pixels. Choosing Shape will give you a shape with a filled color. Selecting Path will give you an outline of the shape with no color. Pixels creates a pixelized shape.
- The fill color of the shape is chosen using the Fill popup menu; the outline color (if any) is chosen using the Stroke popup menu; the stroke width is set with the stroke width menu. Use the stroke options menu to select a stroke style (i.e. dashed or solid lines and more).
- If you select the Polygon tool, you can select how many sides the polygon has in the box labeled "Sides".
-
3Use the Paint Bucket Tool. Click the icon that resembles a paint bucket in the toolbar to the left or press "G". The Paint Bucket tool is paired with the Gradient tool. If it's not in the toolbar, click and hold icon that resembles a square with a black and white fade to display the Paint Bucket tool. Click a colored area to fill the area with the Foreground color.
- Photoshop lets you adjust the tolerance so that any pixel that falls within the range of the original click location will get filled. Increase the number next to "Tolerance" at the top of the menu to allow a wider range of colors to get filled with the Paint Bucket tool.
- You can also adjust the opacity at the top. Lower the number next to "Opacity" to create a more transparent Paint Bucket fill.
-
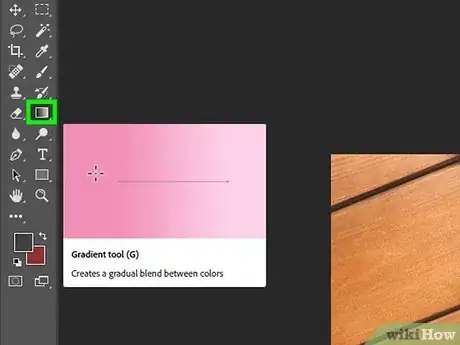
4Select the Gradient Tool. Click the icon that resembles a square with a black and white fade, or press "G" to select the gradient tool. If the Paint Bucket Tool or 3D Material Drop tool is selected, press Shift-G until the Gradient tool is selected. The Gradient tool will let you fill an area with a smooth blending between 2 or more colors. Click and drag across the area you want to fill to create a gradient blend across the area.
- To edit a gradient, click on the gradient palette. The Gradient Editor will appear. Click on the colored tabs to choose a color for each point and move the points to set the start and endpoints for each color. Click on the black tabs at top to assign opacity.
- Close the Gradient Editor.
Using Retouch Tools
-
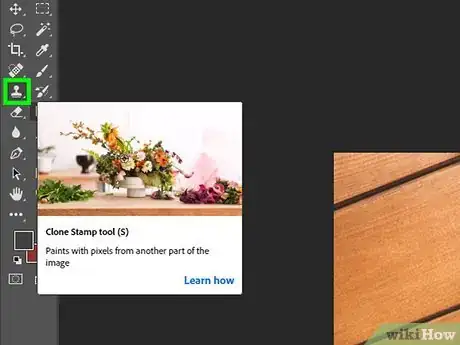
1Use the Clone Stamp tool. The clone stamp lets you pick up part of the image and copy over another part of the image. Click the icon that resembles a rubber stamp or press "S" on your keyboard to select the Clone Stamp tool. Use the following steps to use the Clone Stamp tool.
- Click the icon with your current brush select to the right of the icon that resembles the Clone Stamp tool in the upper-left corner to display the bursh menu. Select a brush from the menu.
- Using the slider bar below "Size" to set the size of the Clone Stamp brush. You can also press "[" or "]" to change the brush size while using the Clone Stamp tool.
- Use the slider bar next to hardness to change the hardness of the brush. The Clone Stamp tool usually works better when you use a soft brush setting.
- Hold the Option or Alt key and click an area you want to sample. This samples the area and allows it to be stamped using the clone stamp tool.
- Click the area you want to stamp over. This stamps the area you sampled over the area you clicked on. This is useful for removing spots and blemishes on an image. Sample the area next to the spot or blemish and then stamp over it.
-
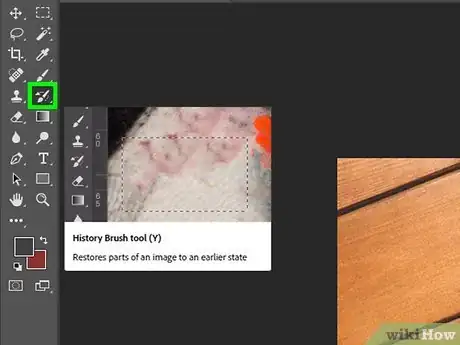
2Use the History Brush tool. Click the icon that resembles a paintbrush with a swirl around it or press "Y" to select the History brush tool. The History Brush allows you to paint a previous version of the image back into your current image. Use the following steps to use the History Brush tool:
- Scroll to the top of the History tab. If it's not showing, select History from the Window menu. Click the checkbox next to the version of the image you want to revert to.
- Use the History Brush to paint a previous version of your image into your current image. For example, if you used the Clone Stamp tool to erase an object in your image, you can use the History Brush tool to paint it back in.
-
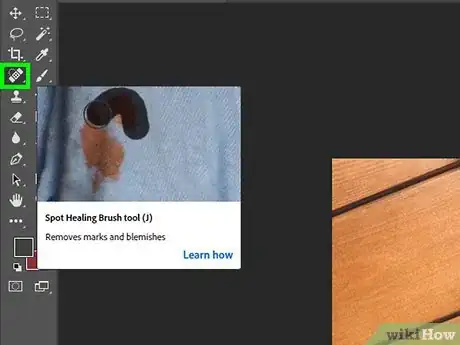
3Select the Spot Healing Brush. Click the icon that resembles a double-ended eraser or press "J" to select the Spot Healing Brush tool. Click over a spot or blemish you want to remove from the image. The Spot Healing Brush tool uses the surrounding area to erase the blemish.
- Use the Brush menu in the upper-left corner to select a brush type, size and change the hardness. The Spot Healing Tool works best if you use a softer brush type.
-
4Use the Dodge, Burn, and Sponge tools. The Dodge tool is used to lighten parts of an image. It has an icon that resembles a bulb syringe. The Burn tool darkens a part of an image. It has an icon that resembles a hand pinching. The sponge tool soaks up color. It has an icon that resembles a sponge. All these tools are bundled together in the toolbar to the left. Click and hold whichever icon appears in the toolbar to display a pop-up menu with all the tools. Select whichever tool you want to use in the menu and single-click over the area of your image you want to apply the brush to.
- Use the Brush menu in the upper-left corner to select the brush you want to use, as well as the size and hardness. You can also adjust the brush size by press "[" and "]". The Dodge, Burn, and Sponge tools work best if you have a soft brush.
-
5Use the Red-eye tool. Click and hold the Spot Healing Brush tool and then click the icon that resembles an eye in the pop-out menu to select the Red-eye tool. Click and drag over red eyes in your image to remove the red eye.
Advanced Tools
-
1Use the Pen Tool. Click the icon that resembles a fountain pen or press "P" to select the Pen tool. The pen tool is excellent for making very precise, editable selections. It's a more advanced tool that will take some practice to use well, but worth getting familiar with. Use the following steps to use the Pen tool:
- Select the fill, stroke and color options at the top of the screen. The Pen tool allows you to freehand draw your own shapes. It uses the same options at the top of the screen as the Shape tools.
- Click anywhere with the Pen tool. This places an anchor point on the screen.
- Click a different spot in the image. Notice this created a straight line between the two anchor points.
- Click a different location and drag the mouse. This time you will notice it creates a curved line in the opposite direction you dragged the mouse. You will also notice two lines extending from the anchor points. These are called Bezier Curve Handles.
- Click spot in the image. Notice this creates another line that continues the curve of your previous line.
- Click the starting anchor point you made. This closes the path and finishes your shape. Try making shapes just using the Pen tool. Don't worry if they aren't perfect. You can adjust the lines and curves afterward.
-
2Use the Direct Select tool. Click the icon that resembles a white mouse cursor in the toolbar to the right or press "A" to select the Direct Select tool. The Direct Select tool allows you to edit the shapes you make using the Pen tool. Use the following steps to edit your shape using the Direct Select tool.
- Click the edge around the shape you just made to select it.
- Click and drag a bezier curve. Notice how this adjusts the curve of the line.
- Click and drag an anchor point. This allows you to move adjust the shape by moving the the anchor points.
Community Q&A
-
QuestionHow can I change the background of the photo?
 Malinga Ignatius MusaaziCommunity AnswerCrop the photo and then get the specific background of you need to put in the photo. Put the background selected to be at the back of your photo, and apply colors.
 -
QuestionHow do you change the background in Photoshop?
 Community AnswerCrop main object, copy it, then paste it in front of the background that you want.
 -
QuestionAfter selecting a tool, how do I cancel the tool selection and return to the regular cursor?
 Community AnswerJust press V (default keyboard shortcut), or click the white cursor in the tool bar on the left.
About This Article
1. Use the Marquee and Lasso tools to select.
2. Use the Brush tool to paint.
3. Use the Crop tool to preserve one part of the image.
4. Use the Text tool to type.
5. Use the Shape tool to make shapes.
6. Use the Paint Bucket tool to fill backgrounds.
7. Use the Clone Stamp tool to clone part of an image.
8. Use the Pen tool to create paths.
