This article was co-authored by wikiHow staff writer, Nicole Levine, MFA. Nicole Levine is a Technology Writer and Editor for wikiHow. She has more than 20 years of experience creating technical documentation and leading support teams at major web hosting and software companies. Nicole also holds an MFA in Creative Writing from Portland State University and teaches composition, fiction-writing, and zine-making at various institutions.
This article has been viewed 407,121 times.
Learn more...
Gradients are gradual changes of color or tint that sweep over or fill an image. Gradients can be used to add subtle color changes to an image, such as those caused by shadow, and they can be layered and blended to create interesting effects. To make a gradient in Photoshop, you'll need to use the gradient tool to add linear, radial, angular, reflected, or diamond gradients to a selected area or layer. This wikiHow teaches you how to create your own gradients and use them to perfect your Photoshop project.
Steps
Creating a Gradient
-
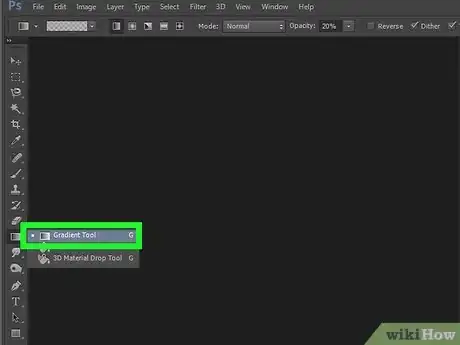
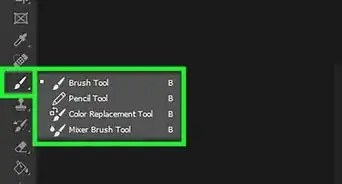
1Click the Gradient tool on the toolbar. It has a square icon with a gray gradient and shares a button with the paint bucket tool. If you don't see the gradient tool, click and hold the paint bucket until the menu expands, and then click Gradient Tool.
-
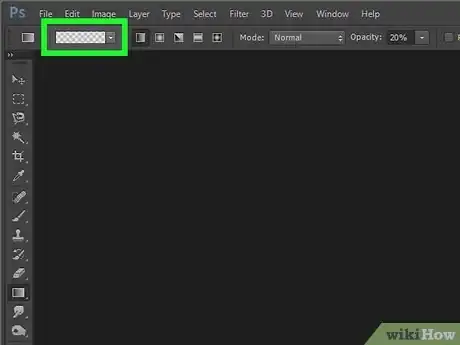
2Open the Gradient Editor. A variety of Gradient tools now appear in the bar at the top of Photoshop. Click the center of the drop-down menu that looks like a wide gradient to open the Gradient Editor.Advertisement
-
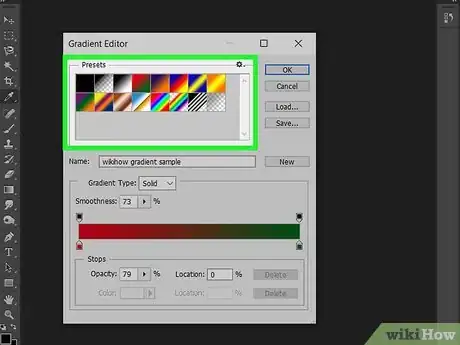
3Select a preset. A variety of presets will appear, organized by color and type. You can edit any of the presets to make it your own, or stick to what it contains. When you select a preset, the gradient bar at the bottom will show a preview.
- If you want to do a lot of customizations, try starting with a gradient from the "Basics" folder at the top.
-
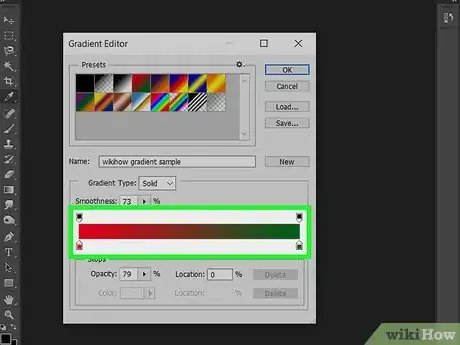
4Select and adjust colors for your gradient. You'll see a square at each corner of the preview bar—the sliders on the bottom are called the "Stops," and they control where colors appear on the gradient. Here's how you can use the stops to add and control color:
- Click the bottom-left stop, and then select a color from the "Color" drop-down.
- Click the bottom-right stop and select another color.
- Drag the stops to the desired locations until the gradient colors appear how you'd like.
- Another stop will appear in the middle, which adjusts the location of where the colors blend together. Drag that stop until the gradient looks the way you want it to.
- Want to add more colors? Click below the gradient where you'd like to add a color to create another stop, then select the color. To delete a stop, just select it and click "Delete."
-
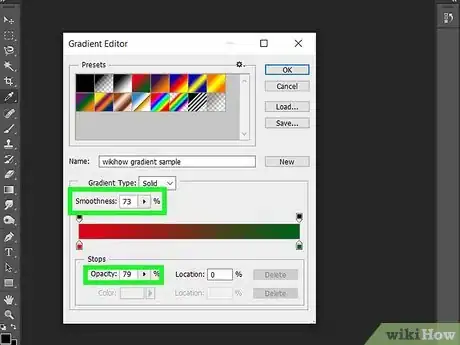
5Adjust the opacity and smoothness of the gradient. The stops at the top two corners are the Opacity stops, which control how hard or translucent the color is at a certain area. You can also use the "Smoothness" menu to adjust how smooth the gradient is where it changes color and huge.
- If you'd prefer a rougher gradient, click the "Gradient type" menu and select Noise. You can then adjust the "Roughness" slider to control the noise amount.
- A "rough" gradient picks random colors for each spot that have similar values to your two end colors. The result looks a bit like a bookshelf, with slots of each color instead of one smooth, unbroken transition.
-
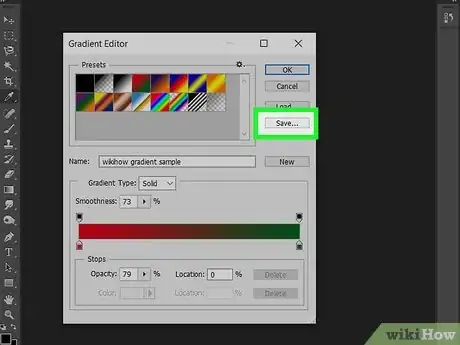
6Save your gradient. Once you've created a gradient you like, you'll want to save it so it doesn't disappear when you switch to a different one. Here's how:
- Type a name for your gradient into the "Name" box.
- Click the New button to add it to the current folder under "Presets."
- You can drag the gradient to a different folder if the one it saved to isn't applicable. Or, if you want to create a brand new group, right-click anywhere on the list of presets and select New Gradient Group.
-
7Click OK to use your new gradient. This closes the Gradient Editor and returns you to your image.
Using the Gradient Tool
-
1Select the part of the image where you want to add the gradient. If you don't want to fill the entire layer or image, you'll want to select (or create) an area to fill.[1] You can create shapes using the shape tool, draw something with the pen tool, or create a selection with the marquee tool.
- If you want to fill the entire layer or image with a gradient, you don't have to select anything first.
- You can make gradients any shape, as long as you can create the selection or shape.
-
2Click and drag across the area you want to fill with a gradient. When you lift your mouse, this will add the gradient to the section of the image on which you placed your line.
-
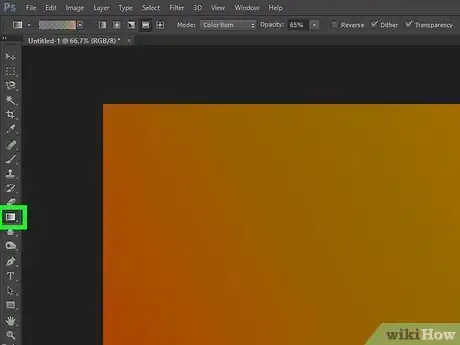
3Click the Gradient tool on the toolbar. It has a square icon with a gray gradient and shares a button with the paint bucket tool. If you don't see the gradient tool, click and hold the paint bucket until the menu expands, and then click Gradient Tool.
-
4Select a gradient. If the gradient color and pattern you want to use is not the one that appears in the wide drop-down menu in the upper-left corner of Photoshop, click the small down-arrow next to it to expand the options, and click the desired gradient.
-
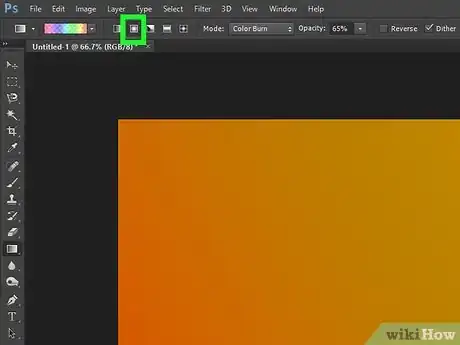
5Select a gradient style. Next to the selected gradient in the toolbar you'll see five squares containing patterns. These are for different gradient styles. Here they are, in order:
- Linear: The classic gradient, like an evening sky. Just a gradual transition between two colors along a straight line.
- Radial: One color starts in the middle, then blooms out in a sphere, gradually changing into the next color. Like looking into the sun. The first color is the "sun" and the second the "sky."
- Angular: More specific, this sweeps the colors in a counterclockwise arc around your starting point. Often leads to two solid colors with gradation around the edges.
- Reflected: Makes a mirror image of a normal linear gradient on both sides of the starting point. Basically, if you draw your "line" to the right, it will repeat the gradient to the left.
- Diamond: Like the radial gradient, only you have a diamond or square in the middle, not a circle.
-
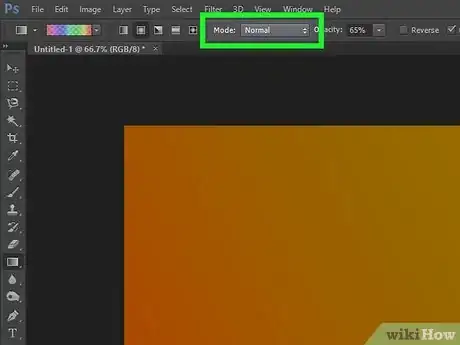
6Choose other options for your gradient. As you move right across the gradient bar at the top of Photoshop, you'll find other options:
- The "Mode" drop-down lets you choose a blending mode, such as Dissolve or Color Burn.
- You can adjust the overall opacity of the gradient using the "Opacity" menu.
- To reverse the gradient pattern, check the box next to "Reverse."
- To make the gradient even smoother with less banding, check the box next to "Dither."
- To fill a transparency mask with the gradient, check the box next to "Transparency."
-
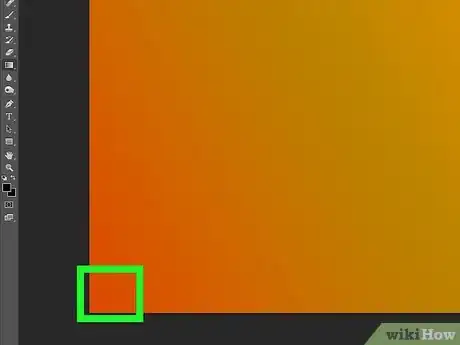
7Click and hold to set the starting point of the gradient. Think of this as the place where you first color is strongest. Remember, the gradient will fill the shape it is in, so you don't have to put the starting point right at the edge to make it fit.
- You don't even have to click in your selection area or layer. If you want the fade to start "off-screen," click off-screen. This can lead to more subtle fades.[2]
- Don't release the mouse button until you're ready to set the gradient.
-
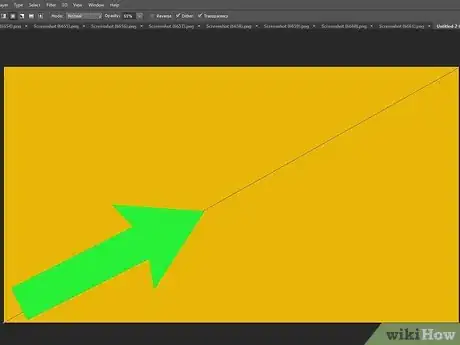
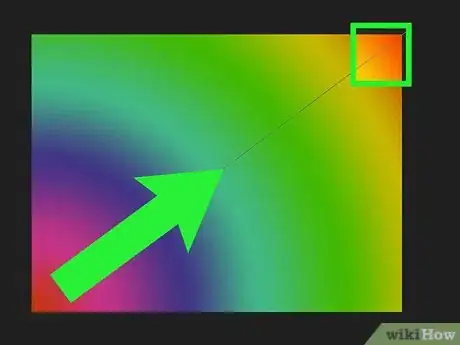
8Move your mouse in the direction you want the gradient, then release. You'll see a line follow you from your starting point, indicating the direction the colors will fade. Release the mouse to create your gradient.
- Longer lines will create more gradual transitions, while shorter lines will cause more abrupt changes between the two colors.[3]
- If you hold the Shift key down as you drag, the line angle will be constrained to 45 degrees.
-
9Apply gradients to layers (advanced). In addition to applying gradients directly to your image by drawing them or placing them in shapes, you can also apply them directly to layers in the Layers panel. Here's how:
- Apply a gradient to text or shape layers as a layer effect or shape fill: Drag the desired gradient from the Gradients panel (on the right side of Photoshop) to a layer in the Layers panel.
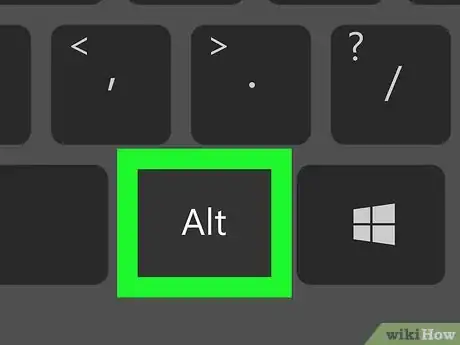
- Apply a gradient to text or shape layers as a fill layer: Hold Cmd (Mac) or Alt (Win) as you drag a gradient from the Gradients panel to the desired layer.
References
About This Article
To make a gradient in Photoshop, click the gradient tool in the toolbar. This tool has a square icon with a gray gradient and shares a button with the paint bucket tool. If you don't see the gradient tool, click and hold the paint bucket until the menu expands, and then click ""Gradient Tool"". A variety of Gradient tools will appear in the bar at the top of Photoshop. Click the drop-down menu that looks like a wide gradient to open the Gradient Editor. Select one of the presets to open the gradient for editing—the gradient bar at the bottom will display a preview. To use the preset gradient, click ""OK,"" and then click and drag across the area you want to fill with a gradient. When you lift your mouse, this will add the gradient to the section of the image on which you placed your line. You can also use different colors than what you see in the presents. To do this, click the Gradient drop-down menu to return to the Gradient editor, and select Basic gradients to start. You'll see a square at each corner of the preview bar. The sliders on the bottom are called the ""Stops,"" and they control where colors appear on the gradient. Click the bottom-left stop, and then select a color from the ""Color"" drop-down. Then, choose an ending color by clicking the bottom-right stop and selecting another shade. Now drag the stops to the desired locations until the gradient colors appear how you'd like. When you do this, another stop will appear in the middle, which adjusts the location of where the colors blend together. If you’d like to add more colors, click below the gradient where you'd like to add a color to create another stop, then select the color you’d like. To delete a stop, just select it and click ""Delete."" The stops at the top two corners are the Opacity stops, which control how hard or translucent the color is at a certain area. You can also use the ""Smoothness"" menu to adjust how smooth the gradient is where it changes color. Click ""OK"" when you're finished, and then draw your line to place the gradient.









-Step-9-Version-2.webp)


