X
This article was co-authored by wikiHow staff writer, Jack Lloyd. Jack Lloyd is a Technology Writer and Editor for wikiHow. He has over two years of experience writing and editing technology-related articles. He is technology enthusiast and an English teacher.
This article has been viewed 890,204 times.
Learn more...
This wikiHow teaches you how to insert a photo of yourself into a photo of a famous person. You can use either free software (GIMP) or paid software (Photoshop) on both Windows and Mac computers to do this.
Steps
Method 1
Method 1 of 3:
Preparing to Create Your Photo
-
1Find a picture of the famous person. You'll need an image into which you can insert your own picture, so find and download a picture of the person with whom you want to make a photo.
- Ideally, you'll find a photo that leaves plenty of room for you to insert your own photo.
- Try to find an obscure, lesser-known photo of the famous person, as using a common photo will make it easier for people to identify the photo as fake.
- Using a photo in which the person is on level ground with natural lighting will help make your final result more convincing.
-
2Find or take a picture of yourself. Once you've found your celebrity photo, you'll need to find a decent photo of yourself to use. You can also take a photo of yourself if you'd prefer not to use an existing photo.
- Take into account the conditions of the celebrity's photo when finding a picture of yourself. For example, if it's raining in the celebrity's photo, you probably shouldn't use an image of yourself in sunbathing attire.
- You'll want to make sure the photo of yourself comes close to matching the overall lighting conditions and resolution of the celebrity's photo. Nothing can flag your photo as fake faster than using a high-quality photo of the celebrity and a low-quality video of yourself.
Advertisement -
3Place both pictures in the same location. For simplicity's sake, make sure that both photos are in the same location on your computer (e.g., the desktop).
-
4Download GIMP if you don't have it. If you're planning on using GIMP to edit your photos, you'll need to download and install it on your computer if you don't already have it:
- Windows — Go to https://www.gimp.org/downloads/, click Download GIMP directly, double-click the downloaded setup file, and follow the on-screen instructions.
-
Mac — Go to https://download.gimp.org/mirror/pub/gimp/v2.8/osx/ in your computer's web browser, click the gimp-2.8.10-dmg-1.dmg link, double-click the DMG file, click and drag the GIMP logo onto the "Applications" folder, and follow any additional instructions.
- On a Mac, you may need to verify the installation before you can install GIMP.
- If you're using Photoshop, skip this step.
-
5Make sure you have a story ready. People will most likely have questions about the picture, so come up with an amusing anecdote or believable story about how the photo came into existence ahead of time.


Advertisement
Method 2
Method 2 of 3:
Using GIMP
-
1Find the size of the celebrity photo. You'll need to know the dimensions of your famous person's photo so that you can create a properly sized canvas later:
- Windows — Right-click the celebrity photo, click Properties in the drop-down menu, click the Details tab, and look at the size (number x number) to the right of the "Dimensions" heading.
- Mac — Click the celebrity photo, click File, click Get Info, and look at the size (number x number) in the "More Info" section (you may first have to click More Info).
-
2
-
3Open the photo of you. Before you can insert your photo into the celebrity's photo, you'll need to crop yourself out of your photo's background. Do the following to open the photo:
- Click File
- Click Open...
- Select the photo of yourself.
- Click Open
-
4Add an alpha channel to the photo. The alpha channel will allow you to crop out your image without adding white space to the background:
- Click the Layer tab.
- Select Transparency
- Click Add Alpha Channel
-
5Select your outline. You'll use the Free Select tool to do this:
- Click Tools
- Select Selection Tools
- Click Free Select
- Click and drag around the outline of yourself.
-
6Crop out the background. Once you've outlined yourself, do the following:
- Press M to select your outline.
- Press Ctrl+i (Windows) or ⌘ Command+i (Mac) to invert the selection.
- Press Del or Ctrl+X (⌘ Command+X on Mac) to delete the background.
-
7Touch up your photo. The easiest way to fix problems like jagged edges is by using the "Blur" tool:
- Click Tools
- Select Paint Tools
- Click Blur / Sharpen
- Click and drag across jagged edges.
- Hold down Ctrl or ⌘ Command while dragging to sharpen blurry textures.
-
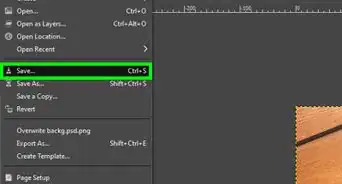
8Save the photo as a GIMP file. This will allow you to reintroduce it as a cropped image later:
- Click File
- Click Save As...
- Enter a file name, then select the folder in which you saved your famous person's photo.
- Click Save
-
9Close the current project. Click the X in the top-right corner of the window.
- If you're on a Mac, you'll click the red circle in the upper-left corner of the window.
-
10Open a new project with your celebrity photo's dimensions. This is where you'll need the dimensions you found earlier:
- Click File
- Click New...
- Enter your celebrity photo's dimensions in the "Width" and "Height" text fields.
- Click OK
-
11Open both photos in the project. Once you've created the canvas, you can add both the celebrity photo and the cropped photo as layers:
- Click File
- Click Open as Layers...
- Click your celebrity photo, then hold down Ctrl (Windows) or ⌘ Command+Mac while clicking the GIMP file you created.
- Click Open
-
12Adjust the layers' order. If the celebrity photo opened on top of your cropped image or if you're unable to edit the cropped image, do the following:
- Press Ctrl+L or ⌘ Command+L.
- Click and drag your GIMP file to the top of the window.
- Click your GIMP file.
-
13Resize the image of yourself. In most cases, you'll need to change the cropped image's size to fit the scale of the celebrity's photo:
- Click Tools
- Click Transform Tools
- Click Scale
- Click your image, then click and drag to resize it.
- Click Scale
-
14Reposition your image. Press M to bring up the movement tool, then click and drag your image to reposition it as needed.
- For example, you might move your image to place it in a standing position on a sidewalk, or move your image closer to the celebrity's image.
-
15Flatten the layers. Once you're satisfied with your image's appearance, you'll need to merge both layers into one file:
- Click Image
- Click Flatten Image
-
16Export your project. This will allow you to save your project as an individual photo on your computer:
- Click File
- Click Export...
- Enter a file name.
- Select a save folder.
- Click Export, then click Export again if prompted.


Advertisement
Method 3
Method 3 of 3:
Using Photoshop
-
1
-
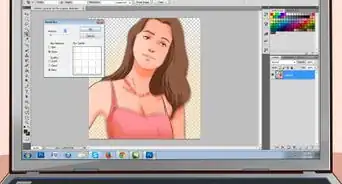
2Open both photos in Photoshop. You'll need both your celebrity photo and your personal photo in Photoshop as separate files:[1]
- Click File
- Click Open...
- Hold down Ctrl (Windows) or ⌘ Command (Mac) while clicking both your celebrity image and your personal image.
- Click Open
- Follow any on-screen prompts.
-
3Click the tab for the photo of you. It should be at the top of Photoshop. Doing so will bring up your photo in the main Photoshop window.
-
4Open the Quick Selection tool. Click the paintbrush-shaped Quick Selection tool icon in the left-hand toolbar, then click the square New Selection icon in the options bar.[2]
- If you don't see the Quick Selection tool, click and hold the Magic Wand selection tool (which resembles a wand with a star on it) until Quick Selection appears next to it.
-
5Select your outline. Click inside of your picture until the whole picture is selected.
- You may need to zoom in on the picture to select some of the finer details (e.g., pieces of hair).
-
6Subtract any extra edges. Click the Subtract icon, which resembles white and black overlapping squares, then click any parts of the selection which stray outside of the section you want to copy.
- For example, if Photoshop selected a section of the background behind you, you'd click that part of the selection to remove it and contain the selection to your outline.
-
7Open the "Refine Edge" menu. Click Select at the top of the Photoshop window (or, on a Mac, at the top of the screen), then hold down ⇧ Shift while clicking Select and Mask... in the drop-down menu.[3]
-
8Remove any jagged edges. Click and drag the "Refine" brush across any sections of the selection which look jagged or unnatural, then click OK when you're done.
- You'll notice this most with hair and pieces of clothing.
-
9Copy the selection. Click Edit, then click Copy in the resulting drop-down menu.
- You can also press Ctrl+C (Windows) or ⌘ Command+C (Mac).
-
10Paste the selection into the famous person's photo. Click the tab for the photo of the celebrity, then click Edit and click Paste in the resulting drop-down menu. You should see the copied outline appear in the celebrity's photo.
- You can also press Ctrl+V (Windows) or ⌘ Command+V (Mac) to do this.
-
11Adjust the image's size and position. Click Image, click Free Transform in the drop-down menu, and then adjust the following attributes of the image:
- Position — Click and drag the center of the image to your preferred spot.
- Size — Click and drag one of the corners of the image inward to shrink it or outward to enlarge it.
-
12Save your completed project. Once you're satisfied with your photo's appearance, you can save it as a cohesive image on your computer:
- Click File
- Click Save As...
- Enter a file name.
- Select a save location.
- Select a format (e.g., JPG for a photo).
- Click Save.


Advertisement
Community Q&A
-
QuestionWhat is the name of the application?
 Community AnswerThe application that was used was Adobe Photoshop, which you would have to purchase. There are a number of free and inexpensive photo-editing software packages available for download, such as iPhoto or Picasa.
 -
QuestionIs it illegal to make Photoshop pictures of myself and a famous person?Community AnswerNo, it is perfectly legal.
-
QuestionHow do I get to all of the things?Community AnswerYou have to print a life-sized picture of the person or find a life-sized poster. Stick the picture on cardboard.
Advertisement
Warnings
- The majority of Internet users are fairly keen at spotting fake photos by this point, so your photo might not convince as many people as you'd like.⧼thumbs_response⧽
Advertisement


References
About This Article
Jack Lloyd
wikiHow Technology Writer
This article was co-authored by wikiHow staff writer, Jack Lloyd. Jack Lloyd is a Technology Writer and Editor for wikiHow. He has over two years of experience writing and editing technology-related articles. He is technology enthusiast and an English teacher. This article has been viewed 890,204 times.
How helpful is this?
Co-authors: 215
Updated: September 7, 2021
Views: 890,204
Categories: Graphics
Advertisement