This article was co-authored by wikiHow staff writer, Travis Boylls. Travis Boylls is a Technology Writer and Editor for wikiHow. Travis has experience writing technology-related articles, providing software customer service, and in graphic design. He specializes in Windows, macOS, Android, iOS, and Linux platforms. He studied graphic design at Pikes Peak Community College.
This article has been viewed 24,102 times.
Learn more...
This wikiHow teaches you how to download and install mods for Minecraft. Mods are modifications to a game that are usually made by fans. You can find Minecraft mods from a variety of websites across the internet. You can use Minecraft Forge to make it very easy to install Minecraft mods. You can only install mods on Minecraft: Java Edition. You cannot install mods for the game console versions of Minecraft or Minecraft for Windows 10 (Bedrock Edition).
Steps
Installing Minecraft Forge
-
1Go to http://files.minecraftforge.net in a web browser. This is the webpage for Minecraft Forge. This software makes it easy to install mods for Minecraft.
-
2Click Install below "Recommended". It's the box on the right. This will install a ".jar" file that can be used to install the Minecraft Forge on PC or Mac.Advertisement
-
3Double-click the forge-installer file. The file name says "forge-1.12.2-14.23.5.2768-installer" or something similar depending on what version you download. By default, your downloaded files can be found in your "Downloads" folder.
- On Mac, you may need to go into the adjust your security settings to open the file. If you receive a message saying that the file can't be opened because it's from an unknown developer, click the Apple icon in the upper-left corner and then click System Preferences. Click the System & Security icon and click Open Anyway under the "General" tab. Then enter your user password. Then reopen the file.
- Note: Minecraft Forge only works with Minecraft: Java Edition. It does not work with Minecraft for Windows 10 (Bedrock Edition).
-
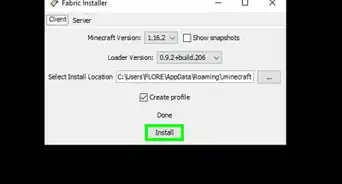
4Select "Install Client" and click Next. Make sure the radial button next to "Install Client" is selected and click Next. This installs Minecraft Forge. Once the installation is finished, you will see a message informing you that it was successful.[1]


Downloading and Installing Mods
-
1Search Minecraft Mods online. There are many places you can download Minecraft mods online. Go to https://www.google.com in a web browser and type Minecraft mods in the search bar to find web pages that have Minecraft mods. Some Minecraft mod pages include:
-
2Click a mod. This will take you to the information page about the mod.
-
3Click the download link. Locate the download link on the information page and click it. This may be a button that says Download, of there may be a link with the mod filename. This will most likely download the file as a ".zip" or ".jar" file.
- Make sure you download the most recent version of the mod or the version that corresponds to your version of Minecraft Forge
-
4Navigate to the location of the mod download file. By default, you downloaded files can be found in your "Downloads" folder. Use Windows Explorer on PC, or the Finder on Mac to navigate to your downloads folder.
-
5Cut or copy the mod file. When you locate the mod ".zip" or ".jar" file, right-click it and click Copy, or Cut.
-
6Navigate to the Minecraft application folder. Use the following steps to navigate to the Minecraft application folder:
-
Windows:
- Click the Windows Start menu.
- Type Run and click the Run application.
- Type %appdata%\.minecraft\ in the text bar.
- Click Run.
-
Mac:
- Click Go in the menu bar at the top of the screen.
- Hold Alt and click Library.
- Click the Application Support folder.
- Click the Minecraft folder.
-
Windows:
-
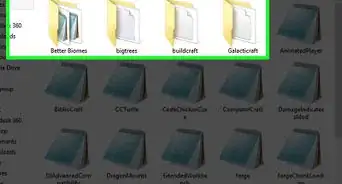
7Click the "mods" folder. It's in the Minecraft application folder.
- If you do not have a Mods folder, right-click a blank spot and click New and click New Folder. Name the new folder "mods" with a lower-case "m".[2]
-
8Paste the mod in the Mods folder. To paste, right-click and click Paste in the menu that appears. This installs the mods on Minecraft.[3]
- Some mods, such as the realistic shaders mod require additional mods and APIs to be installed. Read any additional instructions that are on the information pages for the mods you download.[4]


Loading Mods in Minecraft
-
1Open Minecraft. Click the Minecraft icon in the Start menu or Applications folder on Mac to launch Minecraft.
-
2Click the green arrow next to "Play". This displays different profiles you can load.
- If you are using an older version of Minecraft, click the drop-down menu next to "Profile".
-
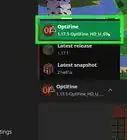
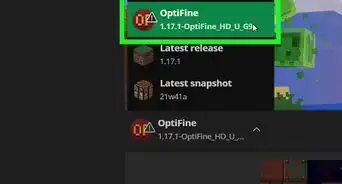
3Select the "Forge" profile. It's in the drop-down menu next to "Profiles" or when you click the green arrow next to the "Play" button.
-
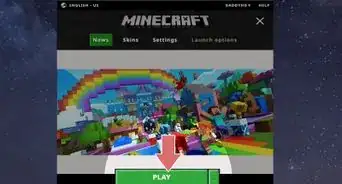
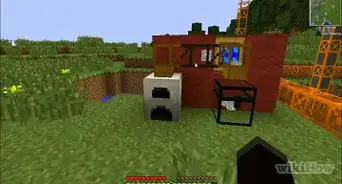
4Click Play. This launches Minecraft with the Forge mods installed.[5]


-Step-12.webp)


References
- ↑ https://www.minecraftmods.com/how-to-install-minecraft-forge/
- ↑ https://www.youtube.com/watch?v=rTFmELr9OUM
- ↑ https://www.minecraftmods.com/how-to-install-mods-for-minecraft-forge/
- ↑ http://shadersmods.com/chocapic13s-shaders-mod/
- ↑ https://www.minecraftmods.com/how-to-install-mods-for-minecraft-forge/
About This Article

1. Download Minecraft Forge from http://files.minecraftforge.net/.
2. Run the install file in your "Downloads" folder.
3. Select "Install Client" and click Next.
4. Search for Minecraft mods online.
5. Find a Minecraft mod and download it.
6. Copy or cut the mod file.
7. Navigate to "appdata/roaming/.minecraft" in Windows Explorer on Windows, or "Library/Application Support/Minecraft" in the Finder on Mac.
8. Open or create a "mods" folder with a lower-case "m".
9. Paste the mod file in the "mods" folder.
10. Open Minecraft: Java Edition.
11. Select the "Forge" profile.
12. Click Play.