This article was co-authored by wikiHow staff writer, Travis Boylls. Travis Boylls is a Technology Writer and Editor for wikiHow. Travis has experience writing technology-related articles, providing software customer service, and in graphic design. He specializes in Windows, macOS, Android, iOS, and Linux platforms. He studied graphic design at Pikes Peak Community College.
The wikiHow Tech Team also followed the article's instructions and verified that they work.
This article has been viewed 1,605,210 times.
Learn more...
This wikiHow teaches you how to install the Minecraft Forge program on your Windows, Mac or Linux computer. Forge is a free and open-source app that is used to make and create mods for Minecraft: Java Edition.
Steps
Downloading
-
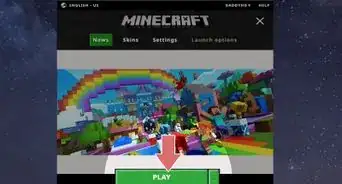
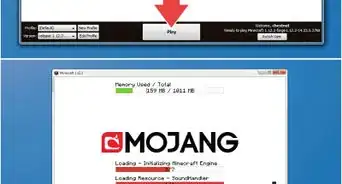
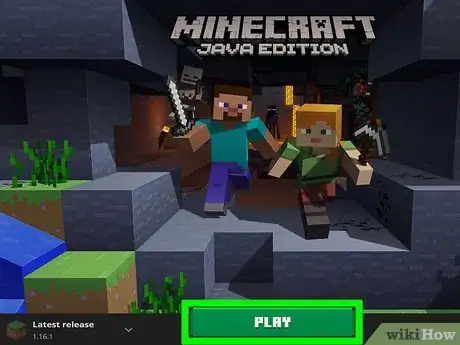
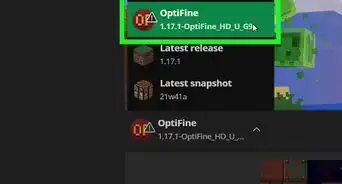
1Make sure you have Minecraft installed. In order to install Forge, you will need to have Minecraft installed and have run it at least once. This will ensure that all of the necessary files are in place.
- Minecraft Forge only works for Minecraft: Java Edition. Minecraft for Xbox One and PS4 cannot be modded. You can use smartphone apps to mod Minecraft for Android and iPhone/iPad versions of Minecraft.
- If you are creating a Forge server, You don't need Minecraft official server software installed. The Forge installer contains all of the server files.
-
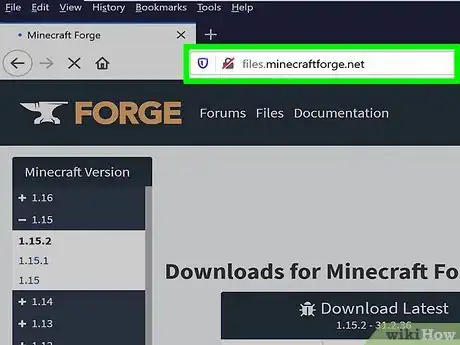
2Go to https://files.minecraftforge.net/ in a web browser. This will take you to the download page of the latest recommended version of Minecraft Forge.
- It is recommended that you install the version of Minecraft Forge that corresponds to the version of Minecraft you are playing. For example, if you are playing Minecraft 1.13, you should download Minecraft Forge 1.13. You can find the link to the different versions of Minecraft Forge in the list that says "Minecraft Version" to the left.
- The latest version of Minecraft Forge is 1.16.1, but this version of Minecraft Forge has had the least amount of testing. The latest recommended version of Minecraft Forge is 1.15.2.
- Some mods require a specific version of Minecraft Forge. If the mod you want to install requires you to install a specific version of Minecraft Forge, click Show all versions to see all versions of Minecraft Forge.
Advertisement -
3Click the Installer button below "Recommended Download". It's the button that has an icon that resembles a filing cabinet in the box labeled "Recommended Download" on the right. This takes you to the website that hosts the download file.
- Warning: The website that hosts the download file is an ad wall website called adfoc.us. This website is full of malware and false download links. Do not click any buttons or links on this website, regardless of what they say. If you see an alert that says adfoc.us wants to send you notifications, click Block.
-
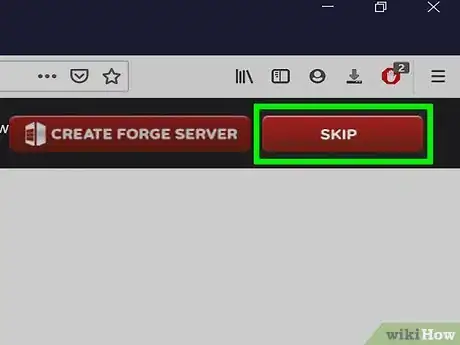
4Wait 6 seconds and click Skip. It's the red button in the top-right corner of the adfoc.us page. You'll have to wait six seconds before this button appears. Doing so prompts the Forge install file to download.
- You may have to select a save location (e.g., the desktop) or confirm that you wish to download the file before the download commences.
- You may see a notification that says the downloaded file may be harmful to your computer. Click Keep to keep the file. If the downloaded file is called "forge-[version number]-installer.jar", it is safe. If you accidentally download any other files from adfoc.us, delete them immediately.
Installing Forge on Windows
-
1Double-click the Forge file. It's a file called "forge-[version number]-installer.jar". You can open downloaded files in your web browser or in your Downloads folder.
- If you receive a pop-up message telling you to install Java, go to https://www.java.com/en/download/ in your browser, click Free Java Download, click Agree and Start Free Download, and then install Java once it finishes downloading.
-
2Make sure the "Install client" radio option is checked. If it isn't, click the box or circle next to "Install client" before proceeding.
-
3Make sure the Minecraft install location is correct. By default, your Minecraft install location should be "C:\Users\[username]\AppData\Roaming\.minecraft" on Windows. If the path listed at the bottom of the installer window isn't correct, click ... to the right of the path. Then navigate to the Minecraft install folder and click Open.
-
4Click OK. It's in the bottom-right corner of the page. Doing so will install the client files and folders for Minecraft Forge.
- You can change the destination folder by clicking ... and then selecting a new folder.
-
5Click OK when prompted. This will complete the installation process.
Installing on Mac
-
1Double-click the Forge file. It's a .jar file with an image of a cup of coffee on it.
-
2Click OK on the error message. You will most likely get a message that explains that Forge is from an unidentified developer. Mac blocks files from unidentified sources for security reasons. You will need to adjust the security settings to allow your Mac to run this file.
-
3
-
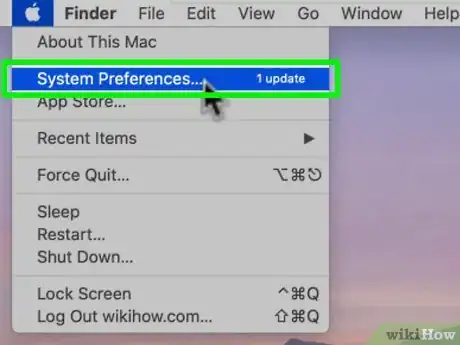
4Click System Preferences. It's near the top of the drop-down menu.
-
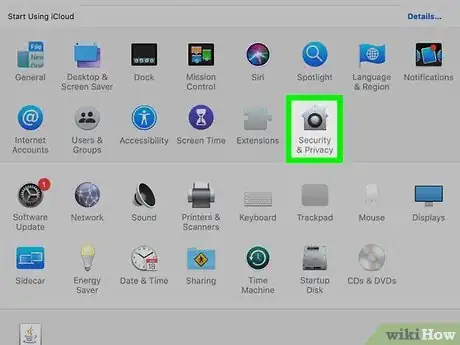
5Click Security & Privacy. This is a house-shaped icon in the top row of the "System Preferences" menu.
-
6Click the lock icon. It's in the bottom-left corner of the window.
- You'll have to enter your administrator password before continuing.
-
7Click Open Anyway. It's under the General tab in Security & Privacy. This will open the Minecraft Forge installer window.
- If this option is not available, open the Finder and navigate to your Downloads folder. Double-click the forge installer JAR file.
-
8Click Open. This confirms that you want to open the file.
-
9Make sure the "Install client" radio option is checked. If it isn't, click the box or circle next to "Install client" before proceeding.
- If prompted to install Java, first click More Info... on the pop-up window, click Download below Java, click the Java .dmg file, double-click the Java .pkg folder, and follow the on-screen instructions.
-
10Ensure the install folder for Minecraft is correct. It's listed at the bottom of the Forge installer window. By default, your Minecraft install folder location should be "/Users/[username]/Library/Application Support/minecraft/". If this is not correct, click ... next to the file location and navigate to your Minecraft install location. Then click Choose.
-
11Click OK. It's in the bottom-right corner of the page. Doing so will install the client files and folders for Minecraft Forge.
- You can change the destination folder by clicking ... above OK and then selecting a new folder.
-
12Click OK when prompted. This will complete the installation process.
Installing on Linux
-
1Navigate to the downloaded file. By default, your downloaded files can be found in your "Downloads" folder. Open the File Manager and navigate to the Downloads folder.
-
2Right-click the Minecraft Forge install file and click Properties. This opens the properties menu for the file. By default, the forge install file is "forge-[version number]-installer.jar.
-
3Click Permissions. It's at the top of the Properties window.
-
4Check the box that says "Allow executing file as program". This makes the file executable. Without this, Linux will not allow you to run the file.
- To make the file executable in the Terminal, navigate to the folder location and type "sudo chmod +x forge-[version number]-installer.jar" and press Enter. [1]
-
5Double-click the Forge install file. This run the file and open the Installer. By default, the forge install file is "forge-[version number]-installer.jar.
-
6Make sure the "Install client" radio option is checked. If it isn't, click the box or circle next to "Install client" before proceeding.
-
7Ensure the Minecraft install folder is correct. In Linux, the Minecraft install folder should be "/home/[username]/.minecraft". If this is not correct, click ... next to the folder location at the bottom of the Forge install window. Navigate to the correct file location and click Ok.
-
8Click OK button. This will install Forge for Minecraft.
-
9Click OK. After installation is complete you'll see a window with this message.
Community Q&A
-
QuestionI don't want to install Java because I'm afraid that I will get a virus. What should I do?
 Community AnswerJava shouldn't have a virus if it's coming from the actual Java website, so just make sure you're downloading it from the correct source.
 -
QuestionI accidentally deleted the mods folder with Forge installed. What should I do?
 Community AnswerSimply create another folder titled "mods" then redownload all of your mods and put them back. It won't mess anything up.
 -
QuestionDo you have to have a server?
 Mike16576Community AnswerNo, you do not. Forge is a mod runner you can use as a version of Minecraft.
Warnings
- Many mods are unstable, and may lead to instability or crashes or inability to play Minecraft. If this occurs, simply remove the mod from your mods folder and start Minecraft again.⧼thumbs_response⧽
About This Article
1. Install and run Minecraft: Java Edition.
2. Go to https://files.minecraftforge.net/ in your web browser.
3. Click Installer below the recommended download box.
4. Wait 6 second and click Skip in the upper-right corner.
5. Navigate to the "forge-[version number]-installer.jar" file in your Downloads folder.
6. Double-click the "forge-[version number]-installer.jar" file.
7. Ensure the "Install Client" option is selected.
8. Ensure the Minecraft install folder is correct.
9. Click Ok to install Minecraft Forge.
10. Click Ok when the installation is complete.
To learn how to install Minecraft Forge on your Mac, keep reading!



-Step-12.webp)
