X
This article was co-authored by wikiHow staff writer, Nicole Levine, MFA. Nicole Levine is a Technology Writer and Editor for wikiHow. She has more than 20 years of experience creating technical documentation and leading support teams at major web hosting and software companies. Nicole also holds an MFA in Creative Writing from Portland State University and teaches composition, fiction-writing, and zine-making at various institutions.
The wikiHow Tech Team also followed the article's instructions and verified that they work.
This article has been viewed 56,059 times.
Learn more...
This wikiHow teaches you how to remove the proxy server settings from Safari and Chrome on your PC or Mac.
Steps
Method 1
Method 1 of 4:
Google Chrome for macOS
-
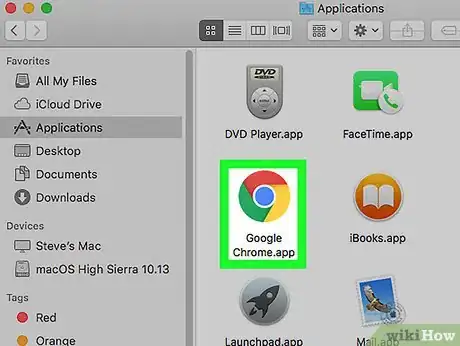
1Open Chrome on your Mac. You’ll usually find it in the Applications folder.
-
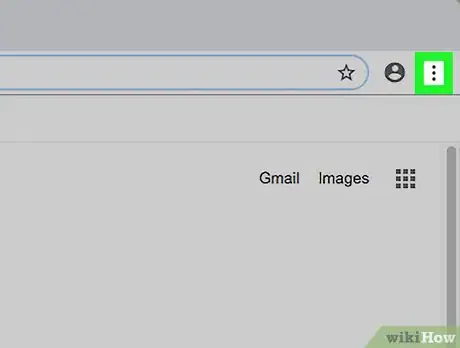
2Click ⁝. It’s at the top-right corner of Chrome.Advertisement
-
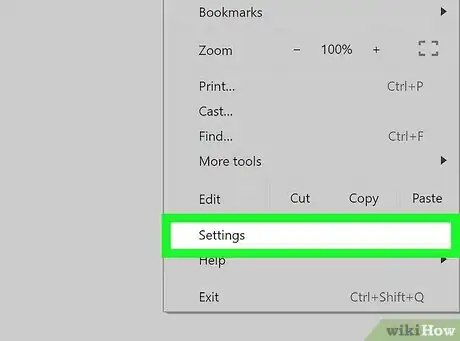
3Click Settings. It’s near the bottom of the menu.
-
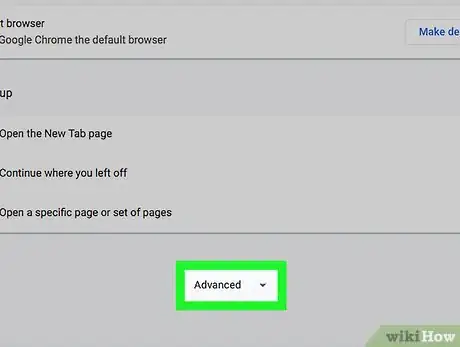
4Scroll down and click Advanced. It’s near the bottom of the screen.
-
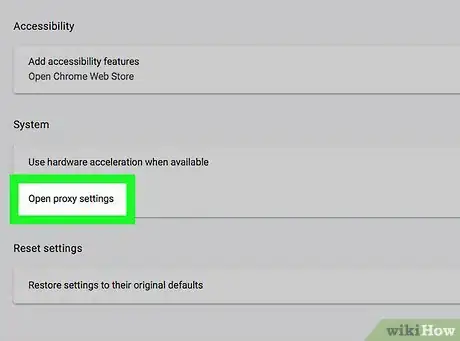
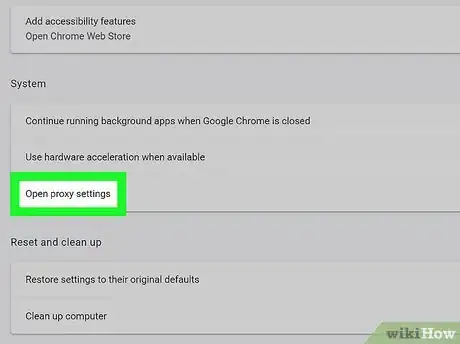
5Click Open proxy settings. It’s under the “System” header.[1]
-
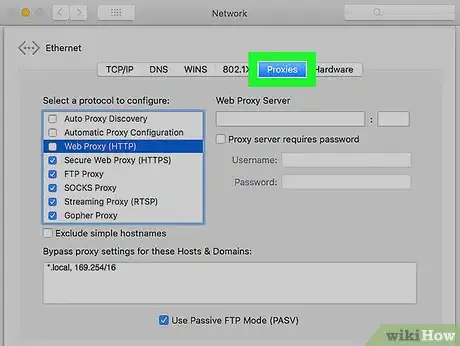
6Click the Proxies tab. It’s near the top of the window.
-
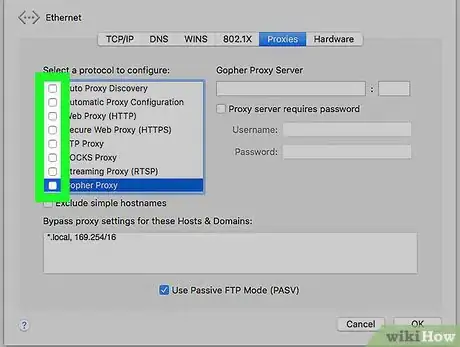
7Remove the check marks from every option under “Select a protocol to configure.” To disable all proxy settings, all of these boxes should be blank.
-
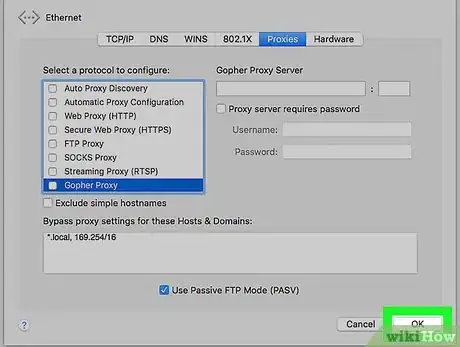
8Click OK.
-
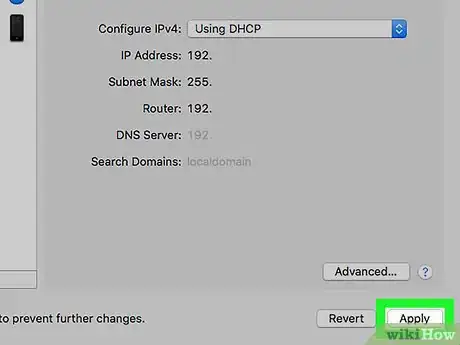
9Click Apply. Your Chrome proxy settings are now disabled.
Advertisement
Method 2
Method 2 of 4:
Google Chrome for Windows
-
1Open Chrome on your PC. You’ll find it in the All Apps area of the Start menu.
-
2Click ⁝. It’s at the top-right corner of Chrome.
-
3Click Settings. It’s near the bottom of the menu.
-
4Scroll down and click Advanced. It’s near the bottom of the screen.
-
5Click Open proxy settings. It’s under the “System” header.
-
6Click LAN settings. It’s the button at the bottom of the Connections tab, which opened by default.
-
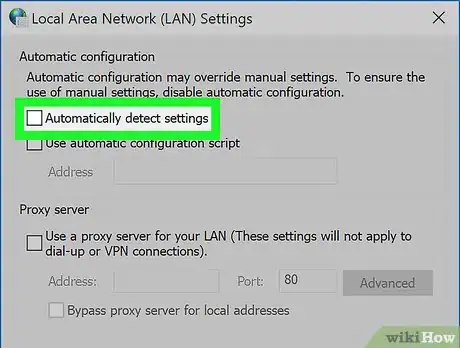
7Remove the check mark from “Automatically detect settings.”
-
8Remove the check mark from “Use a proxy server for your LAN.”
-
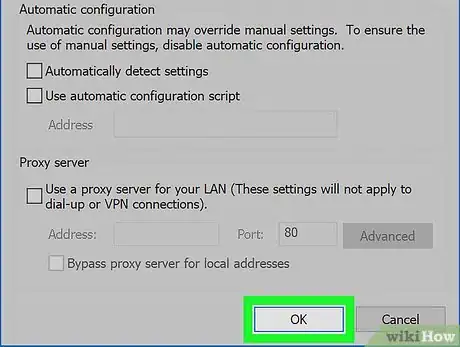
9Click OK.
-
10Click Apply. The proxy settings are now disabled.
Advertisement
Method 3
Method 3 of 4:
Safari for macOS
-
1Open Safari on your Mac. It’s the compass icon typically found on the Dock.
-
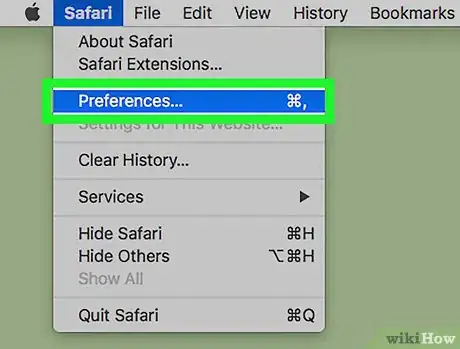
2Click the Safari menu. It’s near the top-left corner of the screen in the menu bar.
-
3Click Preferences….
-
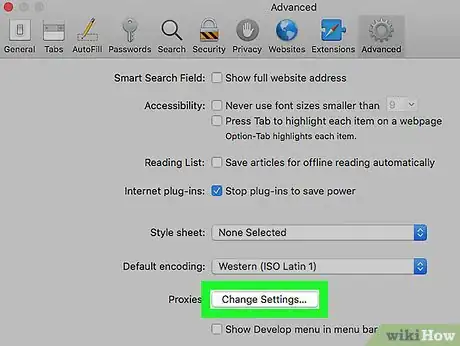
4Click Advanced. It’s the icon with the gear near the top-right corner of the window.
-
5Click Change Settings…. It’s next to “Proxies” near the bottom of the window. This brings you to the Proxies tab of your network preferences.[2]
-
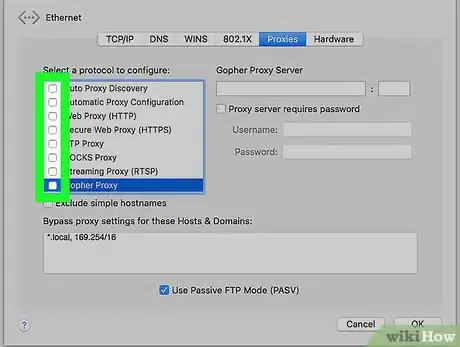
6Remove all check marks on the screen. This ensures that no proxies are enabled.
-
7Click OK. All proxies are now disabled in Safari.
Advertisement
Method 4
Method 4 of 4:
Microsoft Edge for Windows
-
1Open Edge on your PC. It’s in the All Apps area of the Start menu.
-
2Click ⋯. It’s at the top-right corner of Edge.
-
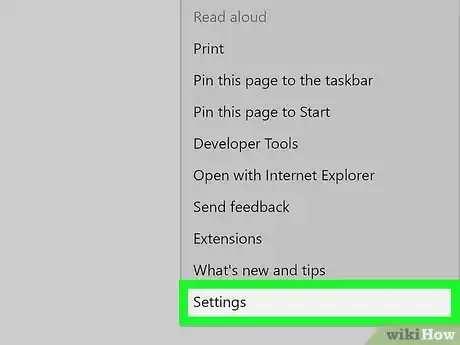
3Click Settings. It’s at the bottom of the menu.
-
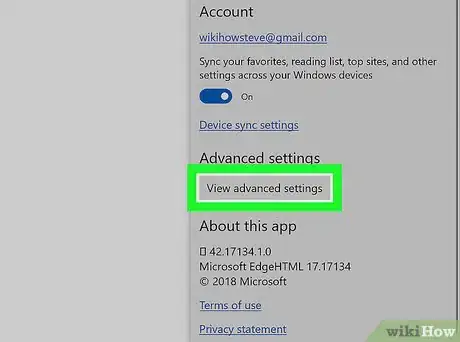
4Scroll down and click View advanced settings. It’s under the “Advanced settings” header near the bottom of the menu.
-
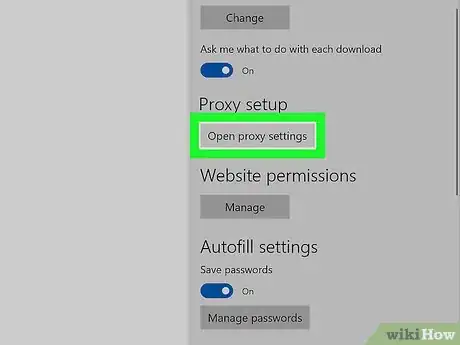
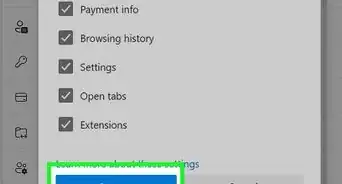
5Scroll down and click Open proxy settings. It’s under the “Proxy setup” header.
-
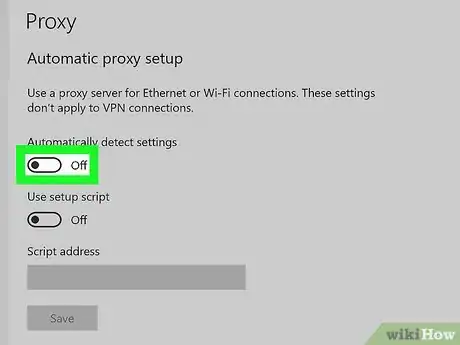
6
-
7
Advertisement
References
About This Article
Advertisement
