This article was co-authored by Spike Baron and by wikiHow staff writer, Travis Boylls. Spike Baron is the Owner of Spike's Computer Repair based in Los Angeles, California. With over 25 years of working experience in the tech industry, Spike specializes in PC and Mac computer repair, used computer sales, virus removal, data recovery, and hardware and software upgrades. He has his CompTIA A+ certification for computer service technicians and is a Microsoft Certified Solutions Expert.
This article has been viewed 40,895 times.
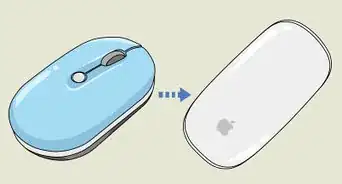
A unifying receiver is a USB dongle that allows you to connect up to 6 compatible devices (mouses, trackballs, keyboards) all at once. You can purchase a unifying receiver, or it may come with a mouse or keyboard that you purchased. This wikiHow teaches you how to connect a Logitech mouse to a Unifying receiver.
Steps
-
1Download the Logitech Unifying Software. Use the following steps to download Logitech Unifying Software:
- Go to https://support.logi.com/hc/en-us/articles/360025297913-Logitech-Unifying-Softwared in a web browser.
- Use the drop-down menu in the upper-left corner to select your operating system.
- Click Download Now.
- Open the installation file in your web browser or Downloads folder.
- Follow the onscreen instructions to complete the installation.
-
2Open the Logitech Unifying Software and click Next. It has an orange icon star-like icon in the middle. Click the icon in the Windows Start menu or your Applications folder to open the Logitech Unifying Software. Then click Next in the lower-right corner.Advertisement
-
3Connect your unifying receiver and click Next. You can connect it to any free USB port on your computer. Then click Next in the lower right corner.
-
4Restart your mouse. Most wireless mouses have an on/off switch on the bottom. Turn the mouse over and flip the switch off and then back on again. Your mouse should pair with the receiver automatically.[3]
-
5Check to see if the cursor on the screen is moving. Move the mouse and check to see if the cursor on-screen is moving.[4]
-
6Select "Yes" and then click Next. If the cursor on-screen moves when you move the mouse, click the radio option next to Yes to indicate the correct device is connected. Then click Next.
-
7Click Finish. It's in the lower-right corner. Your Logitech mouse is now connected to the unifying receiver and ready to use.[5]


References
- ↑ Spike Baron. Network Engineer & Desktop Support. Expert Interview. 9 January 2019.
- ↑ https://www.youtube.com/watch?v=p_HrJGcw2_c
- ↑ Spike Baron. Network Engineer & Desktop Support. Expert Interview. 9 January 2019.
- ↑ Spike Baron. Network Engineer & Desktop Support. Expert Interview. 9 January 2019.
- ↑ https://www.youtube.com/watch?v=eTv8rfbPHYc
About This Article

1. Download and install the Logitech Unifying Software.
2. Open the Logitech Unifying Software and click Next.
3. Insert the unifying receiver in a free USB port and click Next.
4. Power the mouse off and then on again.
5. Check to see if the mouse moves the cursor on-screen.
6. Click Yes if the mouse moves the cursor and then click Next
7. Click Finish.