X
wikiHow is a “wiki,” similar to Wikipedia, which means that many of our articles are co-written by multiple authors. To create this article, volunteer authors worked to edit and improve it over time.
This article has been viewed 34,696 times.
Learn more...
The most common mistake new players make when approaching any game is to do so with an unconfigured or misconfigured mouse. You should not "get used to your mouse"; your mouse should be "set right for you".
Steps
Part 1
Part 1 of 3:
Configuring the Driver for a Gaming Mouse
-
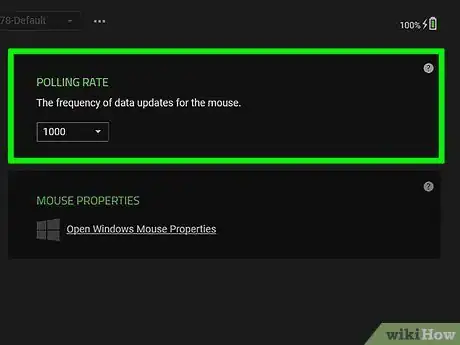
1Set the polling rate as high as your mouse and USB can handle without it introducing errors. If the cursor seems to be randomly freezing in Windows while you're moving the mouse, that would be an example of just such a tracking error. A half-decent gaming mouse should handle 1000mhz fine.
-
2Set your mouse's DPI to the maximum that its sensor can natively handle. Many gaming mice (especially older ones) will claim to feature DPIs far in excess of what their sensor can handle, so Google the data-sheets to find out what the native resolution for the sensor really is. Generally between 800 and 1600 DPI is typical for most budget or older gaming mice; better sensors can handle far higher DPIs.[1]
- This establishes an upper boundary for the subsequent process of tuning your DPI. If your mouse has specific features or quirks which negatively effect performance beyond a certain DPI, treat that as the maximum instead of the sensor's native resolution.
Advertisement -
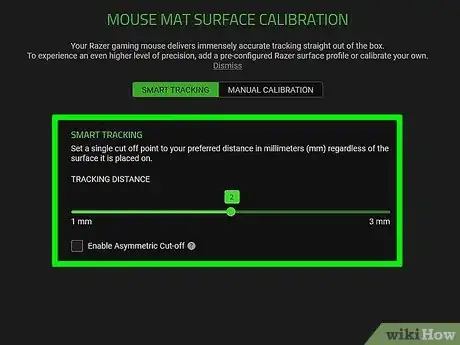
3Manually calibrate your mouse for the surface it's resting on if the mouse's software suite supports this functionality. Razer mouse users can find "Calibration" as a sub-tab under "Mouse" in their Razer Synapse software; and "Manual Calibration" as a sub-tab under that, then click "add a surface" to begin the calibration process. Logitech mouse users can find "Surface Tuning" as an option in their Logitech Gaming Software. Using one of the Logitech presets on an incompatible mouse mat can cause "patchiness" in the mouse's tracking, as if parts of the mouse-mat were dead-zones.
Advertisement
Part 2
Part 2 of 3:
Configuring Your OS's Mouse Settings
-
1Figure out whether your game uses your OS settings. A very rare handful of games make use of your Operating System's mouse settings for sensitivity and / or Mouse Acceleration (generally shoddy console ports, browser-based games, or obscure ultra low-budget titles). In these cases you'll need to adjust these settings in the OS instead of or as well as in the game.[2]
-
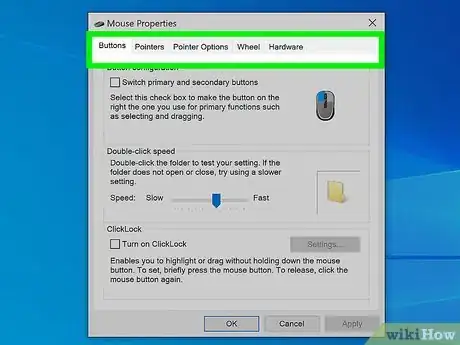
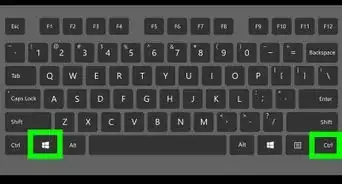
2Adjust as needed. In Windows, go to your Mouse Settings (In Windows 10, hit your Windows key, type in "mouse settings" without the quotes and hit carriage return then click "additional mouse options"). Go to the "Pointer Options" tab. Make sure Pointer Speed is set to the default (middle) position of the slider, and that "Enhanced Pointer Precision" is disabled.
- When in doubt, test the sensitivity with something simple to see if it's more to your liking. Playing Solitaire is usually a good a idea.
Advertisement
Part 3
Part 3 of 3:
Adjusting In-Game Settings to Their Optimal Values
-
1Disable Mouse Acceleration and enable Raw Input. Most modern games will have these settings available for you to adjust in the Mouse / Controls part of the options menus; if not, they will have them unavailable but correctly set behind the scenes. Older titles might require you to edit configuration or *.ini files in order to force these settings.
- Some games might use different and ambiguous terminology to refer to the above, for example using "Aim Smoothing" instead of "Acceleration". If in doubt, you can ask each game's community for an explanation.
-
2Set your in-game sensitivity to a value which gives a 1:1 ratio between mouse input and crosshair / cursor movement. Generally sensitivity is treated as a numerical multiplier for input, so you would ideally want an in-game sensitivity of "1" (1x your mouse's input).[3] Some games simply have unlabeled sliders for sensitivity, or use their own arbitrary numerical scaling - in which case "lower is generally better".
-
3Load up a tutorial or practice map. You don't want to be disturbed or bother other players while you're fine-tuning your configuration, so it's best to tinker while you're in practice mode.
-
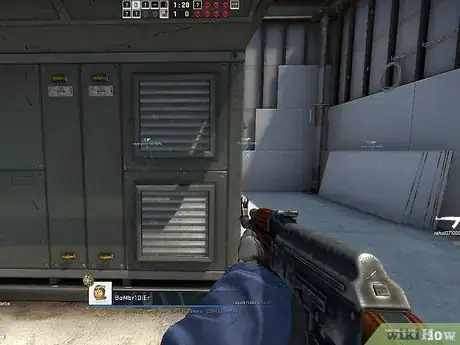
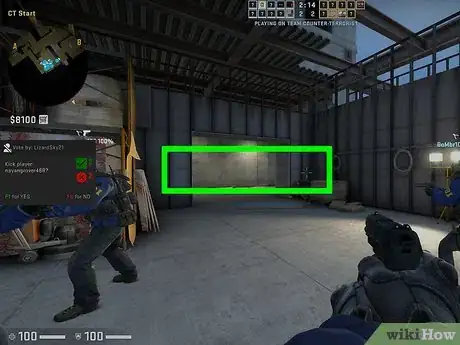
4Test your crosshair or cursor's ability to track. In a first-person shooter pick one fixed position, strafe left-and-right (ideally as one of the faster characters in the game) and try to keep your crosshair on that fixed point. In a MOBA, set your character walking around the map (with your view fixed, not locked to the character, of course) and keep your cursor following him or else any other moving target on the map (a creep, for example).
- If your mouse-hand is pulling the crosshair off the point / cursor off your character you are "overshooting" what you are aiming for, and as such either your DPI or your Sensitivity is too high. If you can lower your DPI to fix this whilst keeping your Sensitivity at 1, do so. Otherwise you'll have to lower your Sensitivity below 1 to compensate instead.
- If your strafing is pulling the crosshair off the point or your target is out-running the cursor in a MOBA, you are "undershooting" what you are aiming for and your DPI or Sensitivity is too low. If your mouse's DPI is below the maximum NATIVE resolution for its sensor, you should raise the DPI until you no longer undershoot. If your mouse's DPI is at the native resolution, or you cannot change your mouse's DPI, you need to increase the sensitivity instead.
-
5Pick any two fixed points in the game and quickly "snap" your crosshair / cursor between the two points. For example, the centre of two different posts on the same wall, between a couple of boxes in a map, between your character and a nearby tower in a MOBA.
- If your crosshair / cursor goes past what you're trying to aim at, you are "overshooting", and need to lower your DPI or Sensitivity as described in the previous Step.
- If your crosshair / cursor doesn't quite reach what you're trying to aim at, you are "undershooting" and need to raise your DPI or Sensitivity as described in the previous Step.
- Repeat this step as many times as necessary in order to fine-tune this to perfection.
-
6Pick a character / weapon that has a scope and use it to zoom-in. Repeat the previous step whilst zoomed, but adjust the game's "zoomed sensitivity multiplier" instead of adjusting DPI or base-sensitivity.
- This value might be represented by sliders for different scope magnifications (as in PUBG); or a numerical slider under an individual hero's control-configuration (as with Widowmaker in Overwatch, with the number representing a percentage of base sensitivity); or just a numerical variable controlled via a console command or configuration file script (zoomed_sensitivity_ratio in TF2).
- Some games (for example, World of Tanks) have a separate in-game Sensitivity slider for top-down views (artillery). The same principle applies.
Advertisement
Warnings
- Although modern sensors can handle DPIs far in excess of what most users will require, some (but not all) will introduce increasing levels of hardware "smoothing" at higher DPIs to eliminate jitter, which can introduce small amounts of latency, and might negatively effect how the mouse feels.⧼thumbs_response⧽
- "Effective sensitivity" (how much relative crosshair movement you get out of any mouse movement) will change if you change polling rate, DPI, screen resolution, screen field-of-view, etc, etc. Making sure you've got these locked down to the best values first before you settle on the right DPI or Sensitivity for you is important.⧼thumbs_response⧽
- It is possible to use third party software to "overclock" budget / non-gaming mice to higher polling rates. Users might see some benefit from this, but it may also introduce problems, and is generally unnecessary.⧼thumbs_response⧽
Advertisement
References
About This Article
Advertisement
