This article was co-authored by wikiHow staff writer, Rain Kengly. Rain Kengly is a wikiHow Technology Writer. As a storytelling enthusiast with a penchant for technology, they hope to create long-lasting connections with readers from all around the globe. Rain graduated from San Francisco State University with a BA in Cinema.
The wikiHow Tech Team also followed the article's instructions and verified that they work.
This article has been viewed 2,296,014 times.
Learn more...
Do you want to customize the appearance of the icons on your Windows desktop? You can adjust icons by using the "Properties" options or you make new desktop icons entirely. You'll only be able to change the icon for system desktop icons, folders, and shortcuts. This wikiHow will show you how to change a desktop icon's appearance and how to download or create a custom icon on your Windows computer.
Things You Should Know
- Right-click the desktop. Hover over "View", then uncheck "Show desktop icons" to hide them.
- Right-click the desktop, hover over "View", then select a new icon size.
- To change icons, right-click the folder or shortcut. Click "Properties" → "Customize/Shortcut" → "Change Icon".
Steps
Showing or Hiding Desktop Icons
-
1Right-click your desktop. For easier navigation, be sure to minimize all open windows.[1]
- A pop-up menu will open.
- Use this method if you want to toggle icon visibility on your desktop.
-
2Hover your cursor over "View". This will be at the very top of the menu.Advertisement
-
3Click Show desktop icons. When this option in unchecked, all desktop icons will be hidden.
- To show desktop icons again, click Show desktop icons.
Resizing Desktop Icons
-
1Right-click your desktop. For easier navigation, be sure to minimize all open windows.
- A pop-up menu will open.
-
2Hover your cursor over "View". This will be at the very top of the menu.
-
3Select your icon size. You can click Large icons, Medium icons, or Small icons. After clicking, your desktop icons will be changed immediately.
- You can also hold CTRL and scroll up or down on your mouse to increase or decrease the icon size.
Changing System Desktop Icons
-
1Open Start . Click the Windows logo in the bottom-left corner of the screen, or press the Windows key.[2]
-
2
-
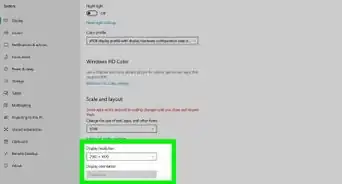
3Click Personalization. This is the monitor-shaped icon on the Windows Settings page.
- You can also access this page by right-clicking a blank space on the desktop and then clicking Personalization in the drop-down menu.
-
4Click Themes. It's a tab on the left side of the Personalization window.
-
5Click Desktop icon settings. This link is in the upper-right side of the Themes page. Clicking it opens the Desktop Icon Settings window.
- If you haven't edited your theme at all, this link will be in the middle of the page beneath the "Related Settings" heading.
- You can also click Get more themes in the Store below the "Apply a theme" heading to browse desktop themes. Some themes will change your desktop icons' appearances.
-
6Click an icon you want to change. This will select the icon.
- For example, you might click This PC or Recycle Bin.
- You can also check the box next to a desktop icon's name at the top of the window to make it appear on your desktop, or uncheck the box to remove it from the desktop.
- Check the "Allow themes to change desktop icons" box on this window to enable theme-related icon changes.
-
7Click Change Icon. It's near the bottom of the window.
-
8Select an icon. You can select two different types of icons:
- System icon: Click an icon in the window.
- Custom icon: Click Browse, then click the folder that your custom icons are in on the left side of the window. Select the icon you want to use, then click Open.
-
9Click OK. This will assign your selected icon to the desktop program.
-
10Click Apply, then click OK. Doing so confirms your decision and changes the desktop program's icon to your selected icon.


Changing Shortcut and Folder Icons
-
1Open the File Explorer . You can find this icon at the lower-left side of your taskbar, or you can press the Start menu and search for File Explorer.
- You cannot change the icons of specific files (e.g., Notepad files or .exe files) using this method. You'll only be able to customize desktop shortcuts and folders with this method.
-
2Click Desktop. It's a folder in the left-hand column of options in the File Explorer window.
- This may already be pinned under Quick access.
-
3Click a shortcut or folder icon. Shortcut icons have a white box with an arrow in their lower-left corners.
-
4Click the Home tab. It's in the upper-left corner of the File Explorer window. Doing so will open a toolbar at the top of the window.
-
5Click Properties. This is a white box with a red checkmark in the "Open" section of the toolbar.
- You can also right-click on the icon on your desktop and then click Properties to get to this menu.
- If the icon is pinned to your task bar, you can right-click it and click Properties to get this menu.
-
6Click Customize or Shortcut. This will be located at the top of the Properties window.
- Shortcut: Click the Shortcut tab at the top of the Properties window.
- Folder: Click the Customize tab at the top of the Properties window.
-
7Click Change Icon. This will be near the bottom of the window.
-
8Select an icon. You can select two different types of icons:
- System icon - Click an icon in the window.
- Custom icon - Click Browse, then click the folder that your custom icons are in on the left side of the window. Select the icon you want to use, then click Open.
-
9Click OK. This will assign your selected icon.
-
10Click Apply, then click OK. Doing so confirms your decision and changes the original icon to your selected icon.

Adding Shortcuts to the Desktop
-
1
-
2Click the Desktop folder. It's on the left side of the File Explorer window.
- This may already be pinned under Quick access.
-
3Click the Home tab. You'll find this tab in the upper-left side of the File Explorer window.
-
4Click New item. It's in the "New" section of the tool bar at the top of the window.
-
5Click Shortcut. This option is in the New item drop-down menu. A window with options for your new shortcut will appear.
-
6Click Browse. It's in the middle of the page. Doing so opens a pop-up window.
-
7Scroll down and click the program's or file's folder. For example, if the program or file is in the Documents folder, you'd click My Documents.
- You may have to click through several different folders to find the program or file for which you want to create a shortcut.
-
8Click OK. Doing so sets the desktop shortcut's target as your selected item.
- If you rename the desktop icon or move it to a new folder, your shortcut will no longer work.
-
9Click Next, then enter a name. The default name for the shortcut is the same name as the program itself.
-
10Click Finish. It's in the bottom-right corner of the window. This will create your shortcut in the folder you selected.
Creating Icon Images
-
1Open the Paint application on your computer. If you don't have the Paint application, you can download it from the Microsoft Store.
- Use this method if you want to create custom icons.
-
2Click File. It's a blue button in the upper-left corner of the Paint window.
-
3Click Open. This option is in the File menu. Doing so opens a window where you can open a file location.
- If you'd rather create your own icon by drawing in Paint, skip this step and instead create your drawing.
-
4Select a picture. You may have to click a location on the left side of the Open window (e.g., Pictures) to find the picture you want to open.
- Skip this step if you're drawing your own icon.
-
5Click Open. This will open your image in the Paint window.
- Skip this step if you're drawing your own icon.
-
6Click File again. It's in the top-left corner of Paint.
-
7Select Save as. This option is near the top of the File menu.
-
8Click BMP picture. It's an option to the right of the Save as button. Doing so opens a Save As window where you can name your file.
-
9Type in your file's name followed by
.ico. This will ensure that your file is saved as an icon file.- For example, you might name your file "shortcut.ico".
-
10Navigate to a save location. Do so in the left-hand pane of the Save As window.
- The Pictures folder is a safe place to save your shortcut file.
-
11Click Save. It's at the bottom of the window. Doing so will save your icon in your selected folder.
-
12Change a program's icon using your created icon. You'll use the Browse method and select your custom icon from the folder where you saved it.
Downloading Icons
-
1Open a web browser. Microsoft Edge is the official Windows 10 browser, though you can use Google Chrome, Firefox, Opera, or another browser.
-
2Search for Windows icons. Type "download windows desktop icons" into your browser's address bar or a search engine and press Enter.
- You can narrow your search by entering the program's name (e.g., "Windows my computer icon") or by using the icon file type (e.g., "ICO").
- Some popular icon websites include:
-
3Download the icons you want. You can do this by opening a site that has your icons and clicking the Download button. Doing so will save the icons to your computer.
- If you download multiple icons at once, you may have to extract the icons to a regular folder before continuing.
-
4
-
5Click Desktop. This folder is on the left side of File Explorer.
-
6Click your icons folder. Doing so selects it.
- If you just downloaded one icon, select the icon instead.
-
7Click Home. This tab is in the upper-left corner of the File Explorer window.
-
8Click Move to. It's in the "Organize" section of the toolbar at the top of the File Explorer window.
-
9Click Pictures. This folder is near the middle of the pop-up window.
- You can select any folder on your computer if you don't want to place your icons in Pictures.
-
10Click Move. This will send your icons to a folder where you won't move or delete them.
-
11Change a program's icon using your downloaded icon. You'll use the Browse method and then select an icon from within the Pictures folder to do this.
Community Q&A
-
QuestionI lost the icon for my email. How do I get it back on my desktop?
 Community AnswerClick on your Windows key and type your email program. Then, just drag it onto your desktop.
 -
QuestionHow do I change the background of icon names on my desktop in XP?Community AnswerHighlight then right-click, and a list of things should pop up. Click on "change."
-
QuestionHow do I put icons on my desktop from a program?Community AnswerIf on windows, search using the windows key for the program and then drag and drop it onto your desktop.
Warnings
- If you move or delete an icon file, the program you were using the file with will stop displaying the icon.⧼thumbs_response⧽
-Step-20.webp)


References
About This Article

1. Click the Start menu and select Settings.
2. Click Personalization.
3. Click Themes.
4. Click Desktop icon settings.
5. Select an icon to change.
6. Click Change Icon.
7. Select a new icon and click OK.
8. Click OK.


-Step-20.webp)


