This article was co-authored by wikiHow Staff. Our trained team of editors and researchers validate articles for accuracy and comprehensiveness. wikiHow's Content Management Team carefully monitors the work from our editorial staff to ensure that each article is backed by trusted research and meets our high quality standards.
The wikiHow Tech Team also followed the article's instructions and verified that they work.
This article has been viewed 65,689 times.
Learn more...
This wikiHow teaches you how to make a picture fully or partially transparent in a presentation slide in Microsoft PowerPoint, using Windows or Mac. On Windows, you can fill a shape with a picture and adjust its transparency. On Mac, you can adjust picture transparency without needing an extra element.[1] The desktop versions of PowerPoint allow changing transparency, but the mobile and online versions don't have this feature.[2]
Steps
Using Windows
-
1Open a PowerPoint presentation on your computer. You can open a new slide show presentation or a saved document from your files.
-
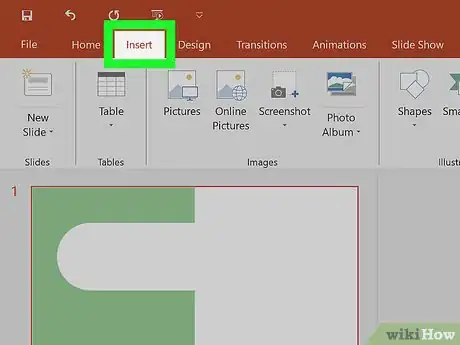
2Click the Insert tab at the top. This button is above the toolbar panel at the top of the app window. It will open your Insert tools on the toolbar.Advertisement
-
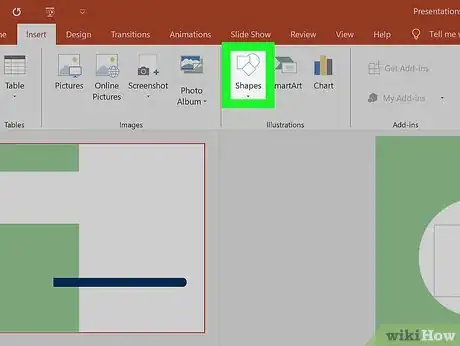
3
-
4Select the shape you want to insert. This will allow you to add the selected shape to your current slide in any size and proportion.
- Make sure to select the same shape as the picture you want to add. You may often need a standard rectangle or a circle here.
-
5Click, hold, and drag your mouse on the presentation slide. This will create and add your new shape to the slide.
- Make sure the shape is proportional to the picture you're inserting. Otherwise, your image may become skewed.
- After creating the shape, you can adjust its size and proportions. Just click and drag the white dots on the shape's selection outline.
-
6Click the Format tab on the toolbar. You can find this tab above the toolbar panel when the shape is selected.
- If the shape is not selected, just click on it in the slide.
-
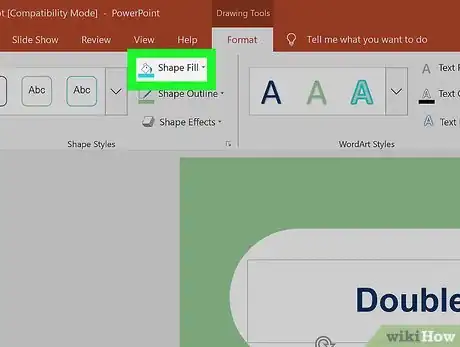
7Click Shape Fill on the Format panel. It's listed next to a paint bucket icon in the "Shape Styles" section of the Format toolbar. This will open a drop-down menu of color and fill options.
-
8Select Picture on the Shape Fill menu. You can find it towards the bottom of the drop-down menu. It will open your picture options in a new pop-up.
-
9Select From a File in the pop-up. This option will allow you to select an image file from your computer, and add it to your slide.
- Inserting the picture as a shape fill will allow you to adjust its transparency as you like.
- Alternatively, you can select Online Pictures here to insert an image from a web link.
-
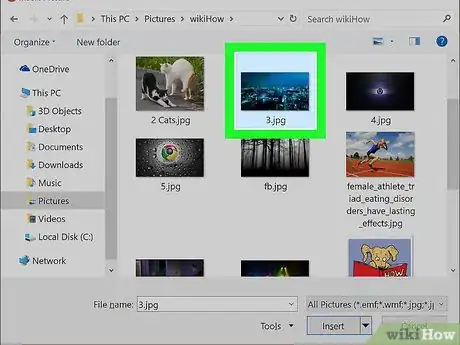
10Select the picture you want to add. Click the picture in the File Explorer window, and click Insert or Open on the bottom-right. This will insert the selected picture inside the selected shape.
- You can adjust the shape from the white dots on its outline.
-
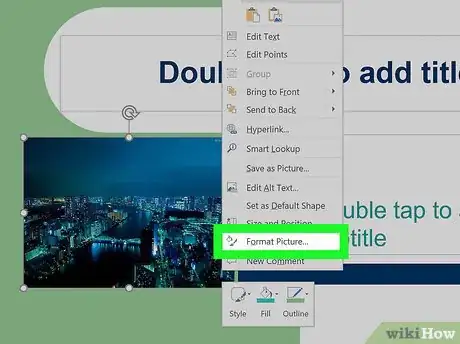
11Right-click the picture in the shape. This will open your right-click options on a drop-down menu.
-
12Select Format Picture on the right-click menu. This will open your formatting options on the right-hand side of the app window.
-
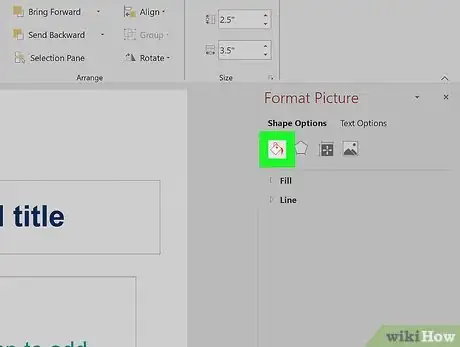
13Click the paint bucket icon on the "Format Picture" menu. You can find this button near the upper-left corner of the Format Picture panel on the right-hand side.
-
14
-
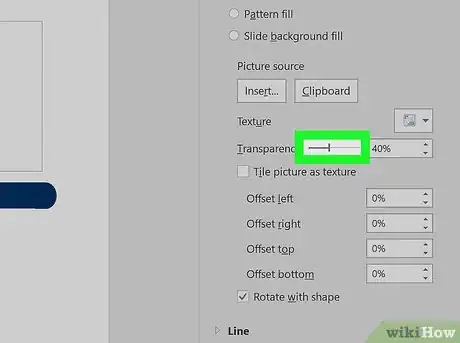
15Click and drag the Transparency slider. This will allow you to manually adjust the transparency level of the selected shape and picture.
- Alternatively, you can manually type in a transparency percentage in the box here.
-
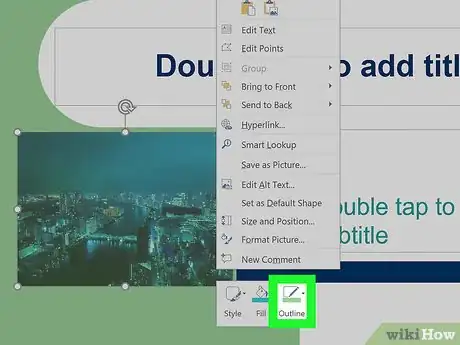
16Right-click the picture in the slide. Your options will pop up.
-
17Select Outline in your pop-up options. This button pops up on a separate toolbar panel at the top of the right-click menu when you right-click. You can find it next to "Style" and "Fill."
-
18Select No Outline on the menu. This will delete the shape outline around the edges of your picture.
Using Mac
-
1Open a PowerPoint presentation on your computer. You can open a new slide show, or a saved presentation file.
-
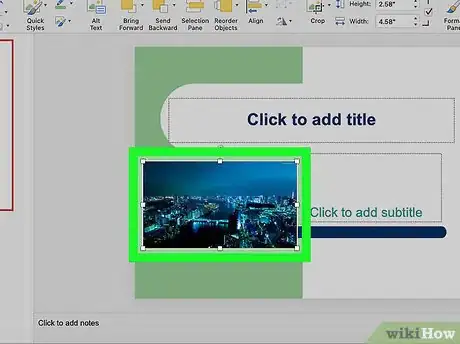
2Select the picture or shape you want to make transparent. Just click on the picture or shape to select it.
-
3Click the Picture Format or Shape Format tab. You can find this button on the tab bar above the toolbar panel at the top. It will open your formatting options.
-
4Click Transparency on the formatting toolbar. This button looks like a picture icon with a dashed, vertical line in the middle. It will open a drop-down panel of your transparency options.
-
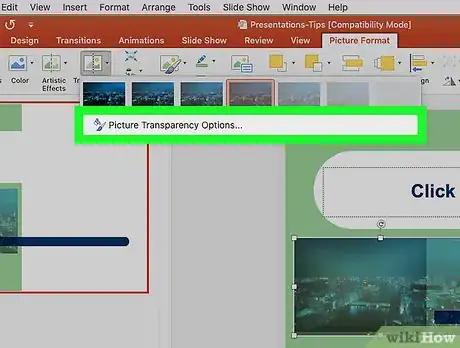
5Click a transparency preset on the Transparency menu. This will instantly change your picture's transparency to the selected preset level.
-
6Click Picture Transparency Options on the Transparency menu. You can find it at the bottom of the Transparency drop-down. This will open the picture formatting menu.
-
7
-
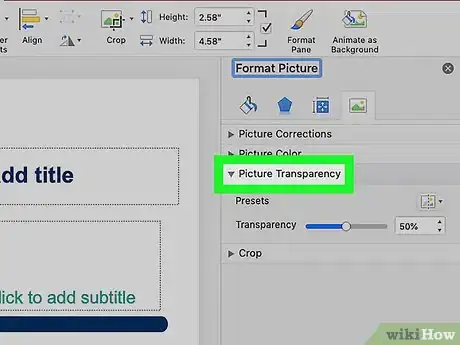
8Click and drag the Transparency slider. You can manually adjust the transparency level of the selected shape and picture in your presentation here.
- Alternatively, you can type in a transparency percentage in the box, or use the up and down arrows here.
References
About This Article
1. Open your PowerPoint file.
2. Click the Insert tab.
3. Click Shape, and select your picture's shape.
4. Click and drag on the slide to create a shape.
5. Click the Format tab.
6. Click Shape Fill, select Picture, and add your picture.
7. Right-click the picture, and select Format Picture.
8. Click the paint bucket icon at the top.
9. Adjust the Transparency slider.























-Step-4Bullet1.webp)


