This article was written by Stan Kats and by wikiHow staff writer, Jack Lloyd. Stan Kats is the COO and Chief Technologist for The STG IT Consulting Group in West Hollywood, California. Stan provides comprehensive technology & cybersecurity solutions to businesses through managed IT services, and for individuals through his consumer service business, Stan's Tech Garage. Stan has over 7 years of cybersecurity experience, holding senior positions in information security at General Motors, AIG, and Aramark over his career. Stan received a BA in International Relations from The University of Southern California.
The wikiHow Tech Team also followed the article's instructions and verified that they work.
This article has been viewed 2,143,276 times.
This wikiHow teaches you how to calibrate a computer monitor to ensure that your color and light settings are correct. Monitor calibration is important when you use your monitor to create or edit visual projects for other people, as poor calibration may result in the project appearing washed-out or off on other people's monitors.
Steps
Preparing to Calibrate
-
1Understand when your monitor needs calibration. Typically speaking, high-resolution monitors that you connect to a desktop unit (e.g., a 4K display) require some calibration before they'll display correctly the colors and items on your screen. Failing to calibrate such monitors can result in washed-out or blurry textures.
- Lower-quality monitors (e.g., 720p ones)—especially ones used for gaming or other casual activities—don't need to be calibrated, though calibration won't hurt them.
- Built-in monitors such as the ones included in laptops rarely need calibration, though you're more than welcome to calibrate built-in monitors using the same process you'd follow for a separate one.
- Color calibration is especially important for graphics professionals, since they want to get everything to match as closely as possible to what the output product might look like.
EXPERT TIPSpike Baron is the Owner of Spike's Computer Repair based in Los Angeles, California. With over 25 years of working experience in the tech industry, Spike specializes in PC and Mac computer repair, used computer sales, virus removal, data recovery, and hardware and software upgrades. He has his CompTIA A+ certification for computer service technicians and is a Microsoft Certified Solutions Expert.Network Engineer & Desktop Support
 Spike Baron
Network Engineer & Desktop SupportOur Expert Agrees: Not every monitor needs calibration. Typically, a monitor straight out of the box doesn't need calibrating and works fine on its own. They have a specific pre-set resolution, but you can always tweak it if you want.
-
2Clean your monitor if necessary. If your monitor is dirty or smudged, take a moment to wipe it down before attempting to calibrate it.Advertisement
-
3Place your monitor in a neutral lighting environment. Your monitor shouldn't have any glare or direct light shining on it; for best results, make sure your monitor is in a room where it can remain unimpacted by direct natural and artificial light.
-
4Connect your monitor using a high-quality cable. If possible, make sure your monitor is connected to your computer using a DisplayPort cable.
- You can use an HDMI cable instead if you don't have access to a DisplayPort option, but refrain from using a DVI, VGA, or lower connector.
-
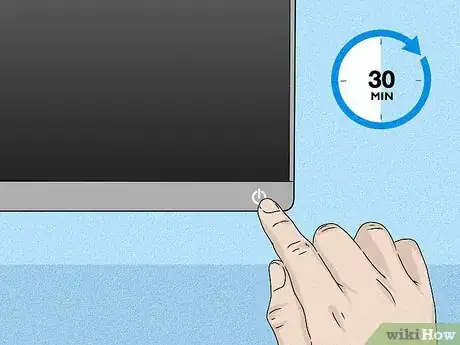
5Turn on your monitor for at least 30 minutes before continuing. This will give your monitor plenty of time to warm up.[1]
- If your computer is set to hibernate or use a screensaver, move the mouse every few minutes to keep your screen from turning off.
-
6Change your monitor's resolution back to default if necessary. By default, your monitor should display in the highest possible resolution, which is necessary for calibration:
- Windows — Open Start , click Settings , click System, click Display, click the "Resolution" drop-down box, and click the "Recommended" resolution. Click Keep changes when prompted.
- Mac — Open the Apple menu , click System Preferences..., click Displays, click the Display tab, hold down ⌥ Option while clicking Scaled, select your connected display, and check the "Default for display" box.
Calibrating on Windows
-
1
-
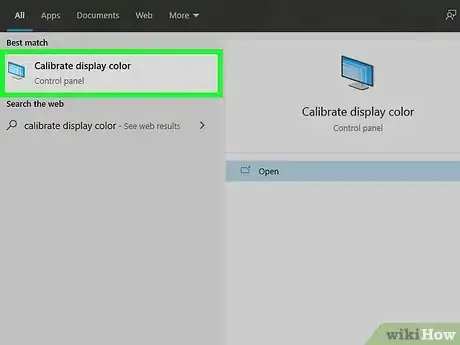
2Open the calibration tool. Type in calibrate display, then click Calibrate display color at the top of the Start menu.
-
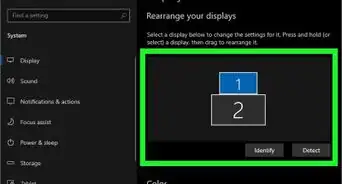
3Make sure that the calibration tool is on the correct display. If you use dual monitors, you may need to move the calibration window onto the second monitor.
-
4Click Next. It's in the bottom-right corner of the page.
-
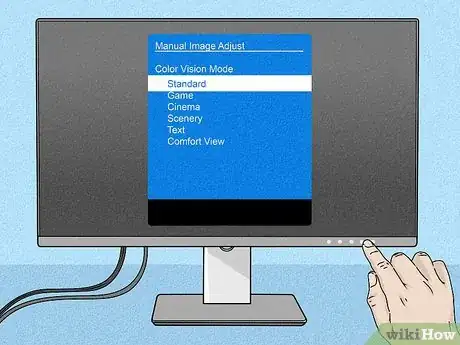
5Set your monitor to its factory-default color settings. If necessary, press your monitor's "Menu" button, then select the factory default color settings from the on-screen menu.
- This isn't necessary if you've never changed the color settings on your monitor (not in your computer's settings).
- Skip this step if you're on a laptop.
-
6Click Next. It's in the bottom-right corner of the page.
-
7Review the "Good gamma" example, then click Next. The "Good gamma" example is in the middle of the page. Ideally, you'll set your gamma to match this example.
-
8Adjust your display's gamma. Click and drag the slider on the left side of the page up or down to raise or lower your gamma, making sure that the cube in the middle of the page resembles the "Good gamma" example from the previous step.
-
9Click Next twice. It's in the bottom-right corner of the page.
-
10Review the "Good brightness" example, then click Next. If you're on a laptop, you'll click the Skip option in the middle of the page and then skip the next two steps.
-
11Adjust your display's brightness. Open your display's menu by pressing the "Menu" button, then select the "Brightness" section and raise or lower the brightness as needed.
- Your brightness should be set so that your display meets the criteria listed under the picture in the middle of the page.
-
12Click Next. It's in the bottom-right corner of the page. Doing so takes you to the "Contrast" example.
-
13Review the "Good contrast" example, then click Next. Again, if you're on a laptop, skip the next two steps.
-
14Adjust your display's contrast. Using your display's menu, raise or lower the contrast until the photo in the middle of the page matches the criteria listed under the photo.
-
15Click Next twice. It's in the bottom-right corner of the page.
-
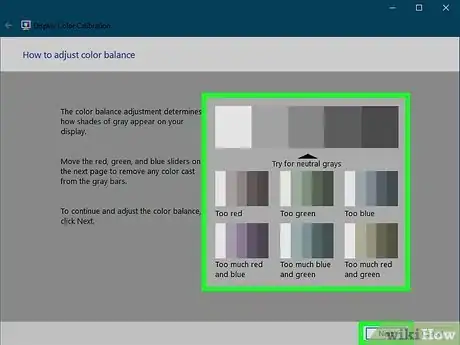
16Adjust the color balance. Click and drag each slider at the bottom of the page left or right until you see neutral (not green-, red-, or blue-tinted) greys in the bar at the top of the page.
-
17Click Next, then review your changes. You can click Previous calibration to see what the monitor looked like before you made your changes and then click Current calibration to see the comparison.
-
18Click Finish. It's at the bottom of the page. Your calibration settings will be saved.
Calibrating on Mac
-
1
-
2Click System Preferences…. It's in the drop-down menu. Doing so opens the System Preferences window.
-
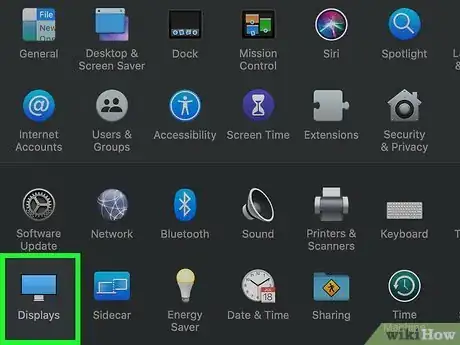
3Click Displays. This option is in the System Preferences window. A pop-up window will open.
-
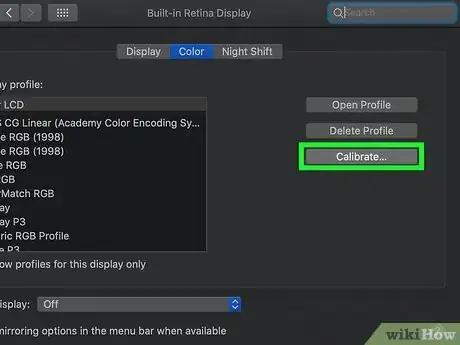
4Click Color. You'll find this tab at the top of the Displays window.
-
5Click Calibrate…. It's on the right side of the page.
-
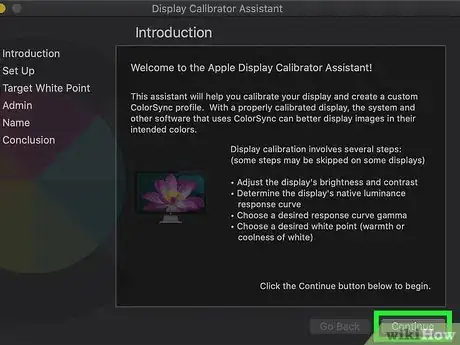
6Click Continue. This option is in the bottom-right corner of the page.
-
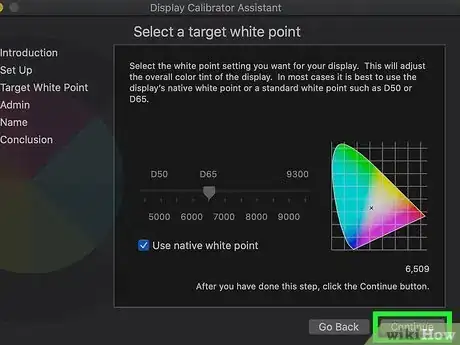
7Follow the on-screen prompts. Depending on your monitor, the options you see in the window may vary; however, in most cases, you'll just click Continue in the bottom-right corner of the page until you reach the password entry prompt.
-
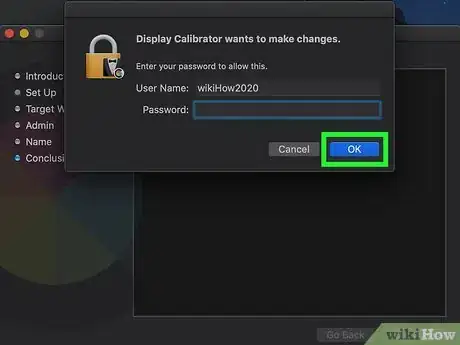
8Enter your password when prompted. Type the password that you use to log in into the "Password" text box, then click OK.
-
9Click Done when prompted. Doing so saves your monitor's calibration.
Using a Colorimeter
-
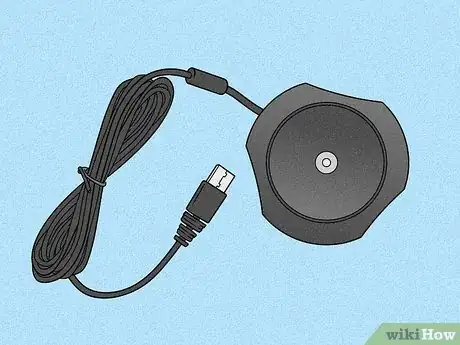
1Understand that you'll need to buy a colorimeter. A colorimeter is a piece of hardware that you place on your screen; the hardware works in conjunction with some included software to calibrate your monitor's colors and brightness regardless of ambient light and other distractions.
-
2Select and buy a colorimeter based on your needs. Colorimeters can range from personal use at a cost of around $150 to corporate use at a cost of over $1000, so buy within your price range.
- The Spyder line of colorimeters is generally considered to be a reputable, high-performing brand.
- Make sure that you buy a colorimeter that works with your operating system. Most colorimeters should work on Windows, macOS, and Linux, but cheap alternatives may be locked to a specific operating system.
-
3Make sure you properly prepare your monitor. If you haven't set up your monitor in a neutral environment and let it warm up, do so before proceeding.
- It's very important to make sure that your monitor is spotless as well, since any smudges or grit may prevent the colorimeter from working correctly.
-
4Install the colorimeter's software if necessary. Some colorimeters will come with a CD that you'll use to install the colorimeter's software component.
- Depending on the colorimeter, you may need to do this after plugging in the colorimeter instead of before plugging it in.
- Your colorimeter may install the proper software upon being plugged in.
-
5Plug in your colorimeter. Plug the colorimeter's USB cable into one of your computer's free USB ports.
- Make sure you use a USB port that's directly connected to your computer rather than using a USB hub or a USB port on a connected keyboard.
- You may need to turn on the colorimeter before proceeding.
-
6Follow any on-screen prompts. Once your computer recognizes the colorimeter, you should see a pop-up window appear; follow any prompts or instructions in the window.
-
7Place the colorimeter over the screen. The colorimeter should fit in the middle of your monitor's screen with the lens facing your screen.[2]
- Most colorimeter software will display an outline that matches the shape of the colorimeter to indicate the general placement of the unit.
-
8Initiate the calibration process. Click Next or Start (or similar) in the pop-up window to prompt the calibration software to start running. The software should run until the calibration is complete, at which point you'll be prompted to remove the colorimeter.
- You may have to click through some more options or follow some on-screen prompts before or during the calibration process.
Community Q&A
-
QuestionWhat do I do if my monitor screen is only showing halfway?
 Community AnswerTurn off your monitor and turn it back on. If that doesn't work, fully restart your computer.
 -
QuestionHow can I fix flickering on the screen?
 Community AnswerChange the screen refresh rate in control panel, or if using Linux, in monitor settings.
 -
QuestionWhat can I do if my monitor screen is too wide?
 Community AnswerOn most monitors, there are a few buttons next to the power button. Click the button entitled "Menu", then, using the up and down keys next to the menu button, scroll through until you find a section with something entitled "clock". Using the menu or select key, select this section and then select clock. Adjust the clock -- the higher the number, the wider the screen -- until it fits your screen. If one side goes off the screen, adjust the V-position.
Warnings
- If you have more than one calibrating program on your computer, make sure that only one is running at a time or else there could be conflicts.⧼thumbs_response⧽
- You'll usually want to avoid your monitor's auto-calibrate option, as this setting is usually customized for the monitor instead of being geared toward optimal calibration results.⧼thumbs_response⧽
References
About This Article
1. Type "calibrate" into the Windows search bar.
2. Click Calibrate display color.
3. Select a monitor and click Next.
4. Set your monitor to its original settings and click Next.
5. Adjust the gamma settings.
6. Adjust the brightness settings.
7. Adjust the contrast.
8. Adjust the color balance.


